Customizing a Cablecast CG Channel
Creating a Cablecast CG Channel from scratch is a multi-step process that requires careful planning, calculations, and a solid understanding of how Cablecast CG channels operate.
If you'd prefer a video walkthrough, be sure to see our webinar on Customizing a CG Channel template.
Customizing A Cablecast CG Channel
In this webinar, Training Specialist Kayla Creamer walks through the planning and configuration process for rebranding or reskinning an existing Cablecast CG channel template. Whether you're looking to give your channel a fresh look or you're curious about what's involved in building something from scratch, this session covers the key concepts and steps you need to know before you start. Topics covered include common misconceptions about customizing CG channels, including what's actually baked into your seamless background image and why zones aren't as simple to move or resize as they might seem. You'll also learn how to plan your CG channel layout with both HD and standard-def output in mind, how to use the PEG template zone overlay to understand what's already configured, and how to use Canva to design a seamless background image. The session also walks through bringing your design into Cablecast CG, uploading your seamless background, using zone branding to update fonts and colors in bulk, setting your new channel on a player, and going live. Resources mentioned in this webinar can be found on the Welcome to Cablecast CG page at support.cablecast.tv.
Planning Your CG Channel Layout
First, you need to determine the purpose of your CG channel—whether it will be used for community bulletins, government updates, or another function. This will help define the type of content, layout, and overall look of the CG channel.
The first step that we recommend is grabbing a piece of paper and sketching out what you'd like your CG channel to look like. This is critical, as you'll need to determine the exact sizing of each zone that you want to include in the channel. You'll also want to understand how any graphical elements tie into the background image.
You could also use one of our existing CG channel templates as a starting point for your design. Download the Illustrator template files to customize a template in Adobe Illustrator, or download the PNG template overlays if you don't have Illustrator.
For this example, let's take a look at the Gov CG channel template and its zone overlay.
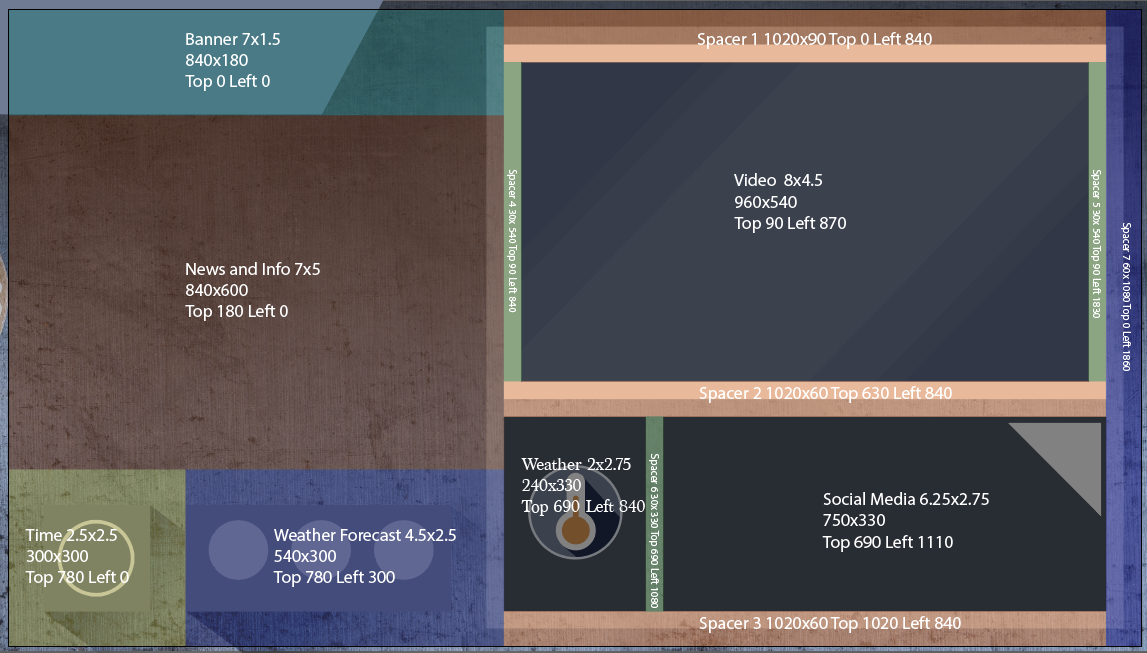
The overlay here shows us exactly where each zone is, what the sizing and position of the zone is, and we can also see what design elements fall into each zone. This channel has 14 zones in total. A number of those zones are spacers between the main zones.
Once you figure out what you want your CG channel to look like and how the design elements are going to tie into the zone configurations, you can bring the sketch into your third-party design application of choice and begin designing.
Main Bulletin Zones
Note that the pre-made Cablecast CG templates all have a main bulletin zone that is 16:9, which is ideal if you intend to run any HD videos on your bulletin board. If you're designing your own channel, you'll want to keep this in mind.
Bringing your CG Channel Design into CablecastCG
Using a pre-made CablecastCG Template
Once you have your design complete and ready to go, you'll want to export it as a PNG file that can be imported into Cablecast CG as a seamless background. If you're using an existing Cablecast CG Channel template, you can import that template and upload the seamless background to that CG channel. Importing a CG Channel Template goes over how to import one of our pre-made CG channel templates. Uploading Seamless Backgrounds goes over how to upload a seamless background.
If you're designing a channel completely from scratch, there are some additional things you'll need to configure first.
Creating a CG Channel from Scratch
If you've opted to create a CG Channel completely from scratch, you'll need to create the zones and then create a new Cablecast CG Channel and add/position those zones, which is where all of that pre-planning that we discussed earlier in this article will come in handy.
Creating a New CG Channel
This video goes over the process for adding new Zones and a new CG Channel when designing a CG Channel from scratch.
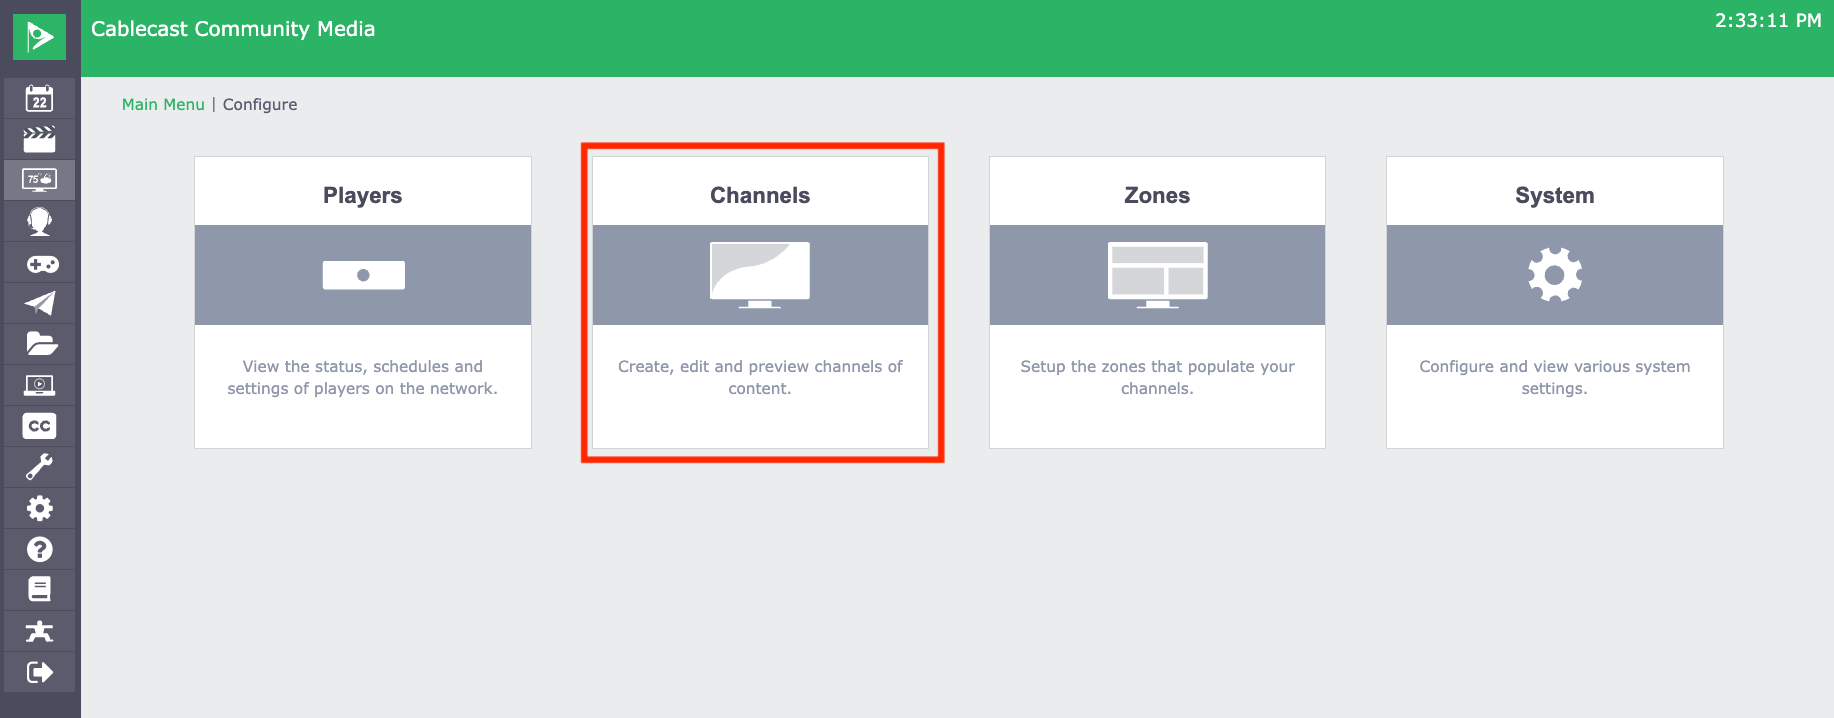
Creating Zones
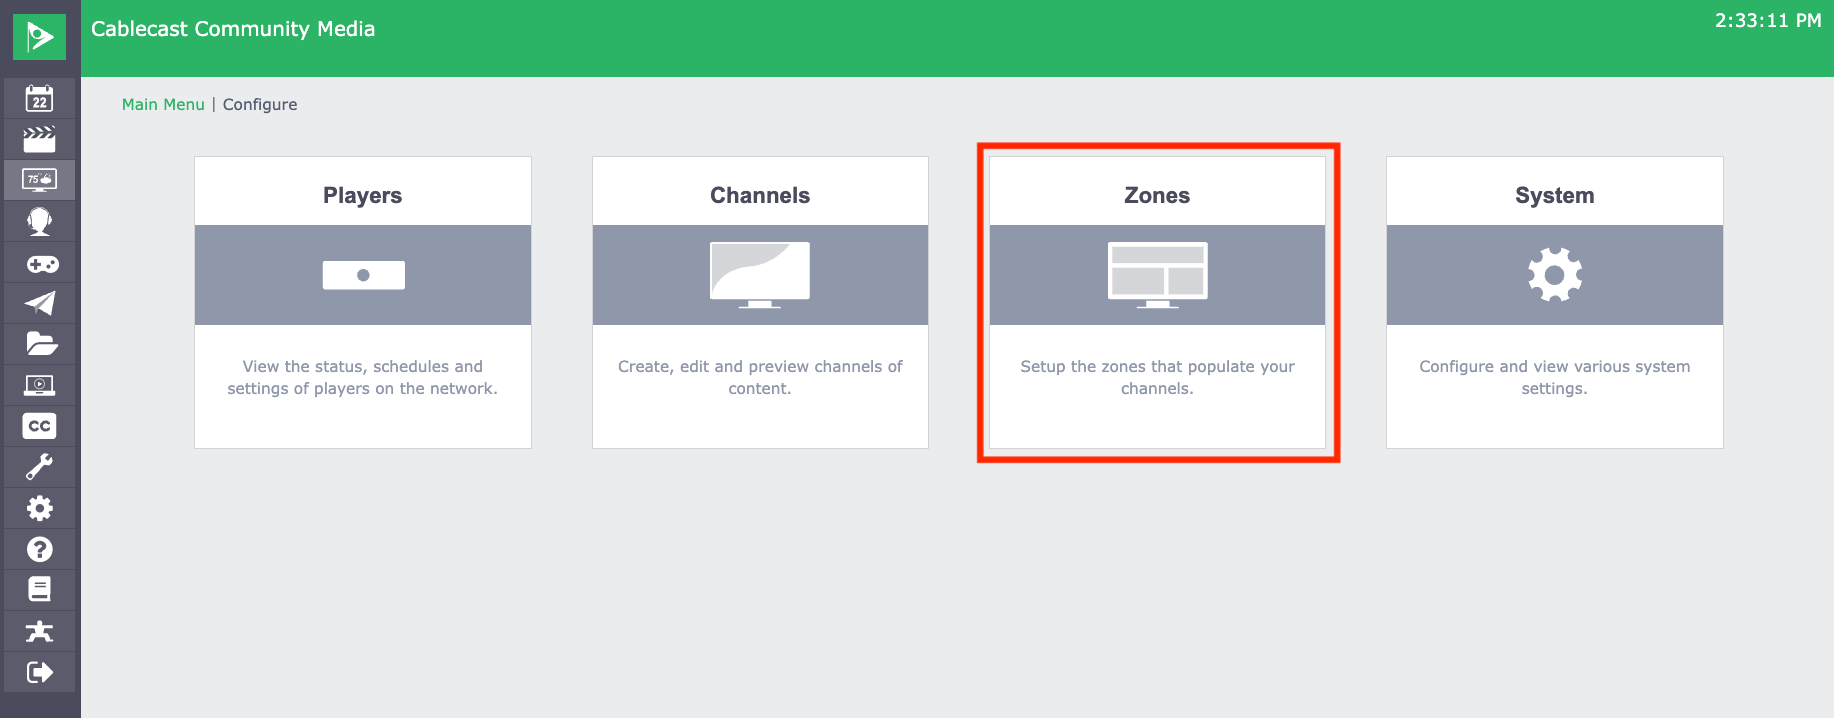
To create your zones, go to Settings > Cablecast CG Settings > Zones.
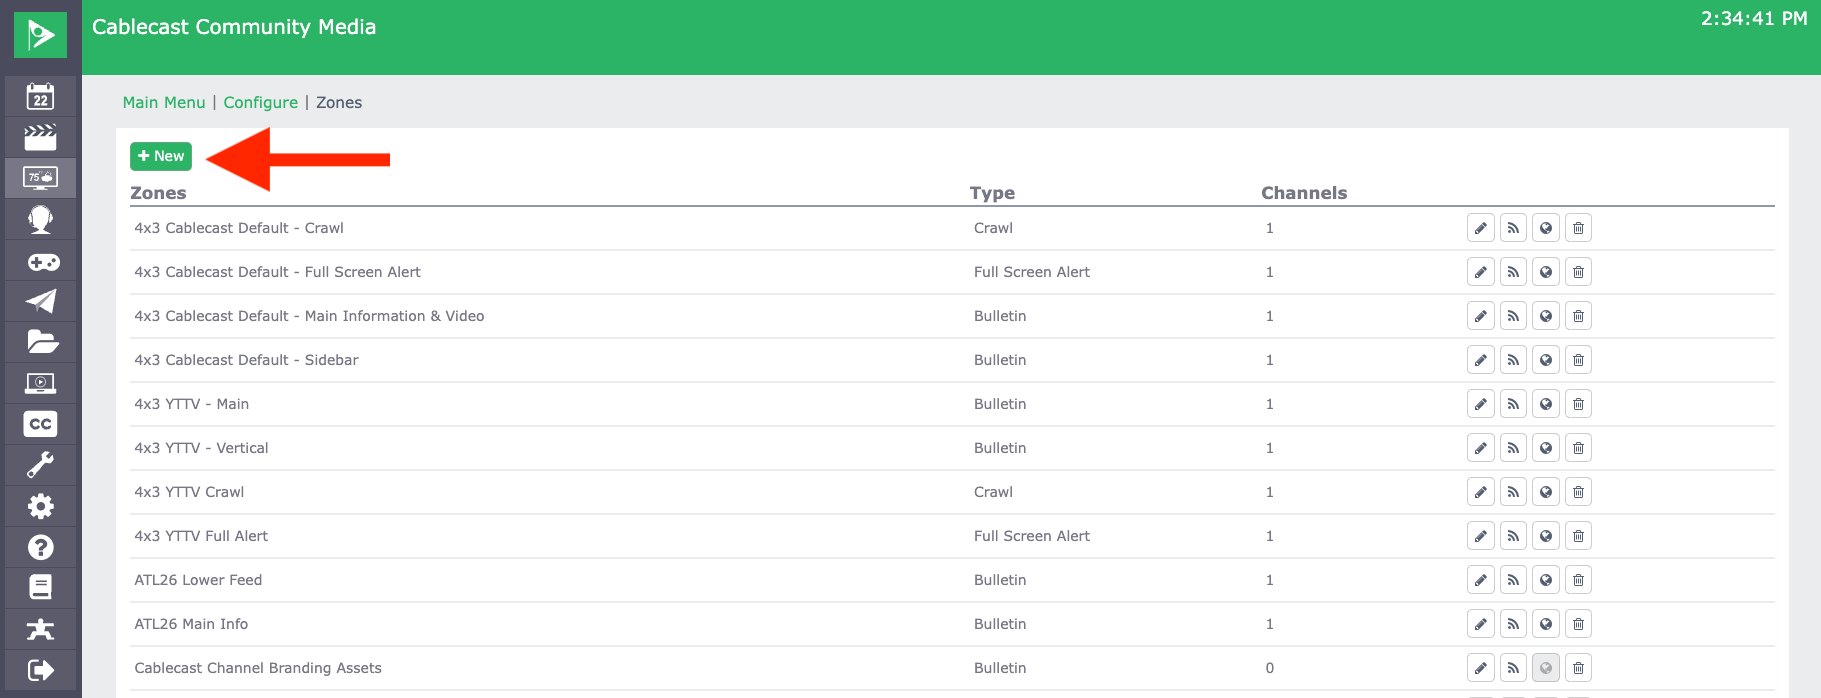
Select the green New button to add a new zone.
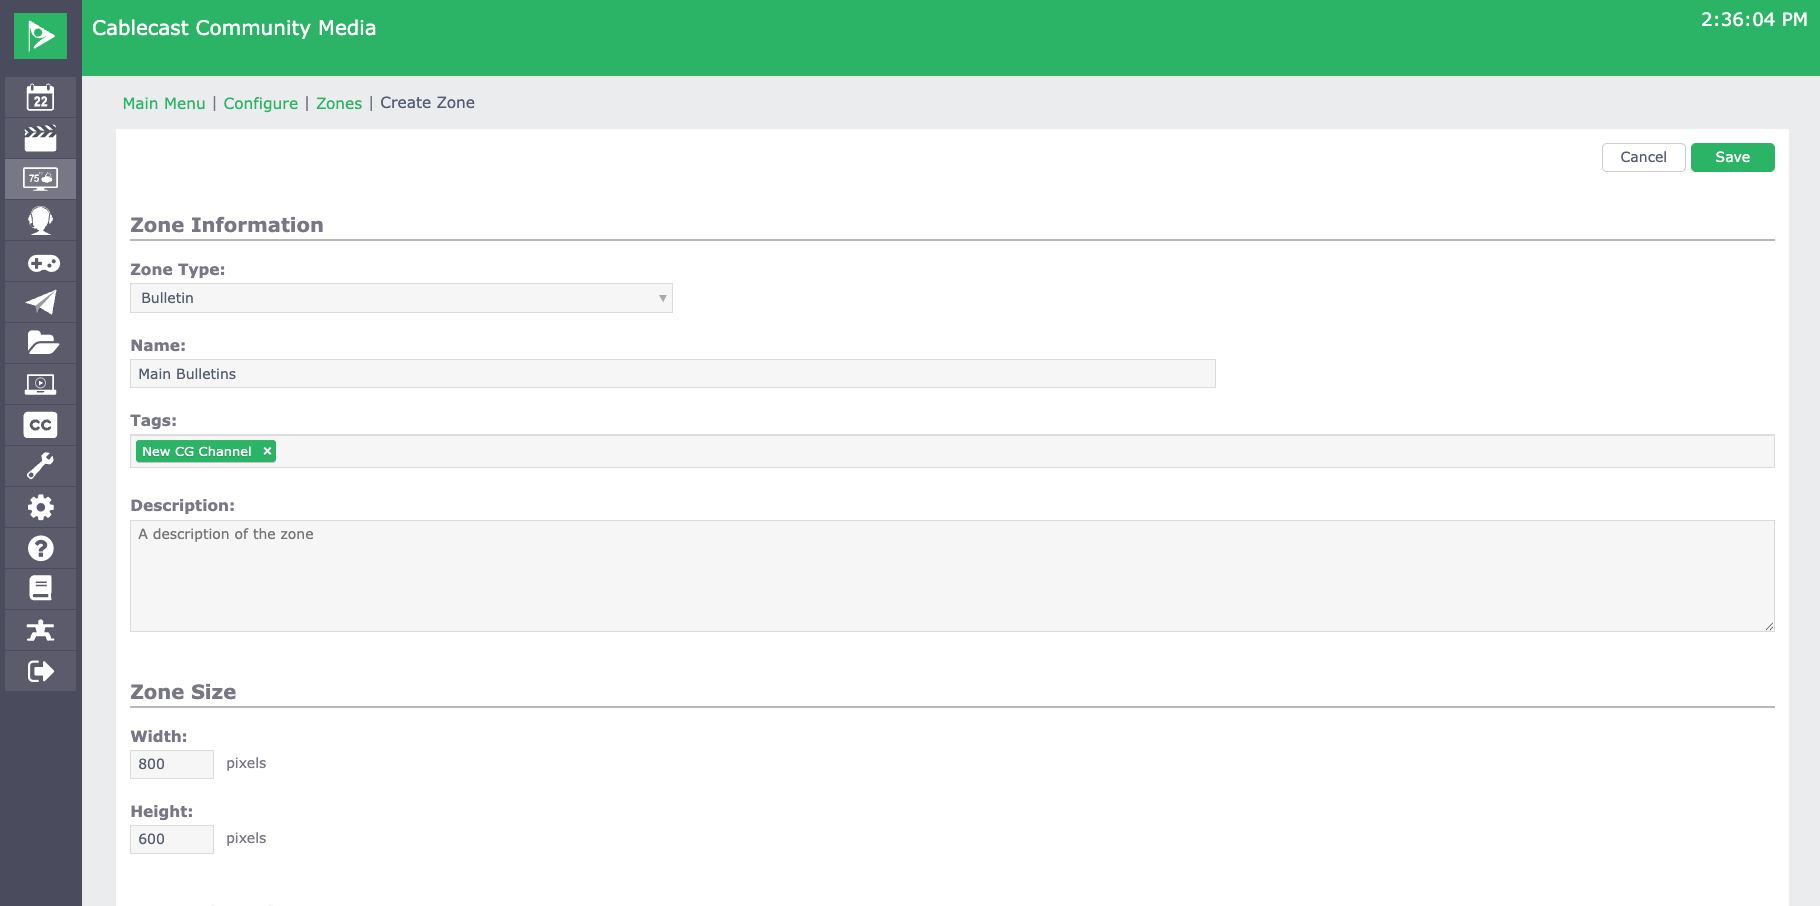
The Zone Type will be Bulletin. Name the Zone accordingly and give it a unique tag that will be used across all zones for the new CG channel. Set the Zone Size. This is going to be based on the math and mockups that you did when sketching out your CG channel. Select Save at the top right of the page.
Do this for each zone in your CG channel. If you want to create a full screen alert and/or crawl for the CG channel, you'll want to go through the steps above, but for the Zone Type, choose Full Screen Alert or Crawl. When creating a Crawl zone, you don't need to enter any dimensions, but when creating a Full Screen Alert, you'll want that to be the full output resolution of your server. If you're outputting 1080i, then you want that to be 1920x1080, etc. The Full Screen Alert will override your multizone layout with bulletins that fill the entire screen.
Creating a New CG Channel
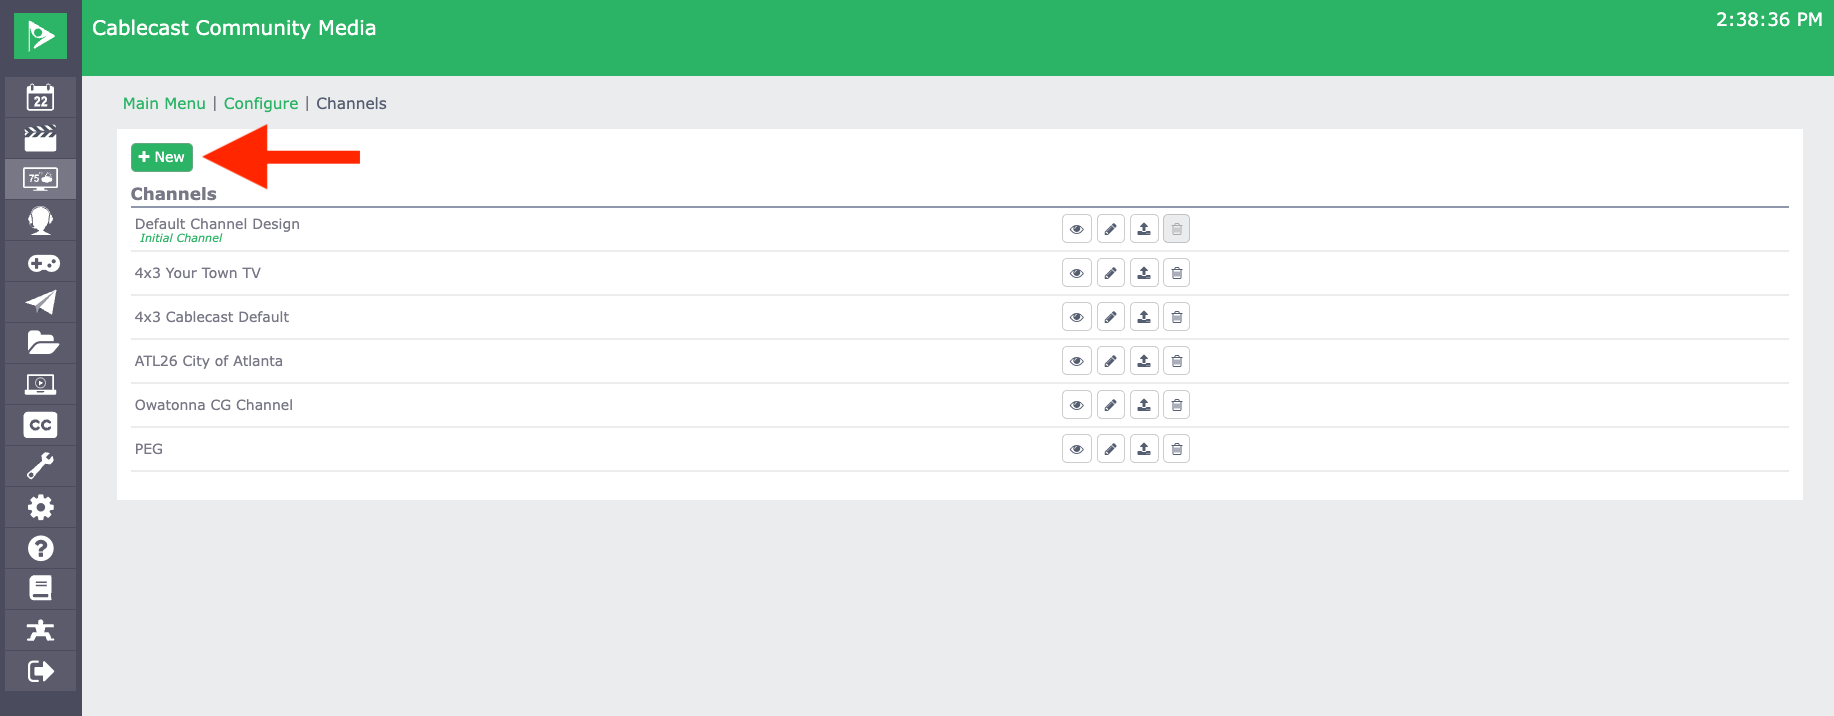
Now that you've created your Zones, you need to create your new CG channel and add them to it. To do this, go to Settings > Cablecast CG Settings > Channels.
Select the green New button on the top left.
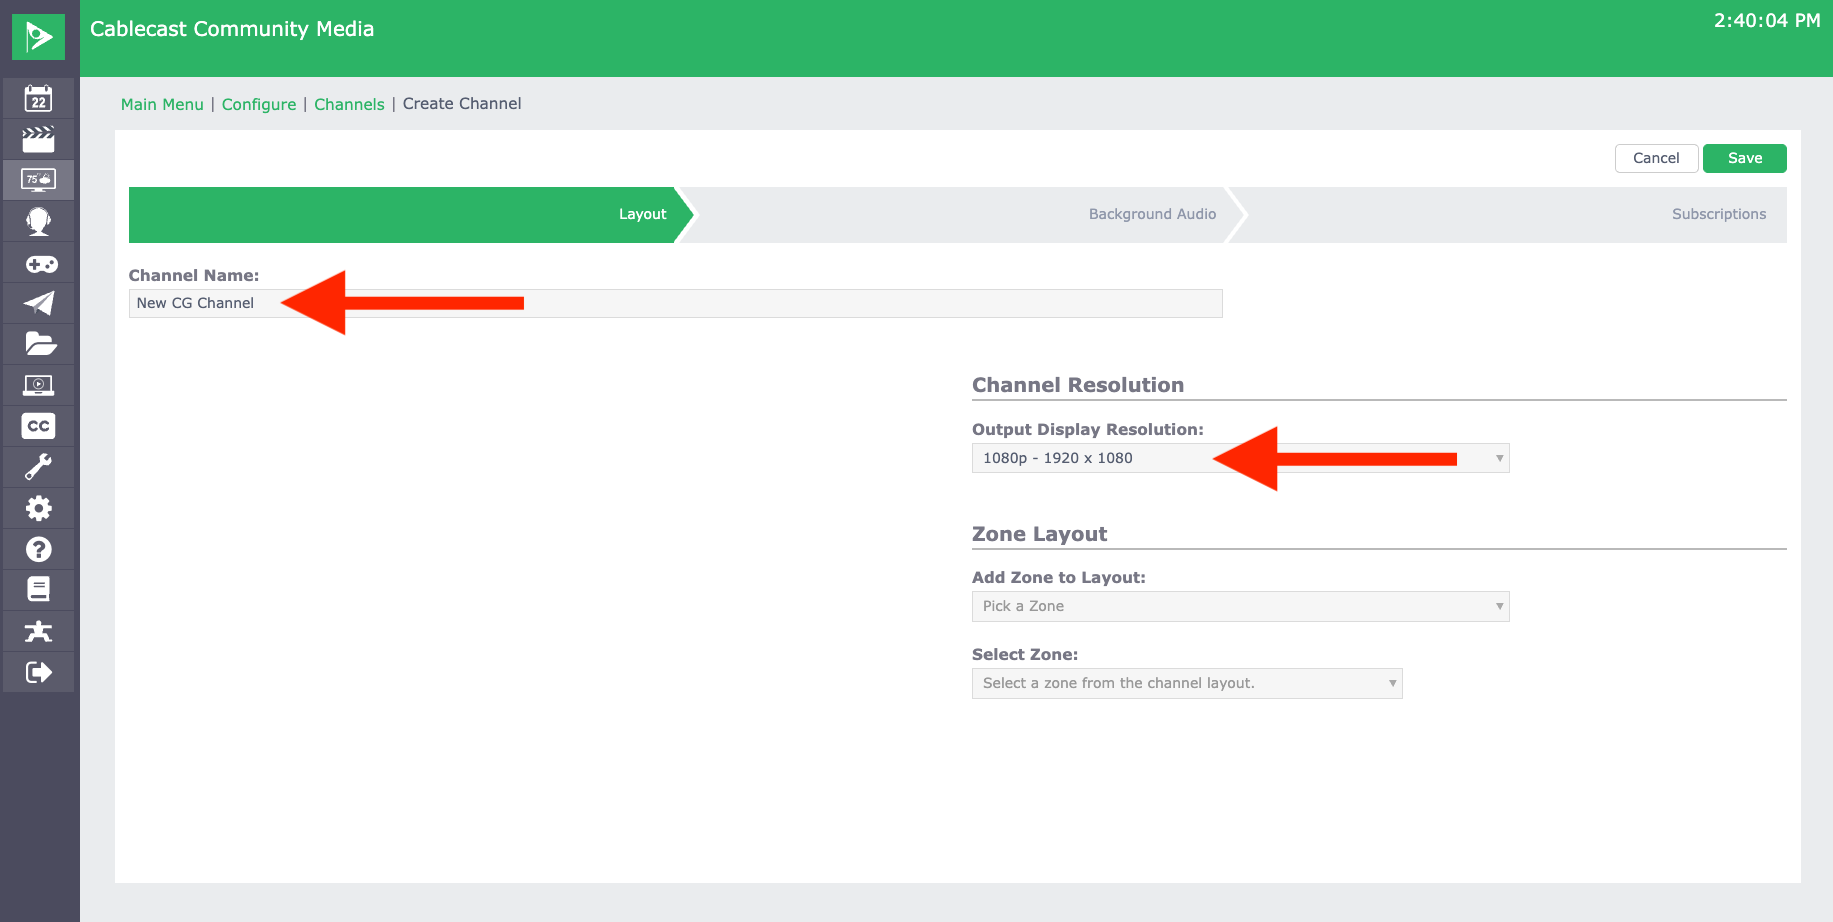
Name your channel. Set your Output Display Resolution. This is generally going to be the same as your server output resolution.
Under Zone Layout add your zones one at a time. You'll need to adjust their placement accordingly based on the mockup that you did when planning out the channel. It's important that your zones not overlap. If any zones overlap, you'll get a warning.
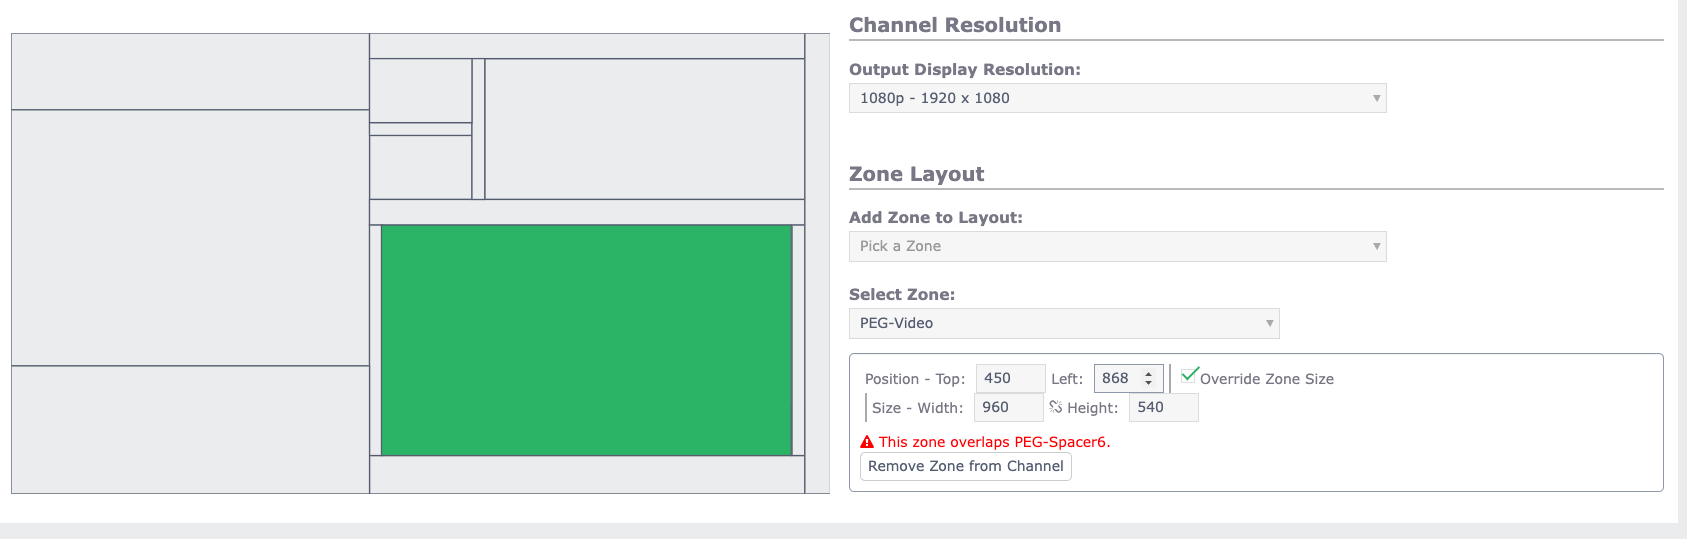
Once all of your zones are added and positioned, you should have a basic layout that matches what you did in your sketch.
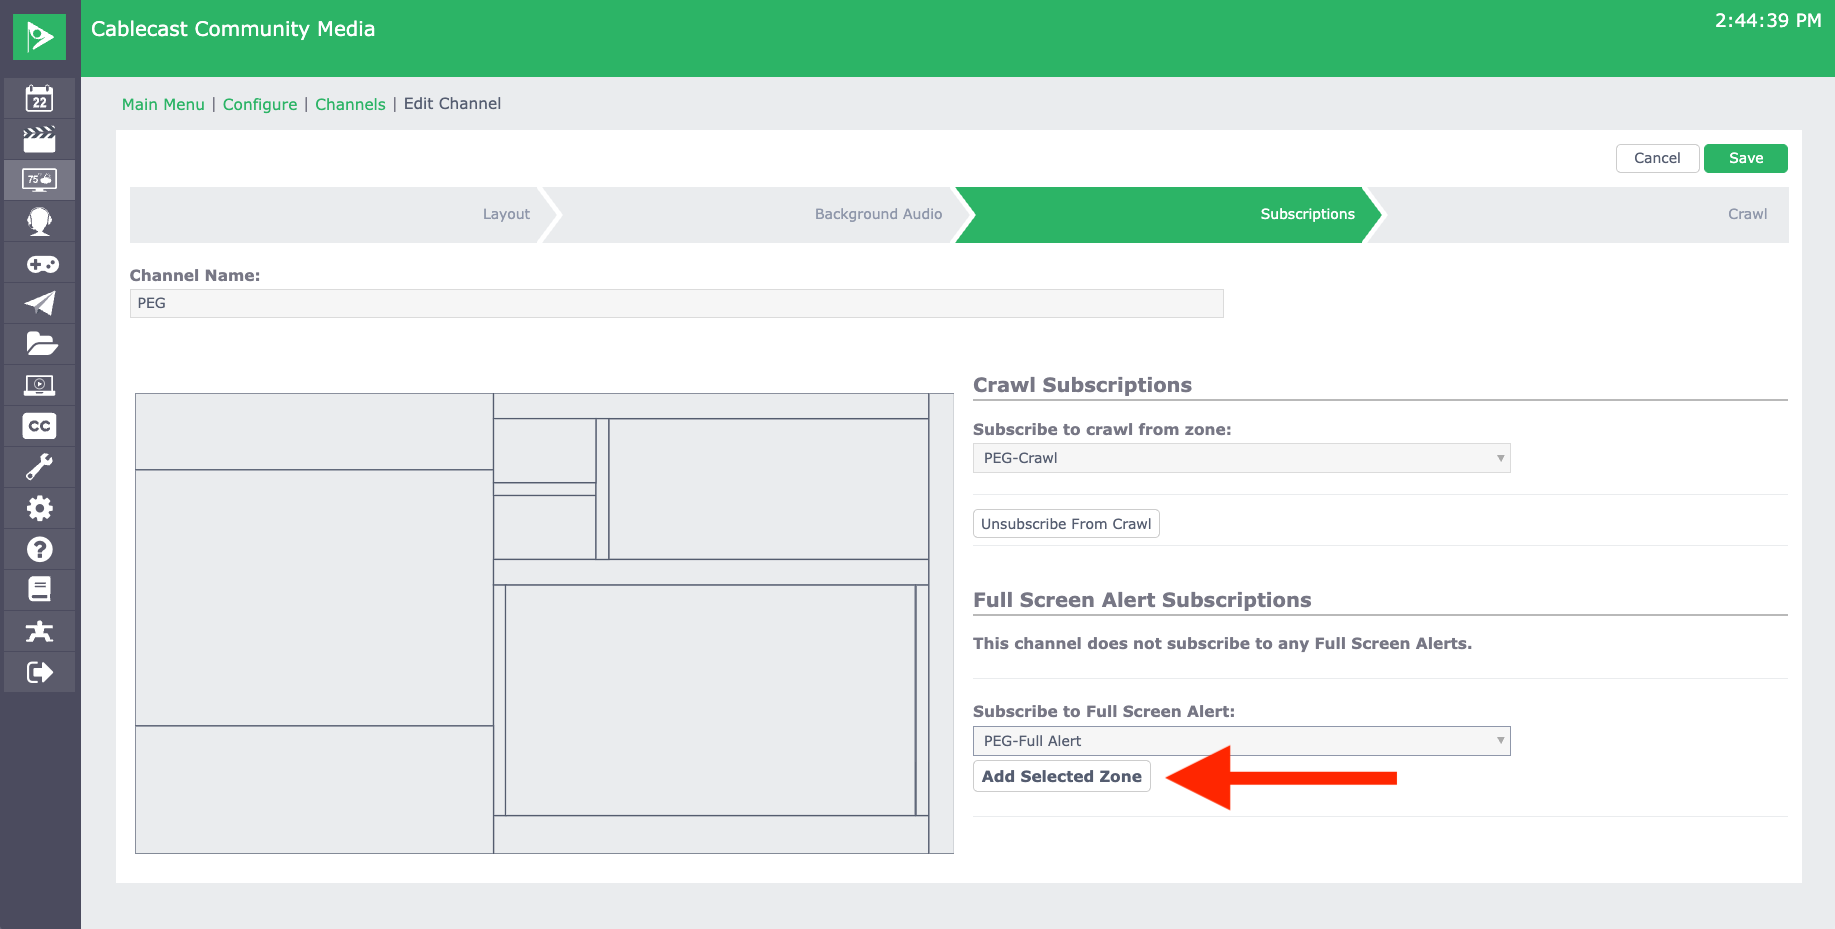
Adding Full Screen Alert and Crawl Zones
If you opted to add a Full Screen Alert zone and/or crawl, you'll add those on the Subscriptions page. For the Full Screen Alert zone, be sure to select Add Selected Zone in order to add the zone.
If you're adding a crawl, you should get an additional tab at the top that allows you to configure the look and placement of the crawl.
Crawls in Cablecast CG vs Schedule Crawls
Note that this differs from the Crawl configuration in the Channel Branding settings, which run over scheduled programming.
See the section of our Cablecast New User Training video on Channel Branding settings for more info on Schedule Crawls.
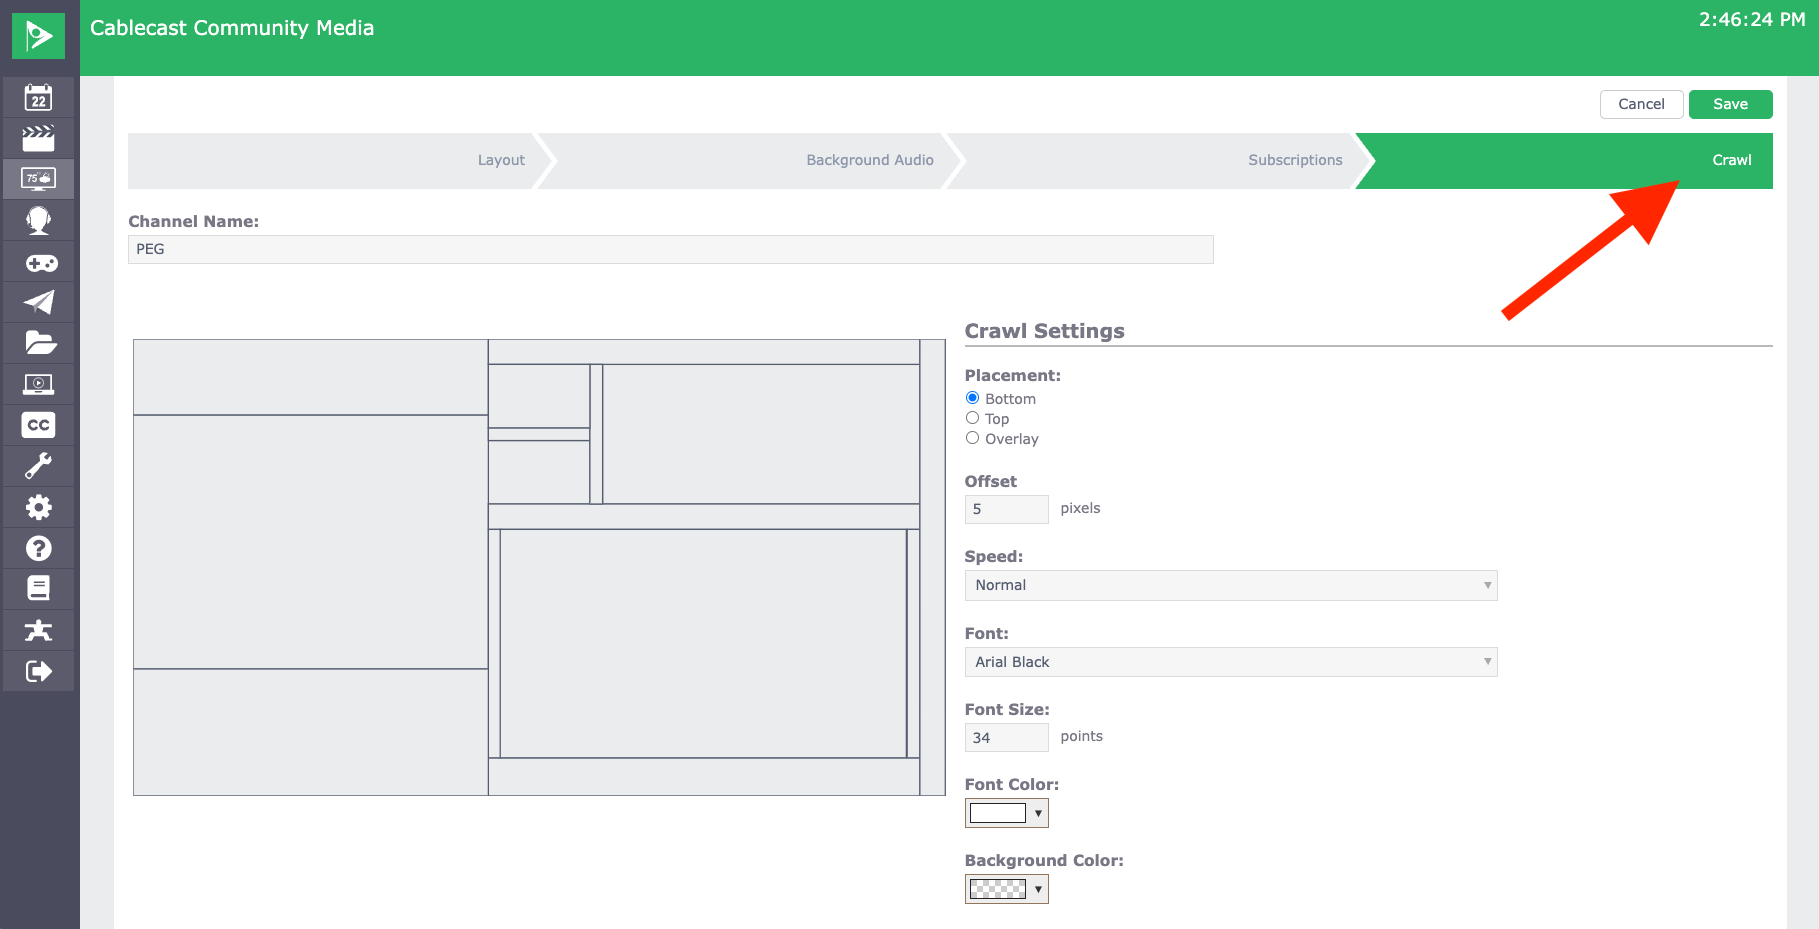
Be sure to select Save at the top right of the page once you've made all of your changes.
Upload Your Seamless Background Image
Now you should be able to upload your background image as a Seamless Background. The steps for that are outlined in this KB article.
Enable the CG Channel Template on Your CG Player
The last step is enabling the new CG channel on your CG player. This section of our KB on importing a CG channel goes over that process.
