Uploading Seamless Backgrounds in CablecastCG
Overview
A seamless background is a single image that Cablecast CG splits into sections to match the zones configured for a channel. Each section becomes the background image for that zone's bulletins, creating the appearance of one continuous background across the entire channel.
This article covers how to upload a seamless background using the CG Channel Editor, what the upload options do, and design considerations to review before you upload.
Before You Begin
Your background image should match the output resolution of your Cablecast CG channel. If your channel is 1080, your image should be 1920×1080 pixels.
If you are replacing the background on an existing template, review the Design Considerations section below before uploading. Templates often include design elements that are part of the background image — understanding where those are before you start will save extra work.
Uploading the Background Image
Go to Settings → Cablecast CG Settings → Channels.
Select the paintbrush icon to the right of the channel you want to update. This opens the CG Channel Editor.

In the CG Channel Editor, select Replace Channel Background. This opens the upload dialogue.

Before uploading your image, review the options at the top of the dialogue. All three are recommended.
Upload to all channel zones — When Cablecast CG splits your background image, it automatically uploads each section to its corresponding zone. This makes those sections available as background options for any bulletins you create in those zones going forward.
Set as default standby graphic — If a zone has no bulletins, it will display the corresponding section of your background image instead of a black screen. This keeps your channel looking polished even when zones are empty.
Replace background on existing bulletins and templates — Automatically updates the background image on all existing bulletins that were created using a bulletin template, as well as on the bulletin templates themselves. Without this option, you would need to update each bulletin manually. This option is strongly recommended if you have existing bulletins in your channel or if you use bulletin templates to create bulletins.

Once you have selected your options, drag and drop your background image into the upload area, or select Browse to Upload and navigate to your file.
Cablecast CG will process the image and begin updating the zones. This may take a few minutes. You can watch the live preview on the right side of the Channel Editor update in real time as each zone receives its section of the background.
Note
It is also possible to upload a seamless background using the upload icon on the Channels list page. However, that method requires updating the background image on existing bulletins and bulletin templates manually afterward. The Channel Editor method described above handles those steps automatically and is the recommended approach.
Updating Zone Fonts and Colors
After uploading your background, you may find that the font colors in your bulletins no longer read well against your new design. The Zone Branding section of the Channel Editor lets you update the font and font color for specific fields across all bulletins and bulletin templates in a zone at once, rather than editing each bulletin individually.
Select a zone from the Zone dropdown, then select a field from the Selector dropdown. Choose your color and font, then select Save Branding. The preview will update in real time.

Note
Zone Branding updates fonts and font colors only. If your template uses color blocks as part of its bulletin templates — as the default Cablecast CG channel template does — those blocks cannot be updated from this screen. They need to be edited directly on each bulletin template.
Design Considerations
Before uploading a seamless background to an existing template, there are a few things worth knowing.
Many templates include design elements such as spacers and color blocks that help text and graphics stand out in specific zones. Where those elements live depends on the template.
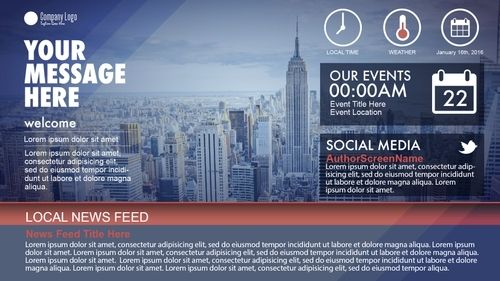
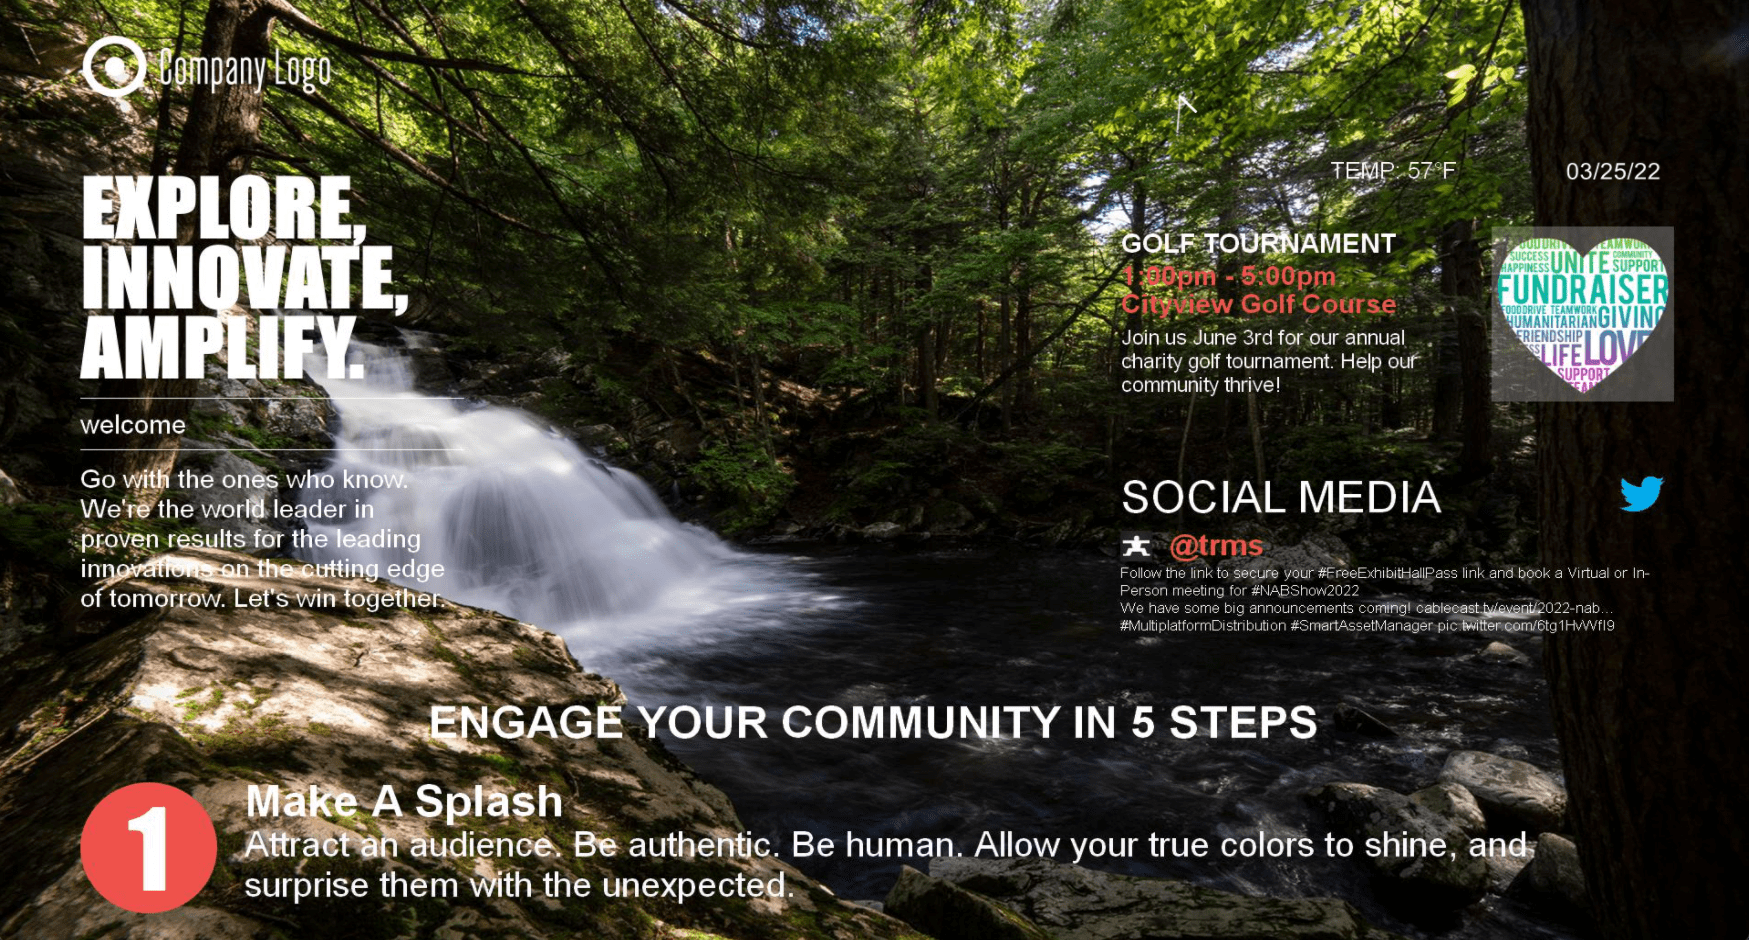
In the PEG and other multi-zone templates, elements like weather boxes, temperature circles, drop shadows, and zone separators are built into the background image itself. If you upload a plain photo without replicating those elements, they will disappear, and your bulletins will display as text on a plain background, which can be difficult to read.
Some bulletins in the default three-zone Cablecast CG template include color blocks as part of the bulletin template — replacing the background image will not affect those blocks, and they will need to be edited directly on the bulletin templates. For zones where bulletins display directly on the background image, those design elements should be built into your new background.
The key question before you upload is: which elements in this template are part of the background image, and which are part of the bulletin templates? Identifying that first will tell you what needs to be designed into your new background and what needs to be updated elsewhere.
To review the zone layout for a template:
Go to Settings → Cablecast CG Settings → Channels and select the pencil icon next to the channel. This shows all configured zones with their pixel dimensions and placement.
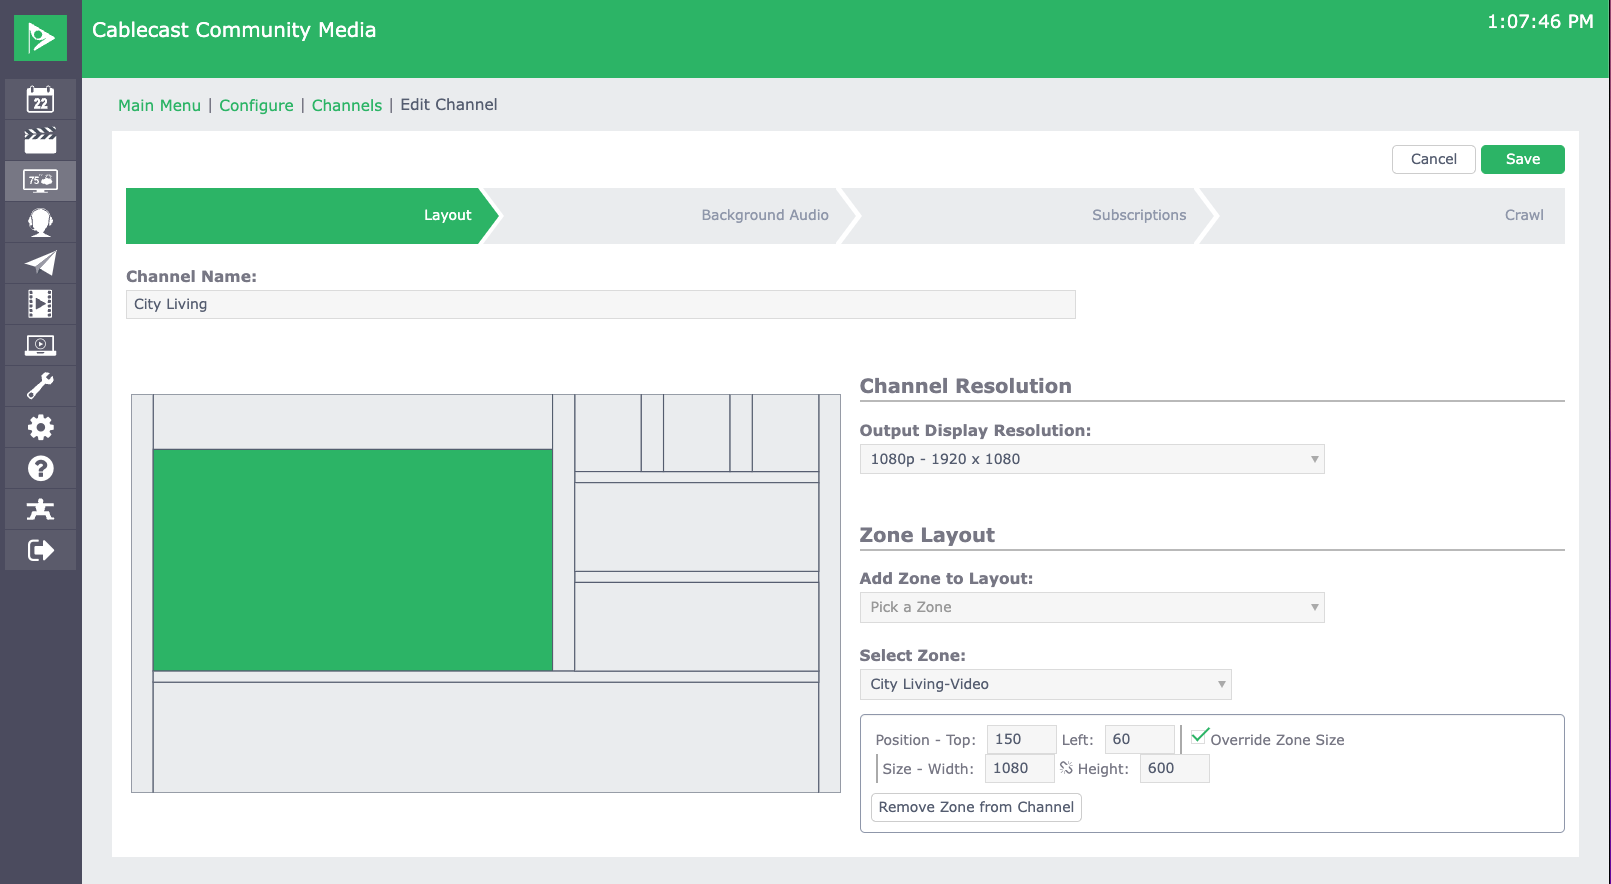
To help plan your design against an existing template, two resources are available:
Cablecast CG Adobe Illustrator Templates — Source files for each CG channel template for use in Adobe Illustrator.
Cablecast CG Zone Overlay Images — Overlay images showing zone names, dimensions, and pixel placement for each template. Useful if you are not working in Illustrator.Summary
Summary
To upload a seamless background, go to Settings → Cablecast CG Settings → Channels, select the paintbrush icon for your channel, and use Replace Channel Background in the CG Channel Editor. Enable all three upload options to automatically distribute the background across zones, set a standby graphic, and update existing bulletins and templates in one step. Before uploading, review the design considerations for your template to understand which elements live in the background image and which live in the bulletin templates.
