Configuring New Cablecast Servers
This article will cover the process for adding and configuring any new servers to your Cablecast configuration. If you are migrating an existing Cablecast system to a new Cablecast system, be sure to review our article on migrating data between Cablecast servers.
When you configure a Cablecast server, Cablecast will generate the necessary Control Modules, configure any devices associated with the server (if applicable), and, if it's a video server, it will allow you to link server outputs to any existing channels (if this is a migration from an existing Cablecast system) or create new Channel outputs as needed.
While static internal IP addresses are generally recommended for Cablecast servers, they are not required. Cablecast servers broadcast a UPD beacon that indicates that the server is a Cablecast server. The host system listens for those broadcasts to locate secondary Cablecast servers (video servers and Live servers) on the network. If the IP address of a server changes, it will get updated automatically in Cablecast.
IP Addresses and Host Servers
A static IP address is still recommended/required for host servers. If you have a VOD or Omni server in your configuration and do not have REFLECT+, an external address is needed and would require a static internal IP for at least the host server in order to configure firewall rules and point an external address to Cablecast.
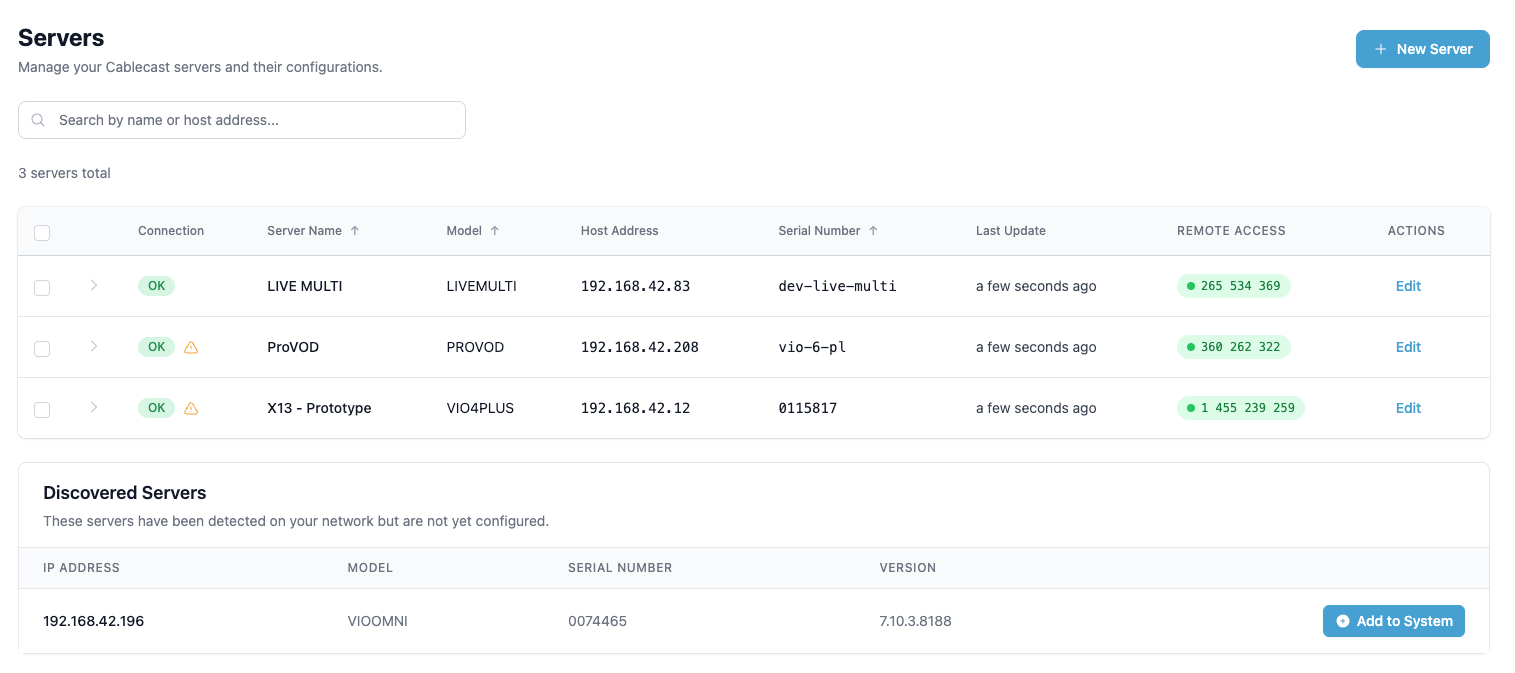
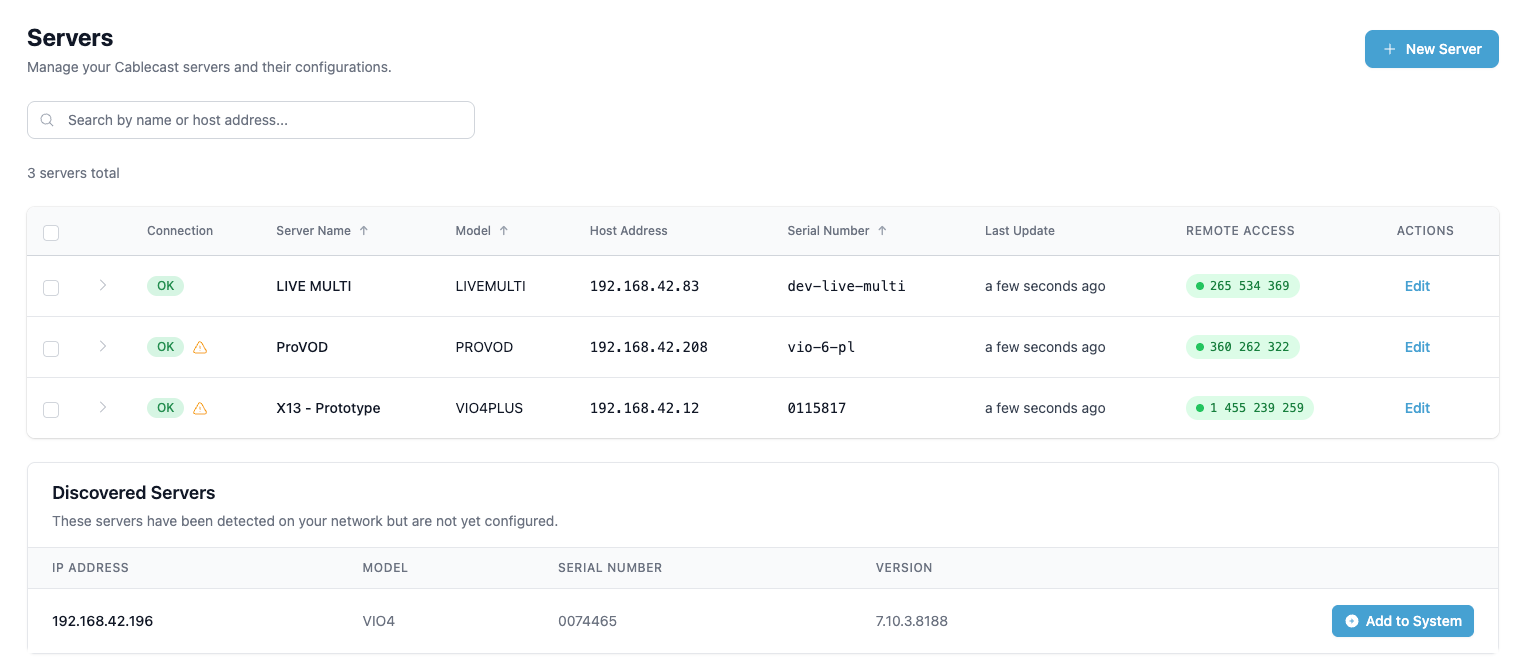
In Cablecast, navigate to Settings > System Settings > Servers. Here, you will find a list of any servers that are already configured in Cablecast. Below that will be a list of any Discovered Servers. If this is a brand new Cablecast system, you will only see unconfigured servers in the Discovered Servers list.
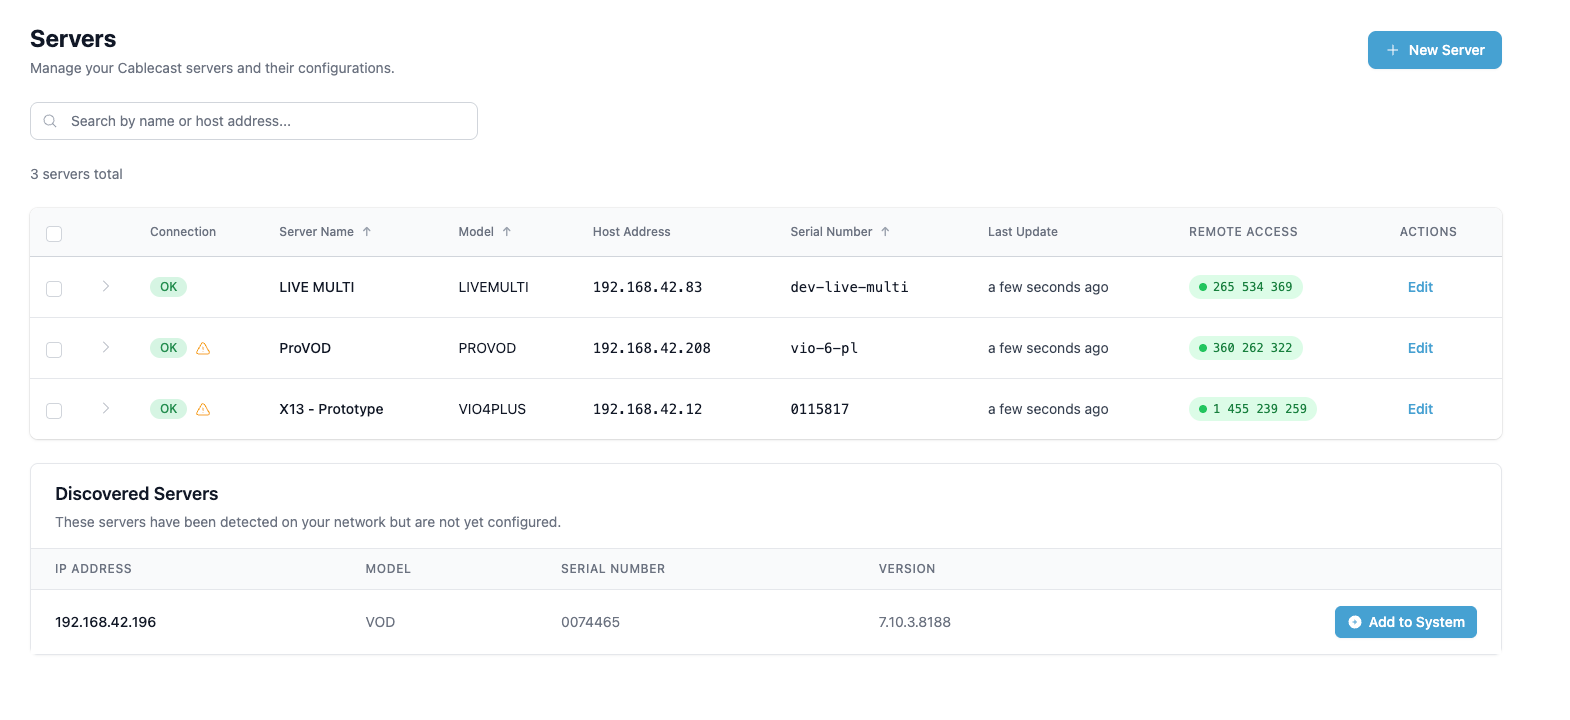
To configure an Discovered Server, click the blue + Add to System button. You'll be taken to a configuration page next. You'll be given configuration options based on what the model of the server is.
Configuring VOD Servers
In the example below, we are adding a new VOD server to Cablecast. The configuration of a VOD server is pretty straightforward. Click the blue Configure for VOD button. You will then be prompted to confirm that you want to reconfigure the server. Click Ok.

Configuring an Omni Server
The Cablecast Omni server is an all in one box that combines VOD, video server, and live stream into one box and is considered a "channel in a box" server.
To configure an Omni server, click the + Add to System button to the right of the server name.
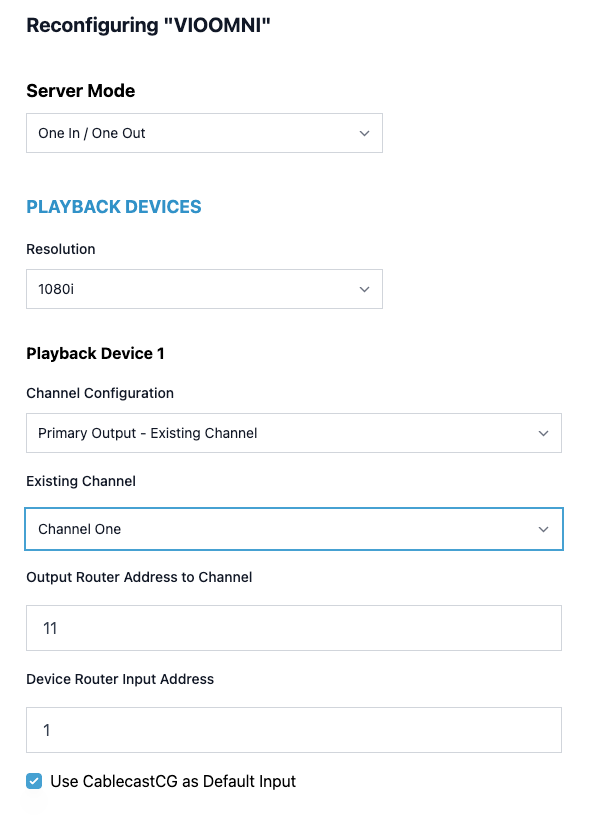
The Server Mode dropdown only lists one option for Omni servers, which is 1I/1O. Select that option.
You'll choose the output resolution for your server. Standard choices are 1080i, 720p, or NTSC 4x3 or NTSC 16x9.
Playback Device Configuration
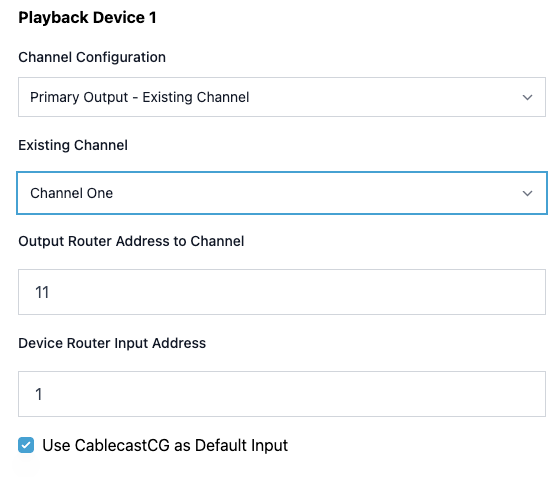
Next, you'll configure each of your Playback Devices. These are the outputs of the video server. In the Channel Configuration dropdown, you have three options:
Output Only - No Channel
Primary Output - Existing Channel
Primary Output - New Channel
Existing Channel
If you are migrating from an existing Cablecast system, you're likely going to chose Primary Output - Existing Channel to map the server output to an existing Channel config from migration. A new drop-down will appear with a list of existing channels. Choose the channel to link this playback device to.
Below that, you'll enter the router output that is going to the cable channel associated with that channel configuration. The Device Router Input Address is the router input that the output of the Cablecast server is going to.
New Channel
If this is a brand new system, you'll likely want to select Primary Output - New Channel to create a new Channel Output and map the playback device to that new Channel. A new Field will appear to enter the Channel name.
Below that, you'll enter the router output that is going to the cable channel associated with that channel configuration. The Devie Router Input Address is the router input that the output of the Cablecast server is going to.
Encode Devices
The last piece of the configuration is the Encode Devices. Omni servers are locked in with one input/encode device. You'll enter the router output that's feeding the input/encoder on the server.
A note About Live Streams on Omni Servers
Since Omni servers are an all in one box, in order for live programming and CG to play out on the Live stream, they have to pass through the video server output. In most cases, CG will output from the same output already since these boxes are intended to do everything in one box.
Live events must pass through the server via the encoder/input in order to show on the Live stream, so you'll either want a router in your configuration, or you'll need to hardwire your live source to the input of your server for this to be feasible. More on passthrough in Cablecast here.
Click the blue Save button at the bottom of the page to save your configuration.
Configuring a Video Server
In this example, we'll configure a VIO4. Other video servers will have a similar configuration, but based on the allowed input/output configurations for that server. Standard configurations are:
VIOCG 1 Out
VIO Stream and VIO Omni are locked at 1 in, 1 out
VIOLite and VIO2 server(s): 1In/1Out
VIO4 server: 1In/3Out
VIO4 server: 2In/2Out
VIO4+ is locked at 4 in 4 out
Examples of non-standard video server configurations are:
VIOLite and VIO2 server(s): 0In/2Out
VIO4 server: 0In/4Out
NON STANDARD Video Server intended I/O configuration
By choosing a NON STANDARD Video I/O Configuration, you are acknowledging there will be no encoding capability with the Video I/O card.
Repeat the steps below for any additional video servers that might be in the configuration.
Click the +Add to System button to the right of the server name.
On the configuration page, you'll have a drop-down with configuration options that are based on the type of video server you have, as outlined above. In this example, we selected 2I/2O.
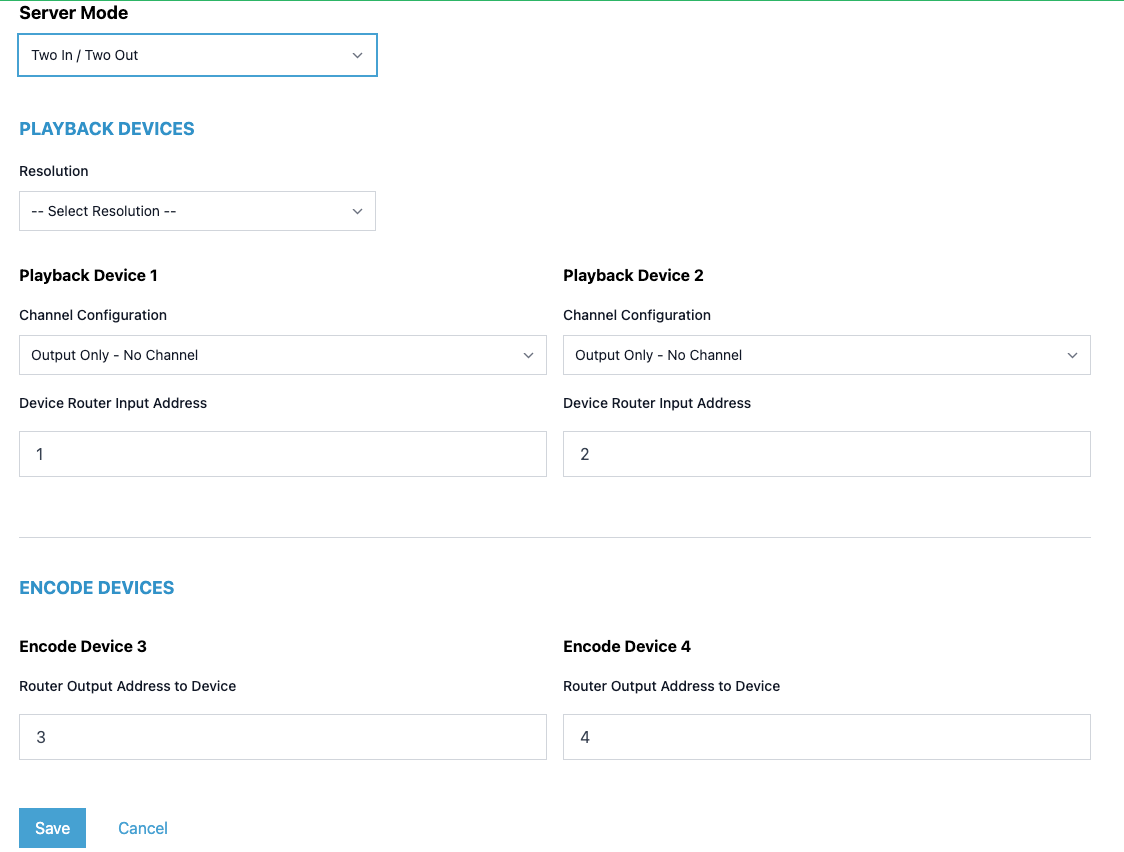
You'll choose the output resolution for your server. Standard choices are 1080i, 720p, or NTSC 4x3 or NTSC 16x9.
Playback Device Configuration
Next, you'll configure each of your Playback Devices. These are the outputs of the video server. In the Channel Configuration dropdown, you have three options:
Output Only - No Channel
Primary Output - Existing Channel
Primary Output - New Channel
Existing Channel
If you are migrating from an existing Cablecast system, you're likely going to chose Primary Output - Existing Channel to map the server output to an existing Channel config from migration. A new drop-down will appear with a list of existing channels. Choose the channel to link this playback device to.
Below that, you'll enter the router output that is going to the cable channel associated with that channel configuration. The Device Router Input Address is the router input that the output of the Cablecast server is going to.
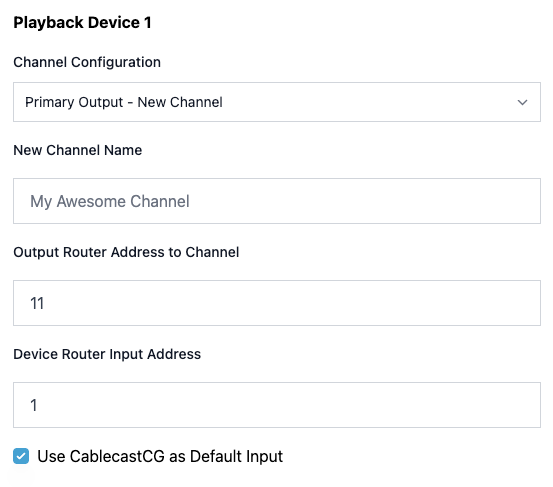
New Channel
If this is a brand new system, you'll likely want to select Primary Output - New Channel to create a new Channel Output and map the playback device to that new Channel. A new Field will appear to enter the Channel name.
Below that, you'll enter the router output that is going to the cable channel associated with that channel configuration. The Devie Router Input Address is the router input that the output of the Cablecast server is going to.
Encode Devices
The last piece of the configuration are the Encode Devices. In our example, the server has two inputs/encoders. You'll enter the router output that's feeding each of the inputs/encoders on the video server.
Click the blue Save button at the bottom of the page to save your configuration.
Configuring a Live Server
Configure Video Servers Before Live Servers
If you're configuring a brand-new Cablecast system that isn't being migrated first, you'll need to configure any Video Servers before configuring Live servers. The Live servers are linked to a Channel output configuration, so those need to be configured before you can fully configure a Live server.
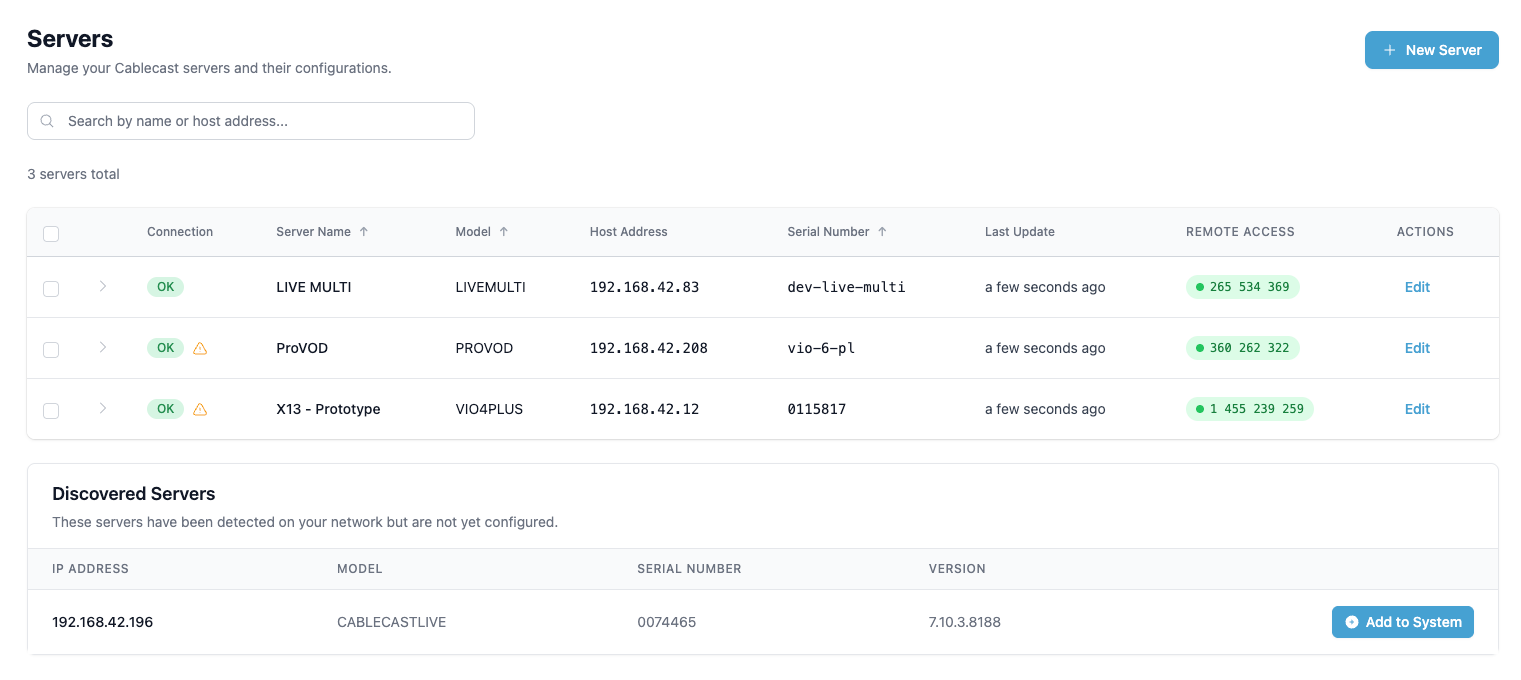
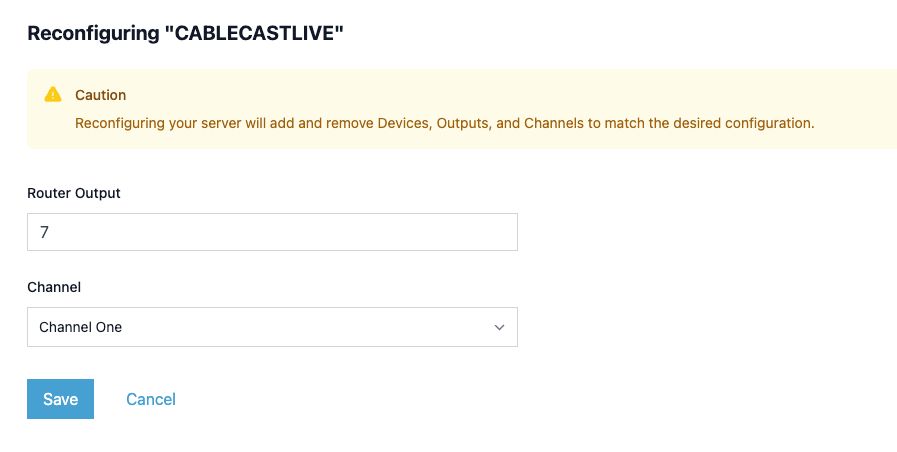
For this configuration, we're adding a Cablecast Live server. Click the blue Add to System button to the right of the server.
On the configuration page, you'll enter the router output that's feeding the signal to the input of the Live server. If you are using a DA downstream to get the signal to your Live server, you can leave the Router Output field blank here.
In the Channel drop-down, you'll choose which channel is going to be feeding the Live server.
What's Next?
Your server is now configured. You'll want to be sure to review our article on File Stores and Creating a File Store next.
