VOD 600/700 Setup Guide
This Article Applies To
VOD Servers
Configurations
VOD = storage and hosting for Video on Demand (VOD) content
What's in the Box?
Cablecast VOD server
AC power cables
Prerequisites
Before beginning setup, make sure you have the following available:
An ethernet network connection
A keyboard, mouse, and a VGA monitor
Hosts and Networking Requirements
All Cablecast systems have a "host" unit. When a VOD is part of the system, it will be the host unless otherwise specified. The host is the "brain" of the system — it's also the external point of contact for livestreaming, VOD, and external login (if used). REFLECT+ relieves the system of the external requirement.
The VOD server will need a static internal network address.
The VOD server will require an external/public address. See External Access Requirements for Live, VOD, VIO Omni Systems for details.
Physical Connections
On the back of your Cablecast server, you'll see several ports. Please refer to the diagram below for connections on your VOD server.
System Connections
All Cablecast servers share some basic system connections:
Connect a keyboard and mouse via the USB ports.
Connect a monitor. The monitor is required for server setup, and we recommend that it remain connected. All Cablecast servers have at least a VGA port — this is what we recommend connecting to the KVM in your rack.
Connect the Cablecast server to the network via one of the ethernet network jacks.
Connect the Cablecast server's power supply to an AC power source using the provided AC power cables.
FIGURE 1: The Cablecast VOD
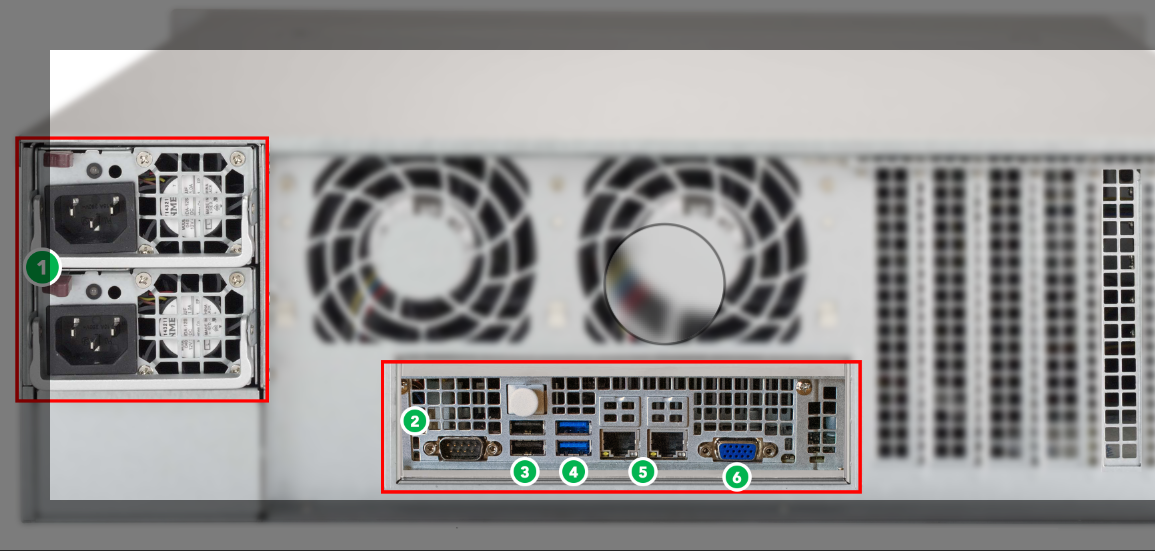
Port legend:
AC Power
RS232 COM port (male)
USB 2.0
USB 3.0
Ethernet
VGA
Powering On
Once your Cablecast server is connected, power on the server by pressing the power button on the front of the unit. You will then go through the Windows 11 Out of Box Setup.
Note
Be sure to note your Windows username and password — Cablecast Support does not have a way to recover credentials other than reimaging the system.
