Force Matrix Overview in Cablecast 7
Introduction
In Cablecast we give you a lot of time saving tools that will allow you to automate your entire channel, from scheduling to recording. But there are also times when you want to manually control your system in different ways. Cablecast also gives you the ability to do everything manually and in this article we will walk you through using the Force Matrix in Cablecast.
Navigating to the Force Matrix
To get to the Force Matrix is rather easy. From the main menu of Cablecast, click on the Autopilot menu option on the left hand side. Then select Force Matrix.
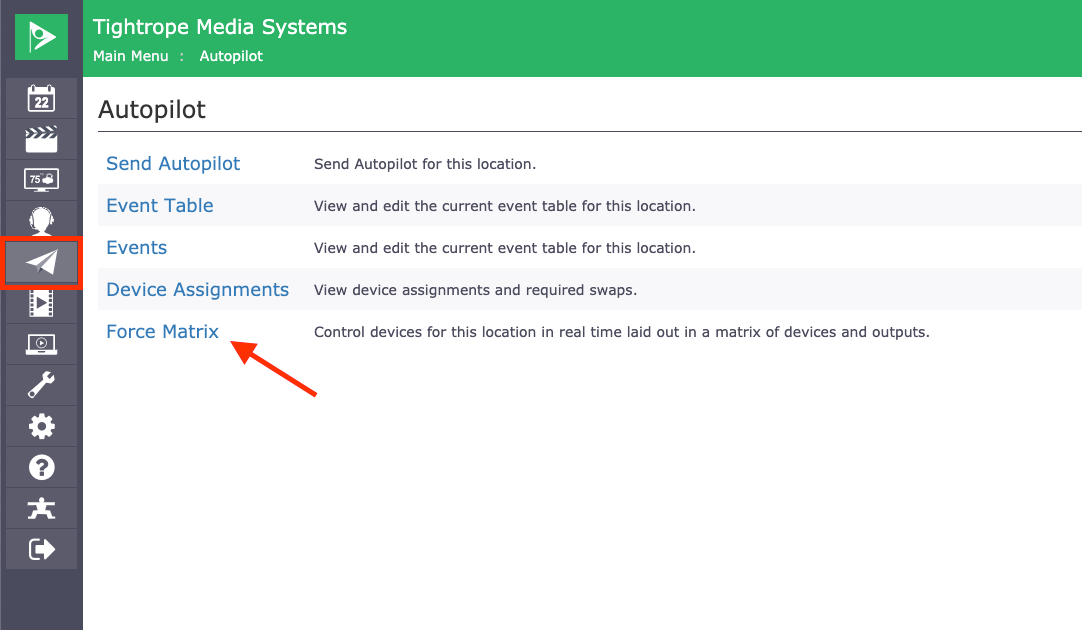
Now that we are in the Force Matrix, there is a lot of different things we can do to manually control our system. But we need to know how the Force Matrix is laid out first.
Force Matrix Layout
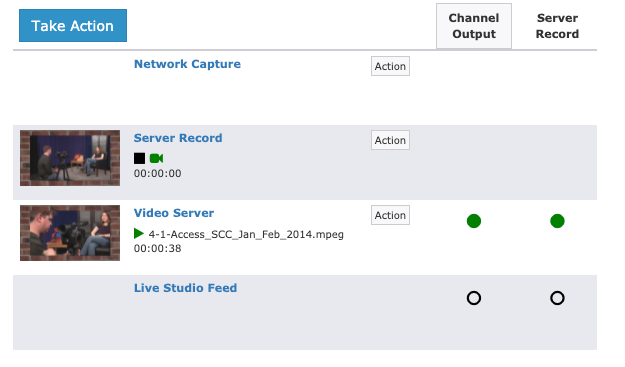
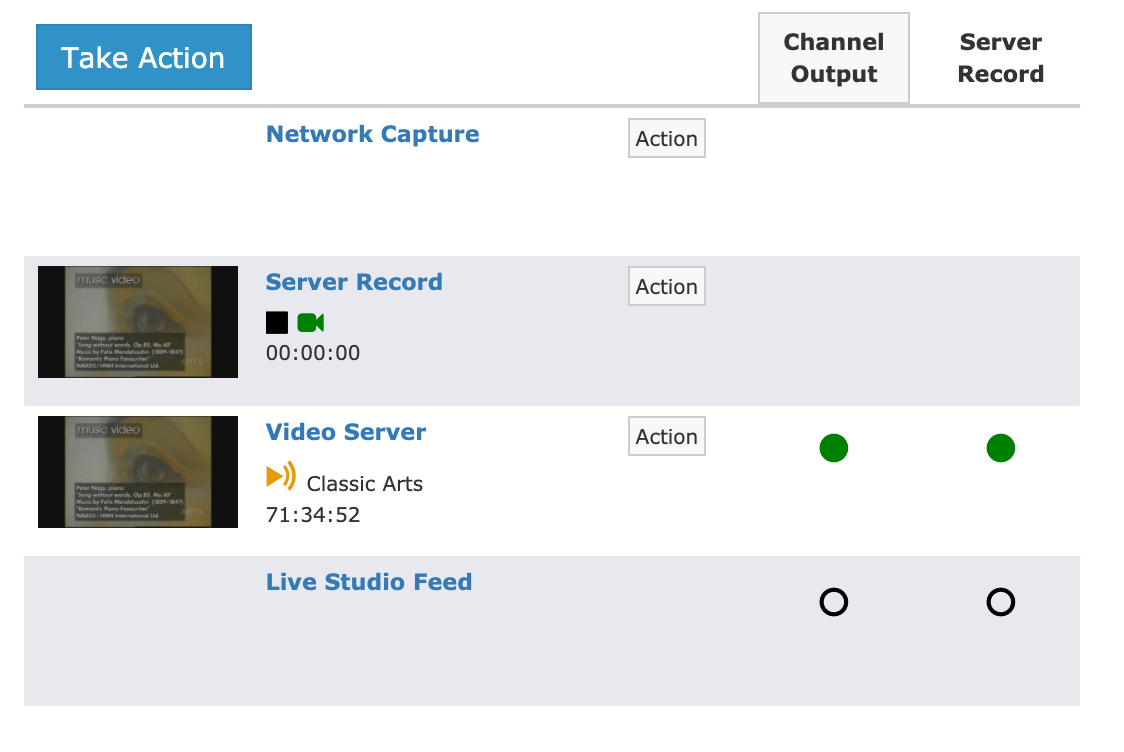
On the left hand side of the Force Matrix will be all of your Devices or Sources. These are the things that you might want to route out to your channel. Across the top are your Outputs or Destination. These are the final place you want a source to go to like your channel output or a record device.
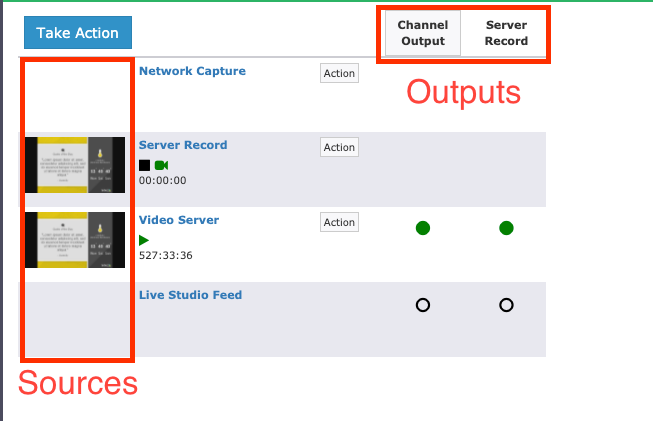
The Green Dots that you are seeing in the Force Matrix are telling you where that source is currently being sent to. So in the image above, Video server is currently routed to both our Channel Output as well as the Sever Record.
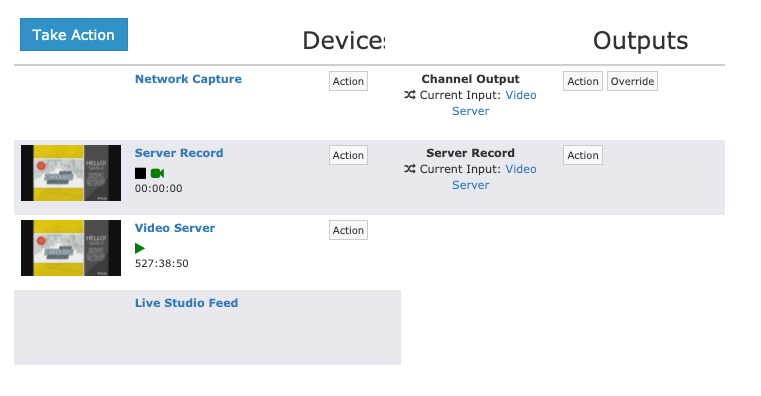
If you have a large system with many sources and outputs, the Force Matrix can be overwhelming and hard to use. For those situations you can go into the Force Small Layout by clicking on the button in the bottom right of your window.
This will compress the layout and make it more manageable for you to use.

Routing Using The Force Matrix
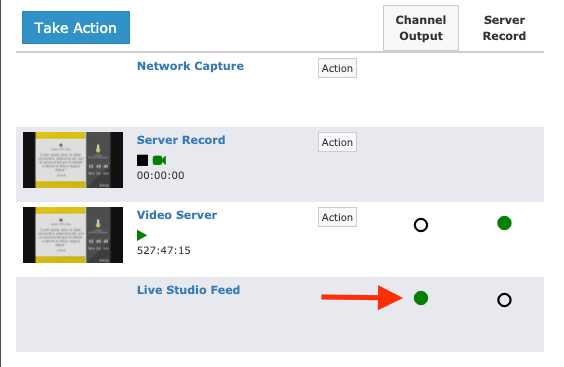
One of the most common uses for the Force Matrix is to Manually Route a Source to a destination. For example, maybe you want to force your Live Studio Feed to your Channel Output. To do that, you will click on the dot that is in relation to where the source is going to the destination.
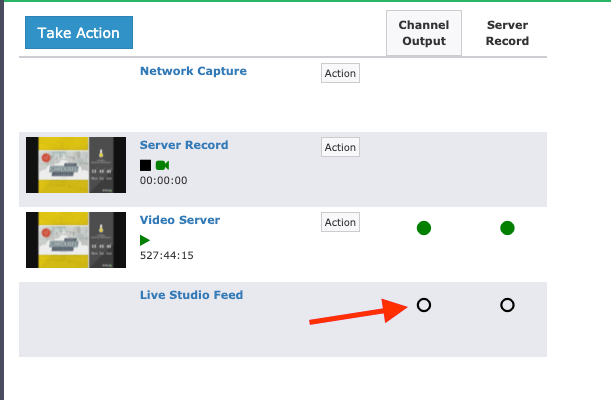
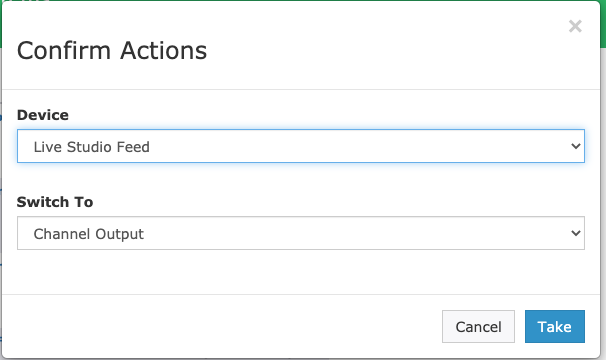
When you click on that dot, you will get a confirmation window. This is confirming that you do infact want that source to go to that destination. If this is correct, click the Take button at the bottom right.
After you click take the route will take place and this will be reflected by the green dot changing as seen below.
Manually Playing A Show
In the Force Matrix, you can also Manually Play a show from your server. To do this, you will click on the Action button for the server output you would like to use.
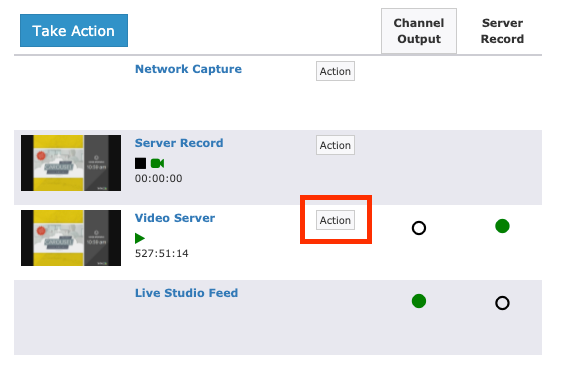
This will open a new Confirmation Window where you can set what you would like to do. First select Play as your Action. This will then give you the File Key field. In that field type in the Show ID you would like to Manually Play. Then in the Switch To section you can select where you would like this to be routed to. so if you want this to go out to your Channel Output you will select that. When finished click Take.
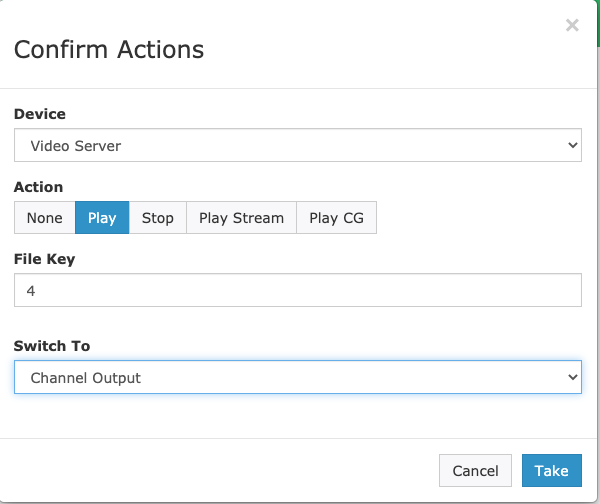
This will then Manually start playing our show and route it out to our channel.
Manually Stoping Playback And Playing CG
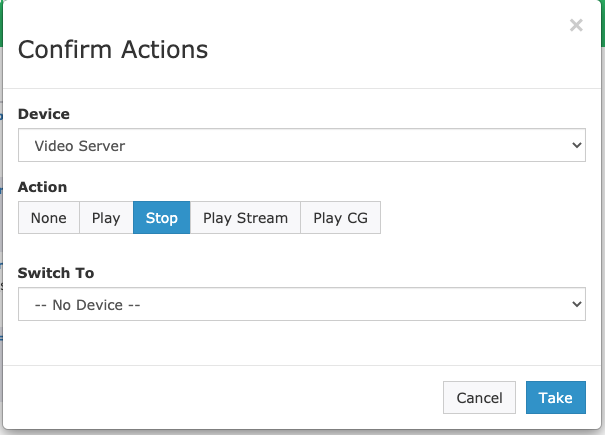
If you want to stop a show from playing, you can use that same action button that you used to play the show to stop it. Click Action, then under the Action options choose Stop. Click Take to stop the playback. You can also route to a different source as well if you want at that time.
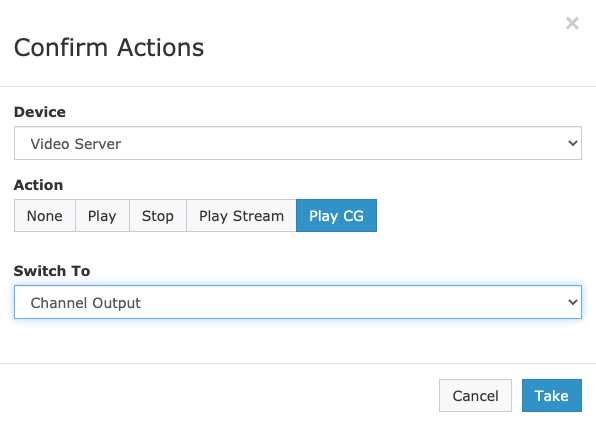
With the new VIO line of servers we introduced Cablecast CG which is the bulletin board that plays out fo the same server output as your shows. If you want to force going back to CG you can do that by clicking on the Action button for that server output. Then under the Action options select Play CG. You can then choose to switch to the Channel Output as well from this window.
***NOTE***
If you manually play a show in the Force Matrix, the channel will not go back to bulletin board automatically once the file is done playing. You will need to manually route or force bulletin board out to your channel afterwards.
Manually Recording
In the Force Matrix you can also Manually start and stop a recording to your server. First you need to make sure that the source you want to record is routed properly to your server record. Use the steps above to route the source to the destination.
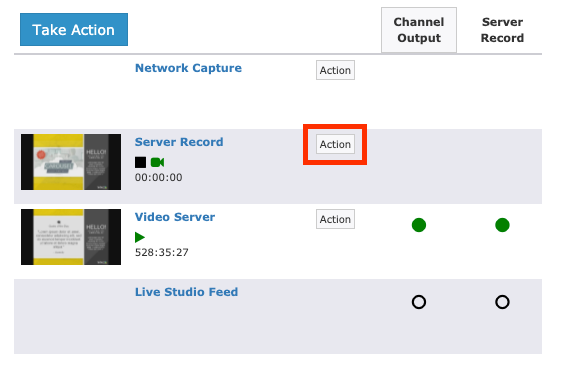
Once things are routed properly, you can then click the Action button for your server's record device.
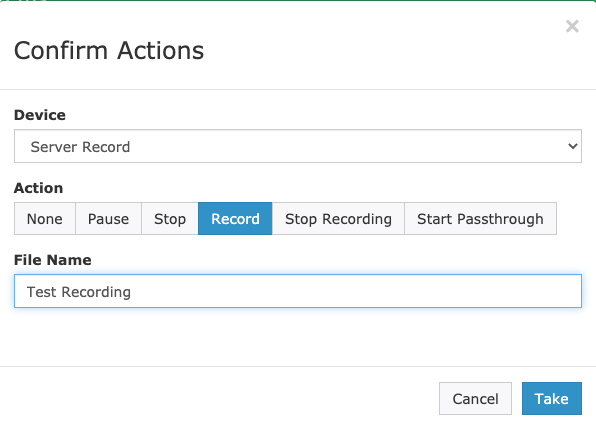
The Record Option will already be selected for you un Action. You can then put in a File Name for the recording that you are about to do so that you can recognize the file in unlinked when you are finished. If you don't put in a unique file name, Cablecast will name the file "Unnamed-Record-DATE". When ready, click Take to start the record.
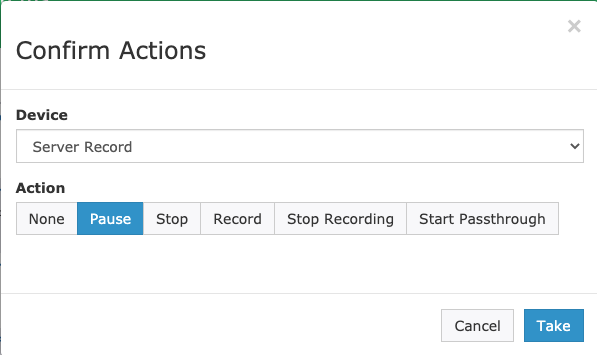
Now that the file is recording you can do a few things. You can either Pause the Recording or Stop the Recording. Pause is a great feature to use if you are recording a meeting and it needs to go into closed session. Instead of stopping the recording and starting a new one when closed session is over, you can pause the recording to make just one file.
To Pause, click the action button for your Server Record Device. In the Confirm Action window, select Pause and then click Take.
To restart the recording, click the Action button again and select Record. You don't need to put in the File Name again, as the file is already named that.
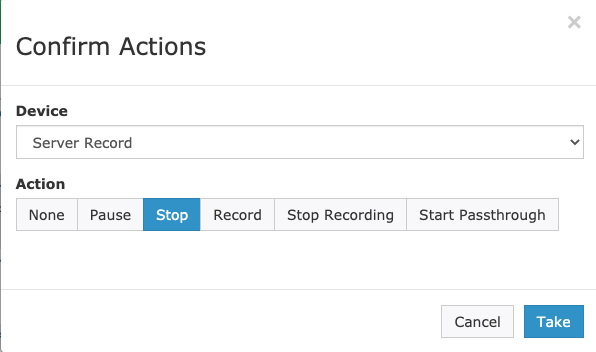
To stop your recording, click on the Action button for the server record device. Stop will automatically be selected in the confirm actions window. All you need to do is click Take.
When the recording is done, Cablecast will start processing your file and place it in the Unlinked section of Digital File Management.
Manually Playing a Network Stream
In the Force Matrix, you also manually play one of your Network Streams that you have already configured. You will want to have these set ahead of time. To learn more about Network Streams, check out our article about Network Streams Overview.
Network Streams use the server output as the device to play the source. Click on the action button next to the server output you would like to use. The Action Confirm window will open, choose the action Play Stream, then select the stream you want to play from the dropdown menu right beneath it. Set the destination you want to switch to, then click Take.
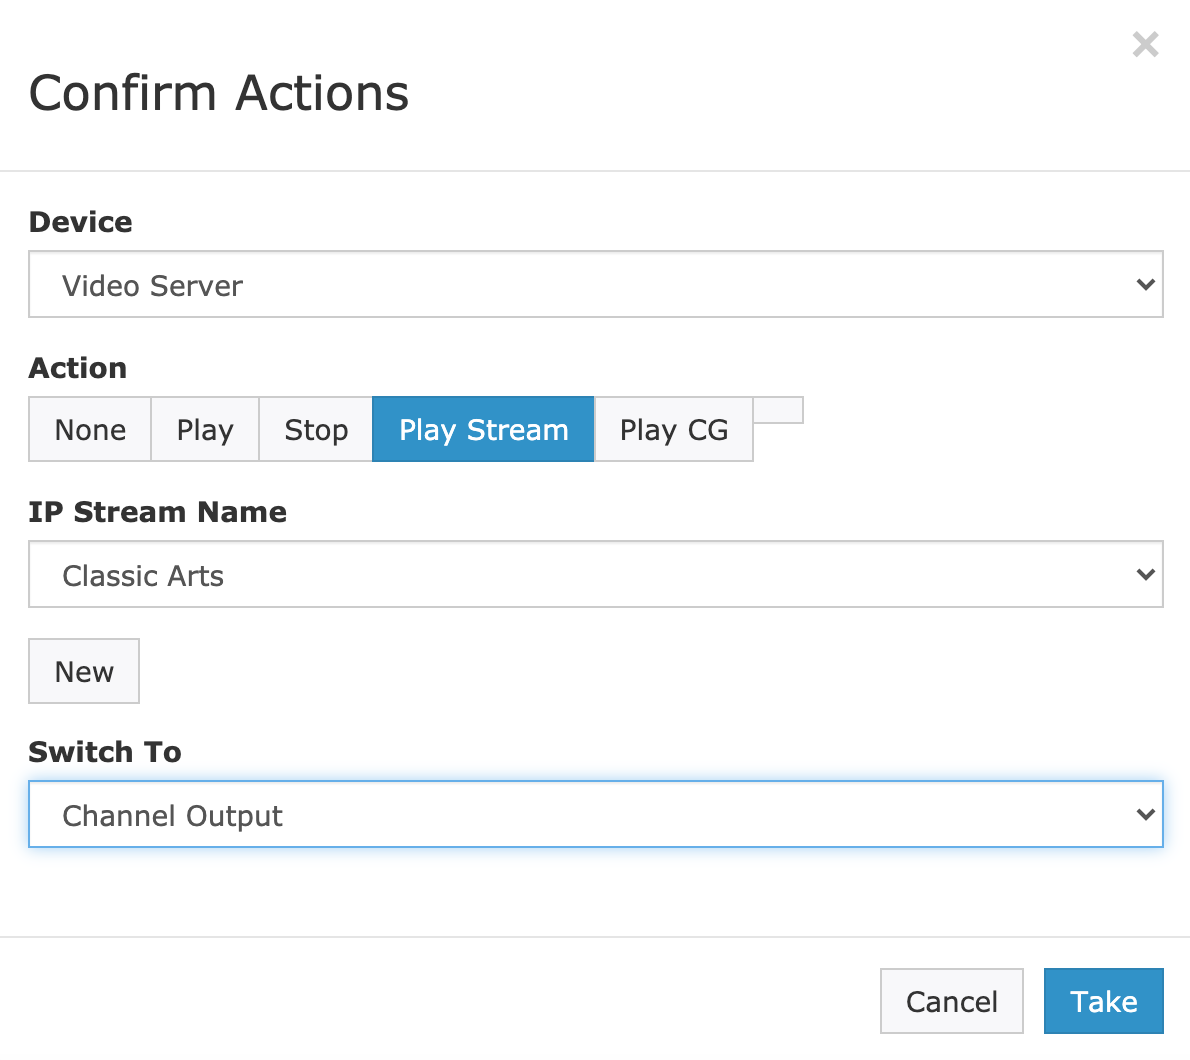
Your stream will then start playing out of your server output.
To stop the stream, you can either use the stop action or play CG option that we described earlier. If you don't do anything, your stream will play until you tell it to stop.
To learn how to Record a Network Stream, check out the following articles