Configuring Gmail for use with Cablecast Email Notifications
Summary
This article steps through the process of setting up an account for use with Cablecast for things like autopilot reports.
Those reading this article may have tried to set up Gmail and keep getting an authentication error when testing. The steps in this article will also address that issue.
This is for the mail server setup only. To use an already configured email with Autopilot, follow the link below.
https://support.cablecast.tv/s/articles/autopilot---settings--emails
Requirements
- A Gmail account that can be logged into and security managed by the user
- A phone/device that can be used for MFA setup
Enable POP in Gmail
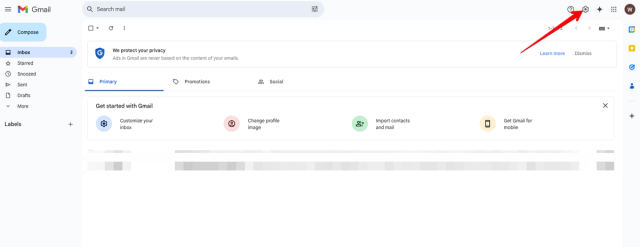
You'll need to go into Gmail via your browser and click on the gear icon in the top right-hand corner. Then click "See all settings".
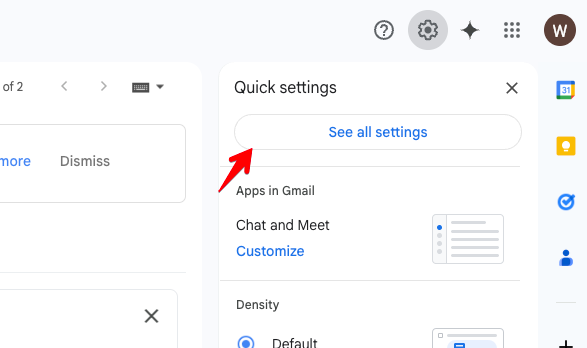
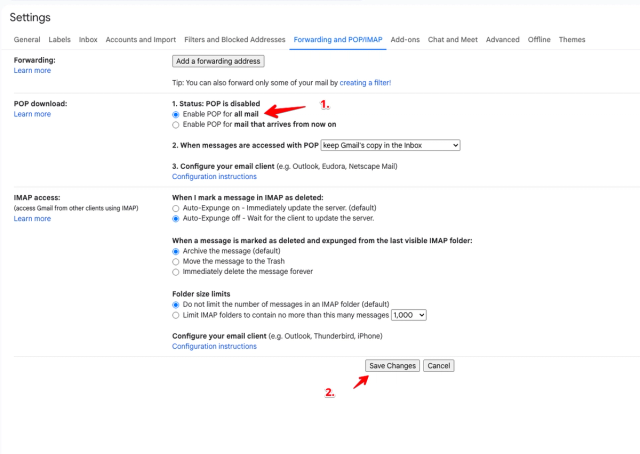
Find the "Forwarding and POP/IMAP tab and click on it.

Once in the POP settings, enable POP as shown below, then click save.
Enable Two-Step Verification for the Google account
This is a required step for enabling app passwords. Google has a support article here for turning this on.
You can also follow this link to turn it on for phones. It is important to make sure you are logged into the correct account that uses the email for Cablecast.
Once this is correctly configured, you should be prompted for a code or a button press from your phone to log into the account. This is necessary for the next step.
Configure Managed App Password
This is the step where we get our special password to use for Cablecast. This
Passcode will not ask for a 2FA code or prompt, which allows it to work with Cablecast.
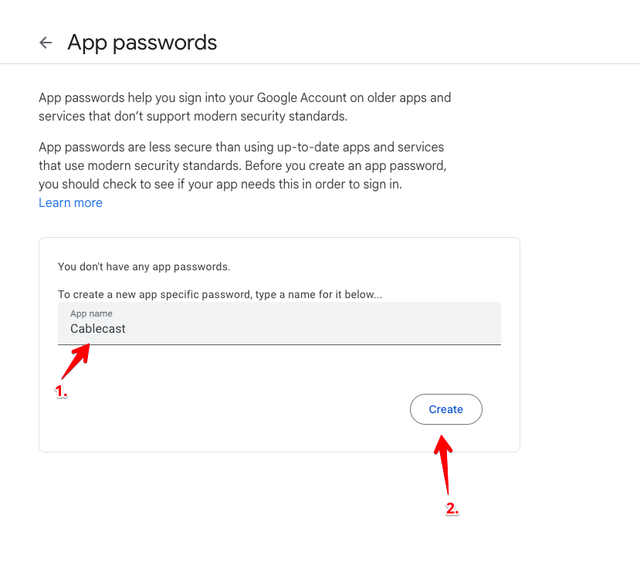
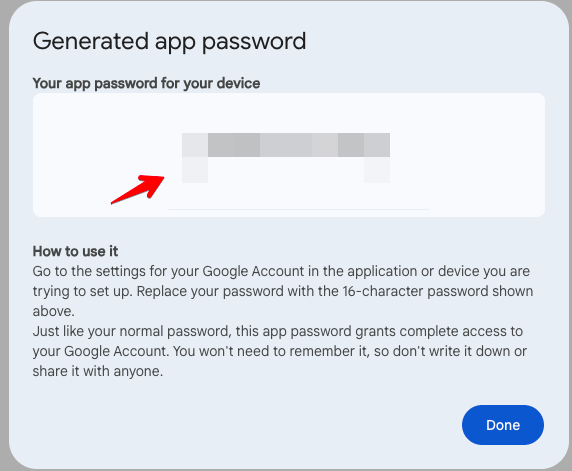
You will then get a password, make sure to record this as it will not show you this password again unless you make a new one. This will be used for our password in the next steps.
Cablecast Mail Settings
Now we're ready to configure Cablecast with our email account.
You'll find the settings under Frontdoor in Server Settings -> Mail Settings

Once open, you'll be greeted with some settings that look like these. Below is a screenshot of my system; you will want to copy the configuration for GMAIL.
SMTP Mail Server
text
1
smtp.gmail.comPort
text
1
587
Use Authentication and Enable SSL - CHECKED

Username - Your Gmail account
Password - Your app password from the steps above

Bounce Address - Another Email, such as your work one.
Once these settings are entered. Click "Update" to apply configuration.
When fully configured, your setup will look like this.
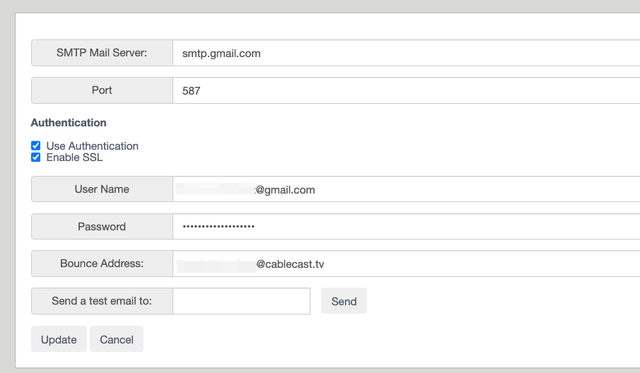
You should be able to send a test email to an inbox and get confirmation. Once this is done, the setup is complete.

