Configuring Cablecast/Frontdoor Login for use with Active Directory
Summary
This article covers the steps to configure a Cablecast system to use Active Directory for its Front door login. These steps should only need to be performed on the host system.
Requirements
Before we begin
Please ensure these requirements are met before proceeding further
An active platinum support contract.
A Cablecast system with version 7.7 or newer.
The Windows system must be joined by the users IT staff to the active directory domain you want to use.
An AD service account that is a standard user that does not expire or require password changes.
The LDAP address of the active directory server.
Determine if you're using Carousel, extra steps will be required.
Configuring the Active Directory server.
The IT administrator must perform these steps on their AD server.
Cablecast staff are unable to configure the active directory server.
The system administrator will need to create two security groups in the active directory domain that will be used for assigning permissions. The names of these groups are built-in and cannot be changed at this time. These are
Text
1
TRMS_USERSand
Text
1
TRMS_ADMINSAssigning active directory users to the TRMS_USERS group will grant them standard login permissions which can be altered in the frontdoor settings. Assigning users to the TRMS_ADMINS group will give users locked-in access to every part of the Cablecast/Carousel WebUI.
You need to create a standard user in the same OU as the users and groups you want to use. This account ideally should not expire or have password changes. It should not be assigned to the TRMS groups we created earlier.
Configuring IIS
What servers do I configure?
Only the host server needs to be configured with these steps.
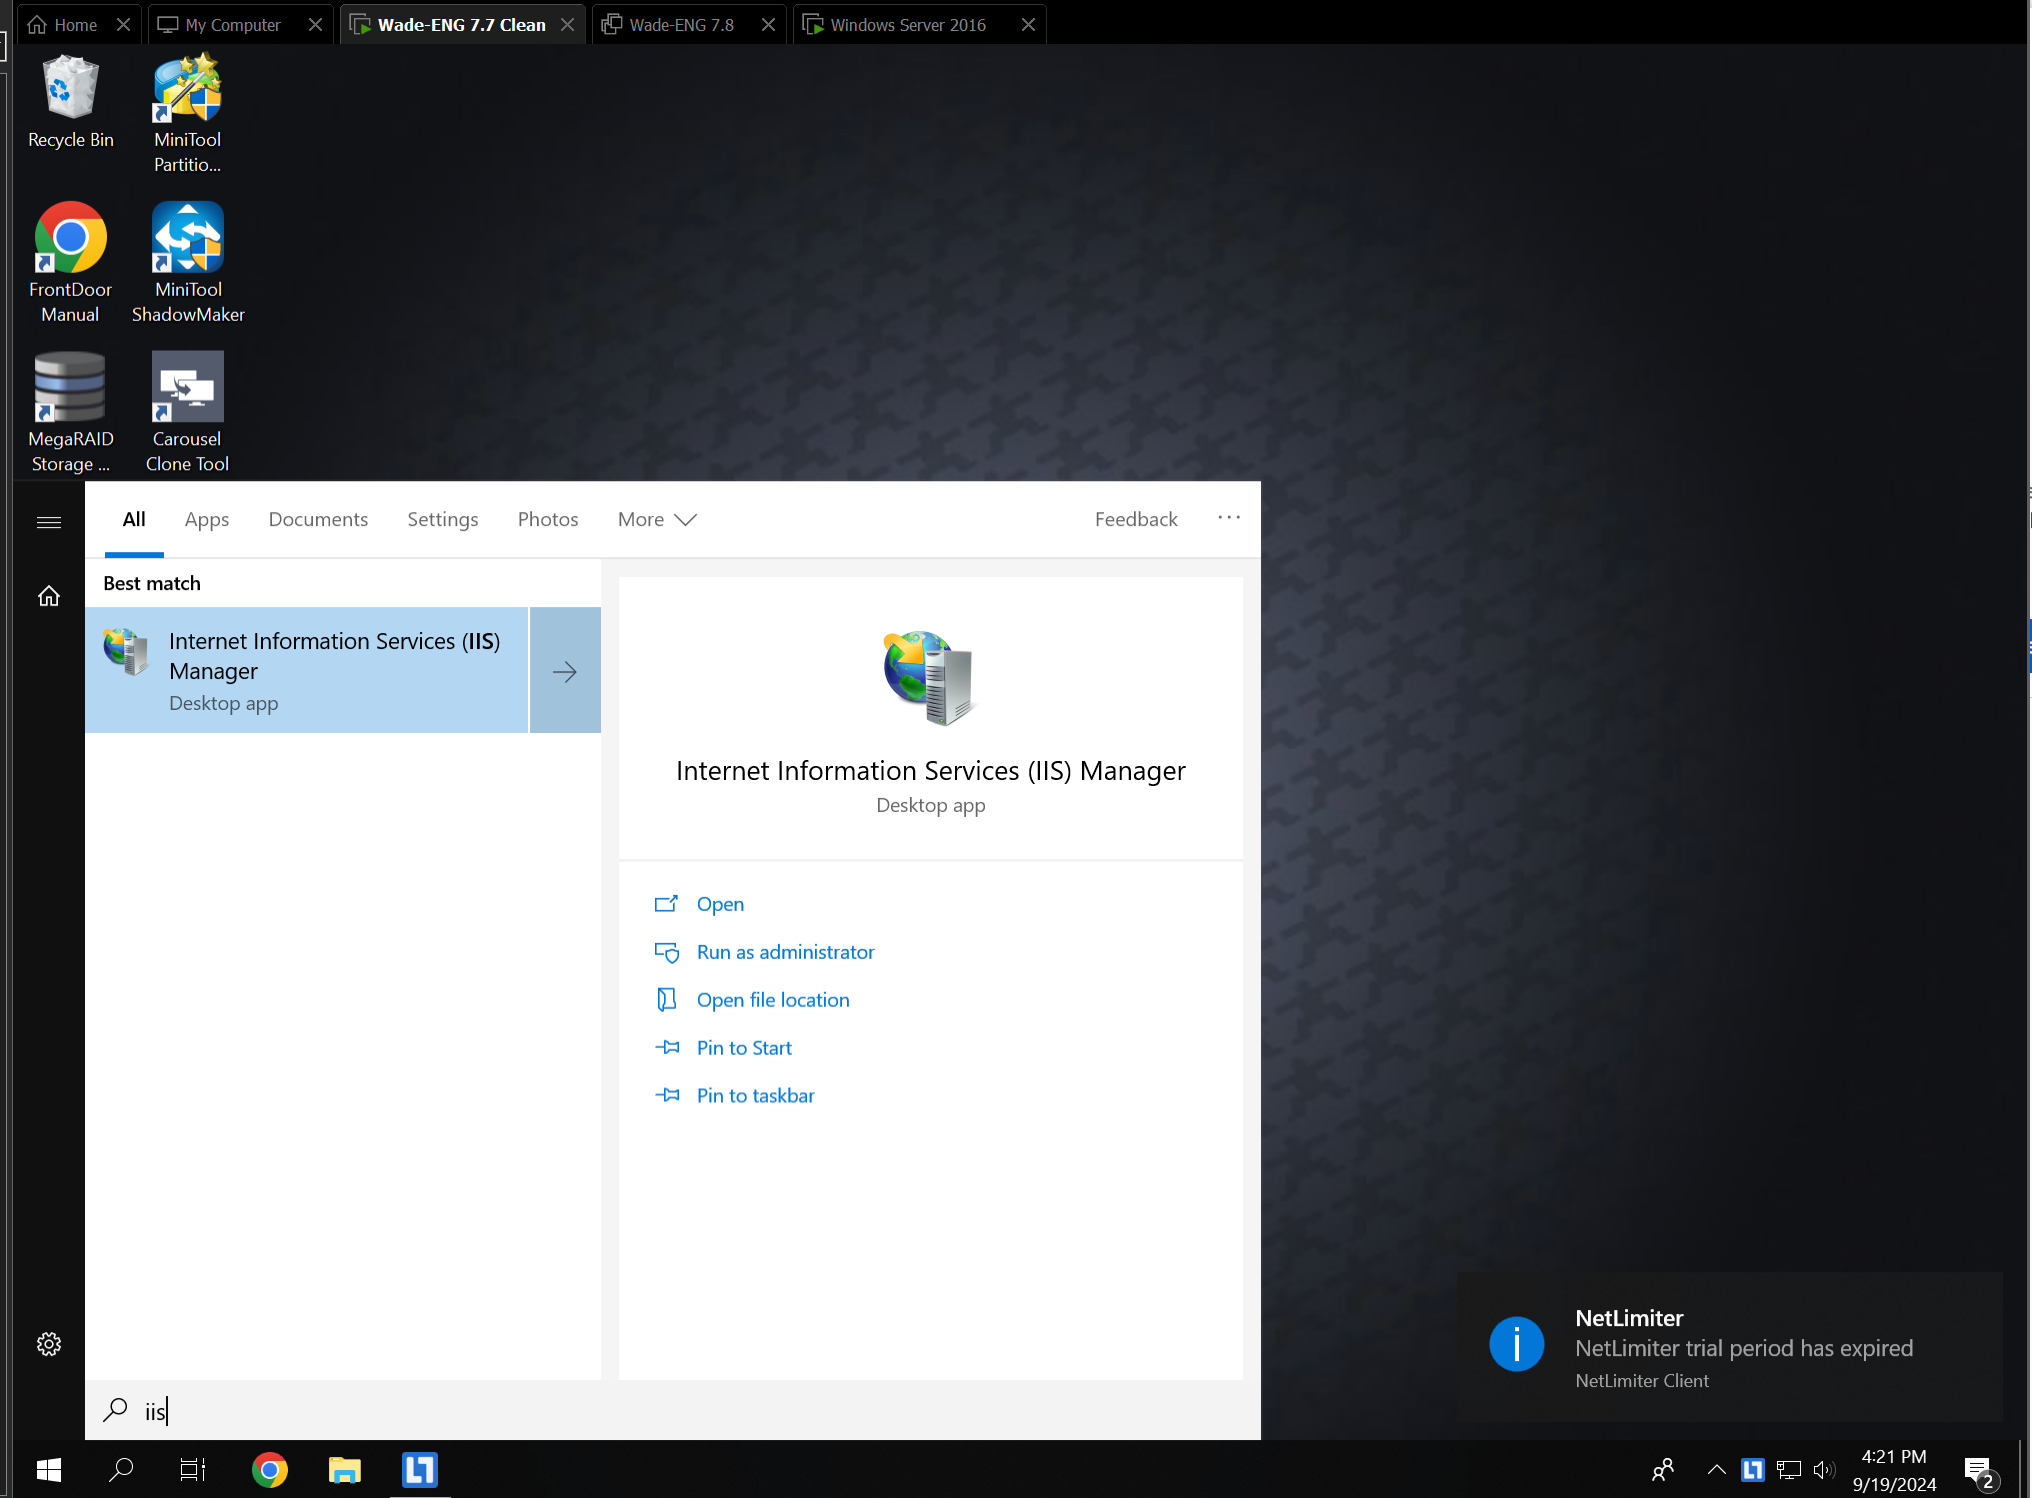
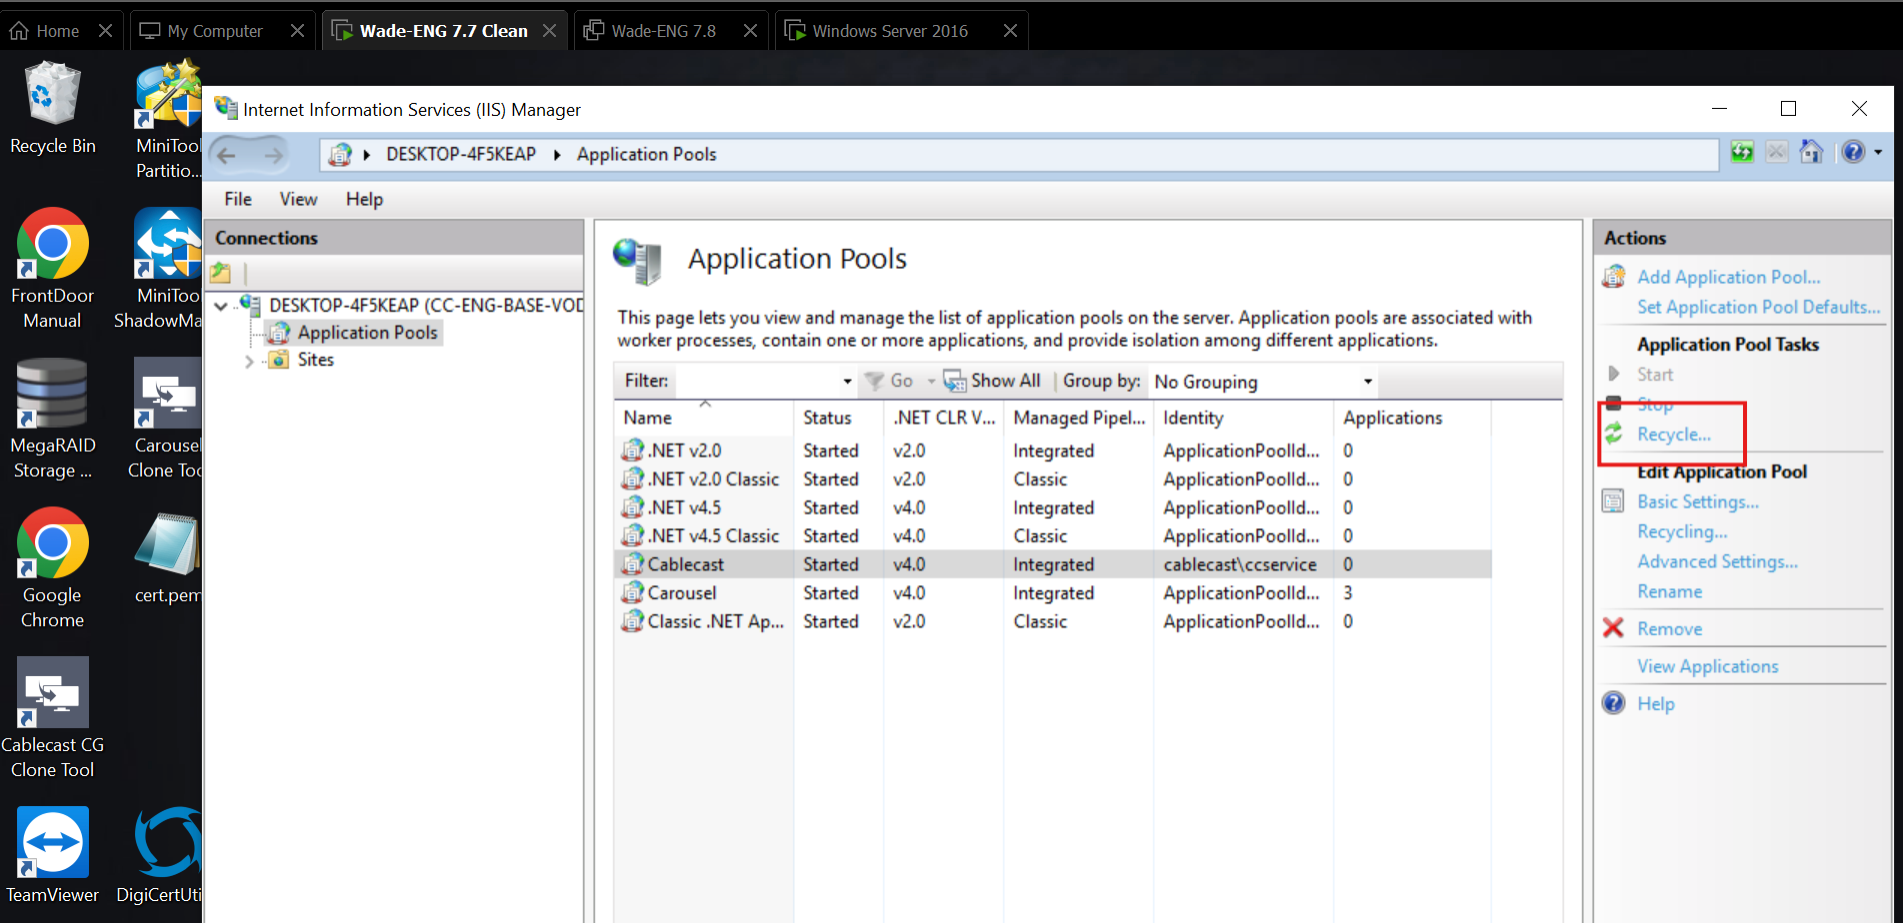
On the host system open and search for IIS in the bottom left-hand search pane.
Once that is done you'll be greeted with the IIS configuration Window. Left-click on the Application Pool page. Once that is open you'll need to highlight the Cablecast pool and then open the advanced settings.
If you are using carousel
Repeat the same steps on the carousel application pool as well.
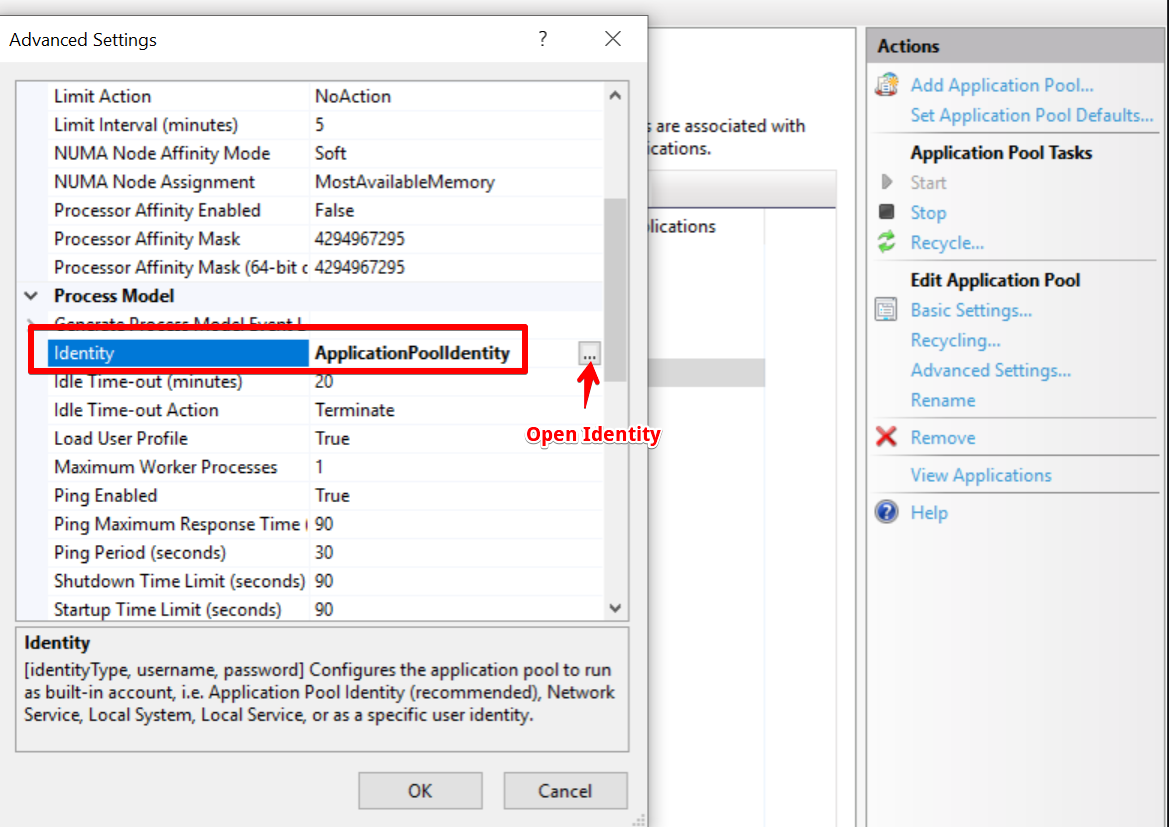
Once that is done you'll need to scroll down to the identity field and open it as depicted below.
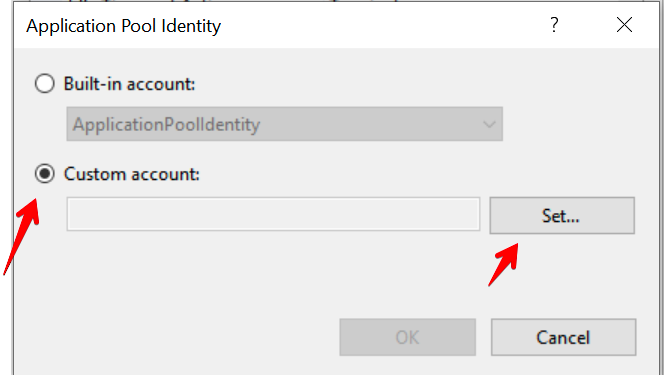
Click Custom Account and then Set.
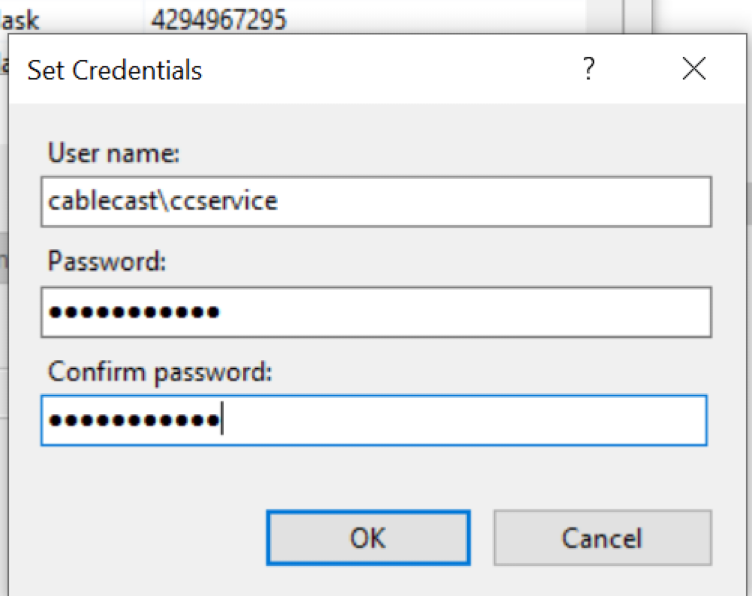
Enter the credentials you've created for your service account and click OK.
Recycle the app pool and ensure no errors occur. If you receive a failure message it likely means the credentials are wrong, the account could be locked/expired or the server cannot communicate with the domain.
If you use Carousel repeat the same steps for the Carousel application pool.
Editing the Web configuration file
Back up the web.config file
Its recommended to keep a copy of the web.conf file in the event an error is made configuring the file.
You will need to edit the root web.config for the next series of steps. Which can be found under
Text
1
C:/TRMS/Web/web.config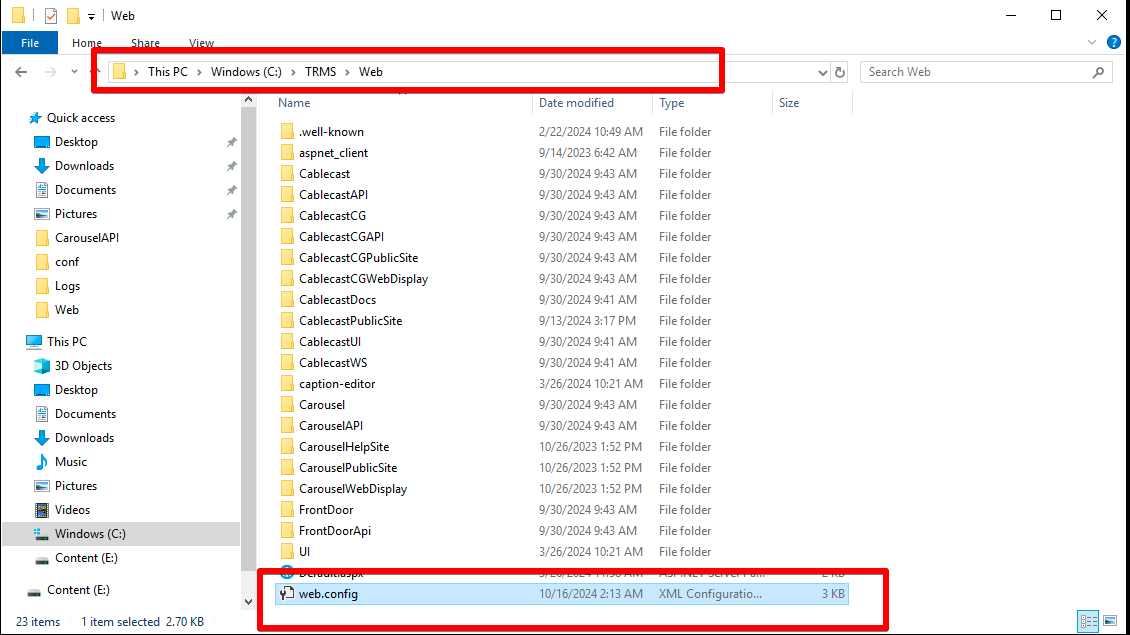
You'll want to right-click and open the web.config file with Notepad.
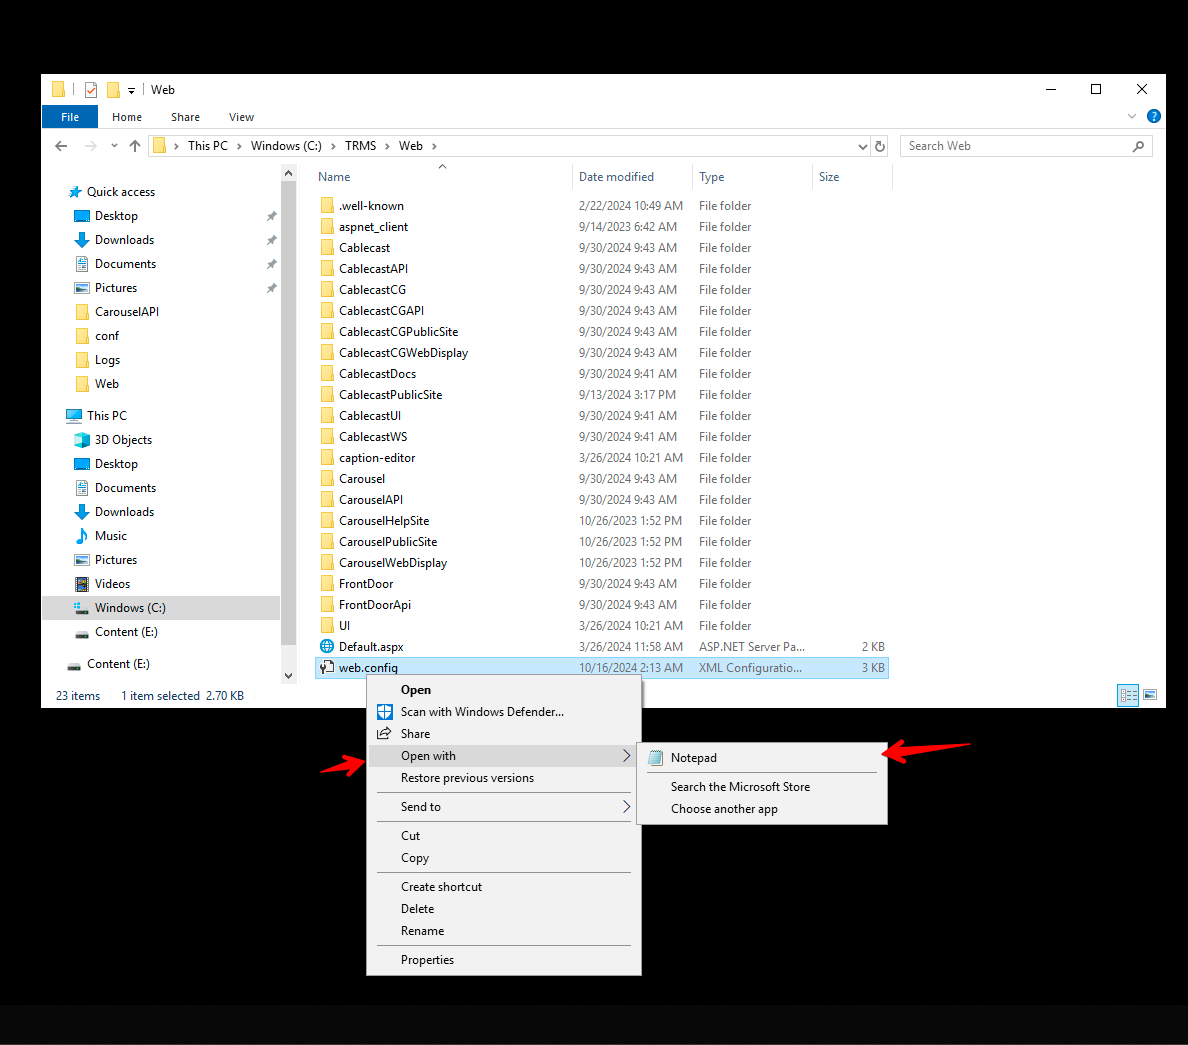
Once the file is open, scroll down until you reach the following section.
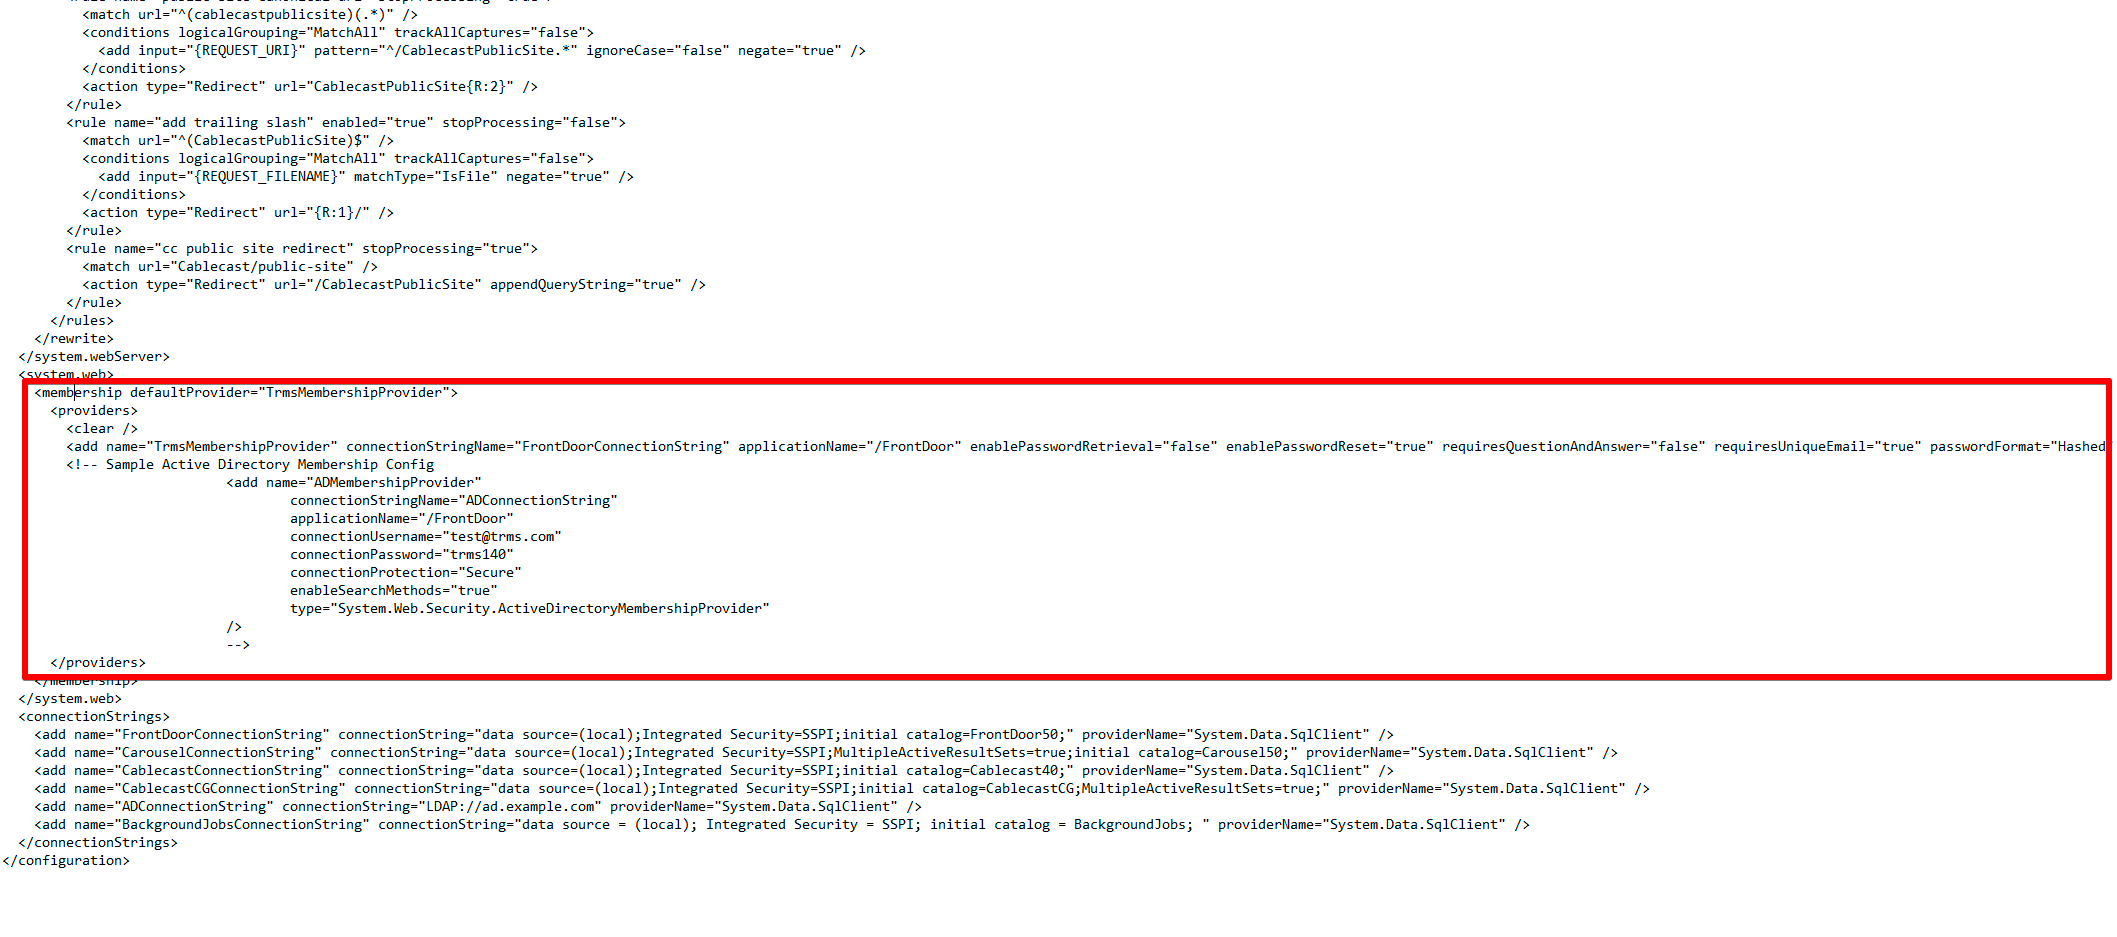
Find the following code
Text
1
2
3
4
5
6
7
8
9
10
11
12
13
14
15
16
    <membership defaultProvider="TrmsMembershipProvider">
      <providers>
        <clear />
        <add name="TrmsMembershipProvider" connectionStringName="FrontDoorConnectionString" applicationName="/FrontDoor" enablePasswordRetrieval="false" enablePasswordReset="true" requiresQuestionAndAnswer="false" requiresUniqueEmail="true" passwordFormat="Hashed" minRequiredPasswordLength="4" minRequiredNonalphanumericCharacters="0" type="System.Web.Security.SqlMembershipProvider" />
        <!-- Sample Active Directory Membership Config
		            <add name="ADMembershipProvider"
			            connectionStringName="ADConnectionString"
			            applicationName="/FrontDoor"
			            connectionUsername="test@trms.com"
			            connectionPassword="trms140"
			            connectionProtection="Secure"
			            enableSearchMethods="true"
			            type="System.Web.Security.ActiveDirectoryMembershipProvider"
		            />
		            -->
      </providers>
Replace the code above with the following
Text
1
2
3
4
5
<membership defaultProvider="ADMembershipProvider">
      <providers>
        <clear />
        <add name="ADMembershipProvider" connectionStringName="ADConnectionString" applicationName="/FrontDoor" connectionProtection="Secure" enableSearchMethods="true" type="System.Web.Security.ActiveDirectoryMembershipProvider" />
      </providers>
This section should now look like the picture below.

Next, you will need to move to the very bottom section and find the AD connection string line for the active directory.
Text
1
<add name="ADConnectionString" connectionString="LDAP://ad.example.com" providerName="System.Data.SqlClient" />
Replace the LDAP address with your AD domain address, in my example, I'm using the local IP of the server.
Text
1
<add name="ADConnectionString" connectionString="LDAP://192.168.0.247" providerName="System.Data.SqlClient" />The connection string section will now look similar to this.

Save the configuration file, you may need to save it to the desktop or another location and then drop it in the web folder to replace it.
Testing the configuration
Clear your browser cache before continuing
It is imperative you clear your browser cache or you will receive an error from Frontdoor.
After you clear your browser cache on your preferred browser you should be able to log into Frontdoor using your AD credentials assigned to one of the two user groups.
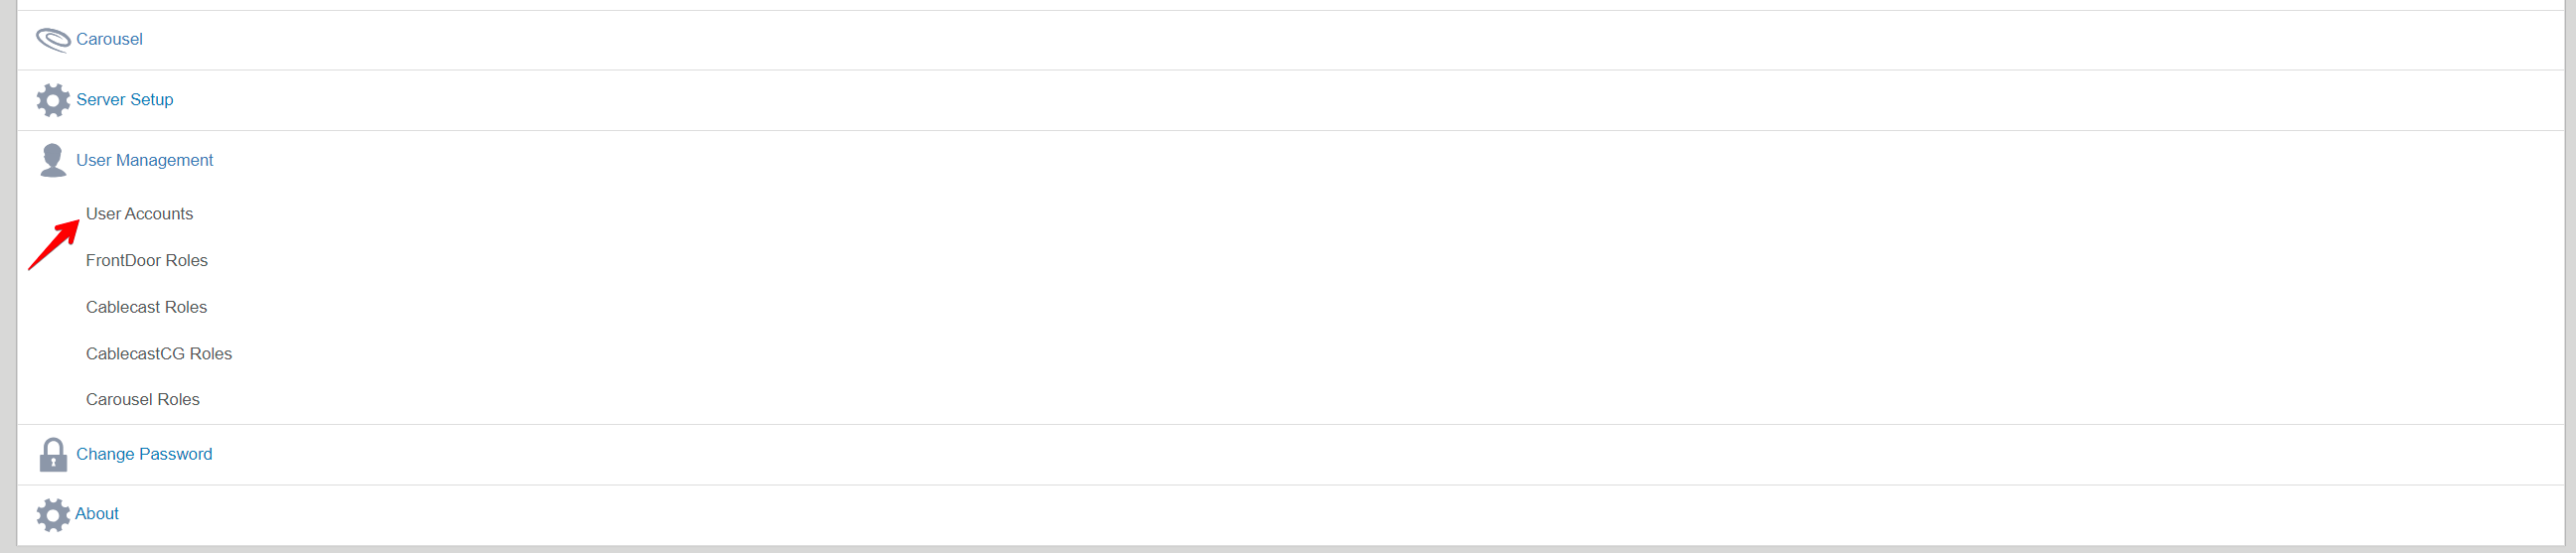
You can check and see the status of other AD accounts that are added into the user groups under user management

After verifying you can load Cablecast and Carousel (if configured) you have completed the configuration successfully.
