Changing Network Type to Private in Windows 10
Windows 10 makes it easy for the users to configure Windows Firewall by using pre-defined configurations of Windows Firewall. By default, there are three network types on which Windows Firewall configurations are used, public, private and domain.
Public Network
A public network is the default network type. If no network type is selected, Windows will configure Windows Firewall using the Public network type rules. In public network, Windows Firewall rules will be the most restrictive. The firewall will block most of the apps from connecting from the Internet and disabling some features like file and printer sharing, network discovery and automatic setup of network devices etc.
You should use this type of network when you have only one computer and do not want to communicate with any other network device.
Private Network
The private network can be a home network or work network. This type of network will enable most networking features of Windows 10 like file sharing, network device setup, network discovery etc.
We will want the network type to be set to Private. There are a few ways to make this change, but the following is our recommendation.
Change network type using Local Security Policy
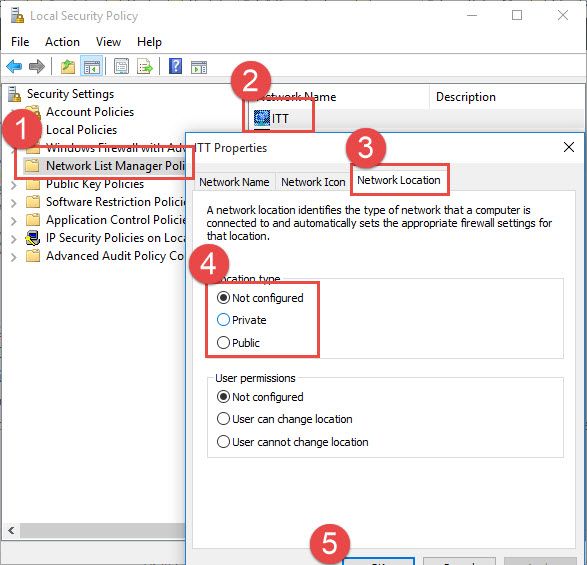
Go to Run –> secpol.msc
Select Network List Manager Policies. This will list all the networks in the right hand pane.
Double click your desired network, go to Network Location tab.
Change the Network location type to private.
If you want to do this for all the connected networks, you can double click All Networks instead of your desired network.
