Getting Started - Setup and Integration
Why accessibility matters for government video
Before you set up MediaScribe, it helps to understand why your agency needs it. The Web Content Accessibility Guidelines (WCAG) 2.1 Level AA set the standard for digital accessibility that government agencies must meet under ADA Title II.
For video content, WCAG Level AA requires:
- Captions for live meetings (Success Criterion 1.2.4) so people who are deaf or hard of hearing can follow along in real-time
- Captions for recorded meetings (Success Criterion 1.2.2) for people accessing archived content
- Audio descriptions (Success Criterion 1.2.5) that narrate visual information for people who are blind or have low vision
- Full transcripts (Success Criterion 1.2.8) as text alternatives to video
Under the DOJ's April 2026 deadline, agencies serving populations over 50,000 must make all public-facing video content accessible. Smaller agencies have until April 2027.
How MediaScribe supports WCAG compliance
MediaScribe automates accessibility for live government meetings:
- Real-time captions that appear within 3 seconds of speech
- In-room caption displays for meeting attendees
- Mobile captions in 72+ languages via QR code
- Automatic audio descriptions of visual content
- Full transcript export for meeting minutes and archives
Your accessibility requirements become part of your normal meeting workflow rather than extra steps that slow you down.
What you need before you start
MediaScribe is a 2 RU rack-mounted appliance that connects to your existing video infrastructure. Before setup, make sure you have:
Equipment
- Keyboard and mouse (USB connection)
- Monitor (VGA connection)
- Ethernet cable for network connection
- SDI cables to connect video sources
Infrastructure
- Gigabit Ethernet connection to your network
- 2 RU rack space (or tabletop space if not rack-mounting)
- SDI video output from your cameras, switcher, or mixer
- Internet access for cloud processing
Information
- Your organization's network settings (if using static IP)
- IT contact for network configuration questions
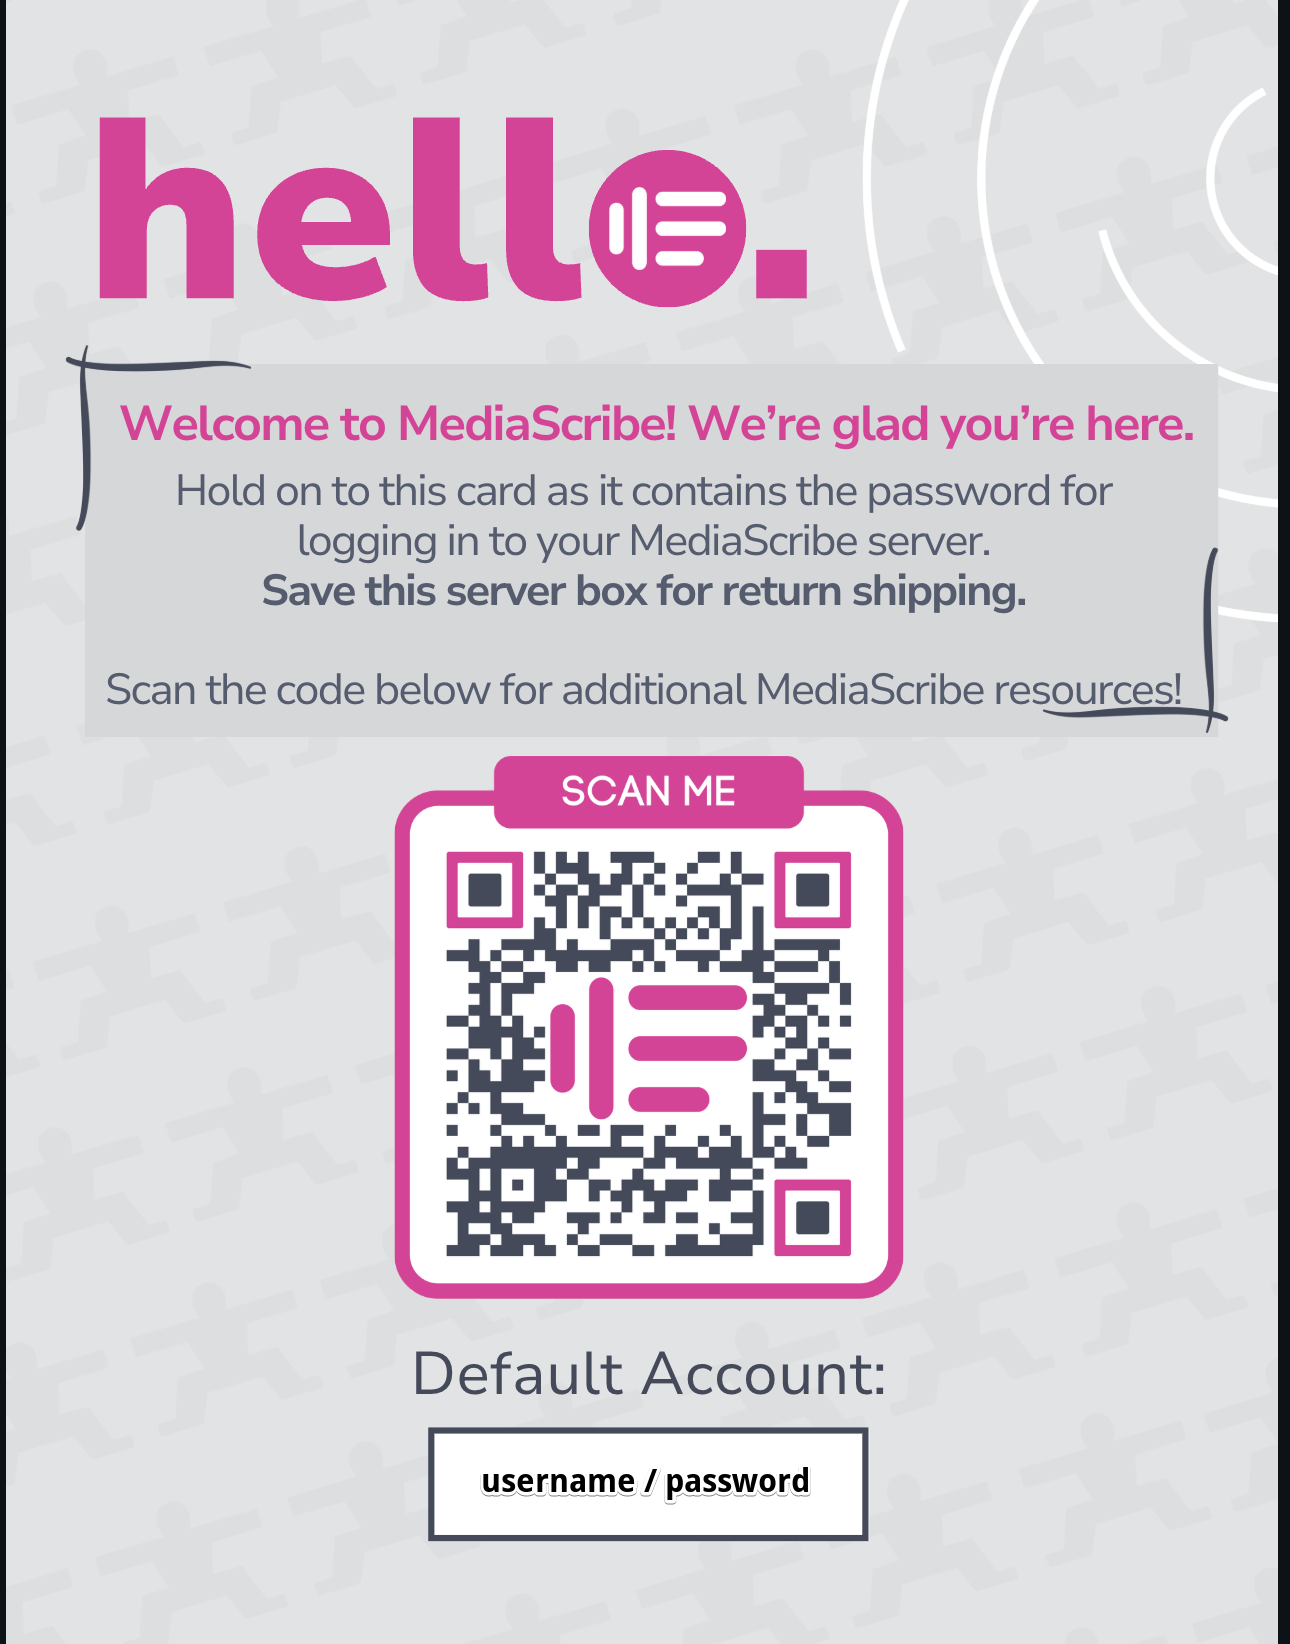
The MediaScribe Gateway ships preconfigured with a unique username and password printed on your welcome card and on the back of the appliance itself.
Physical setup
Mounting the appliance
Take the MediaScribe Gateway out of its shipping box. If you're installing in a server rack, attach the included rack ears to both sides of the chassis using the provided screws.
Making connections
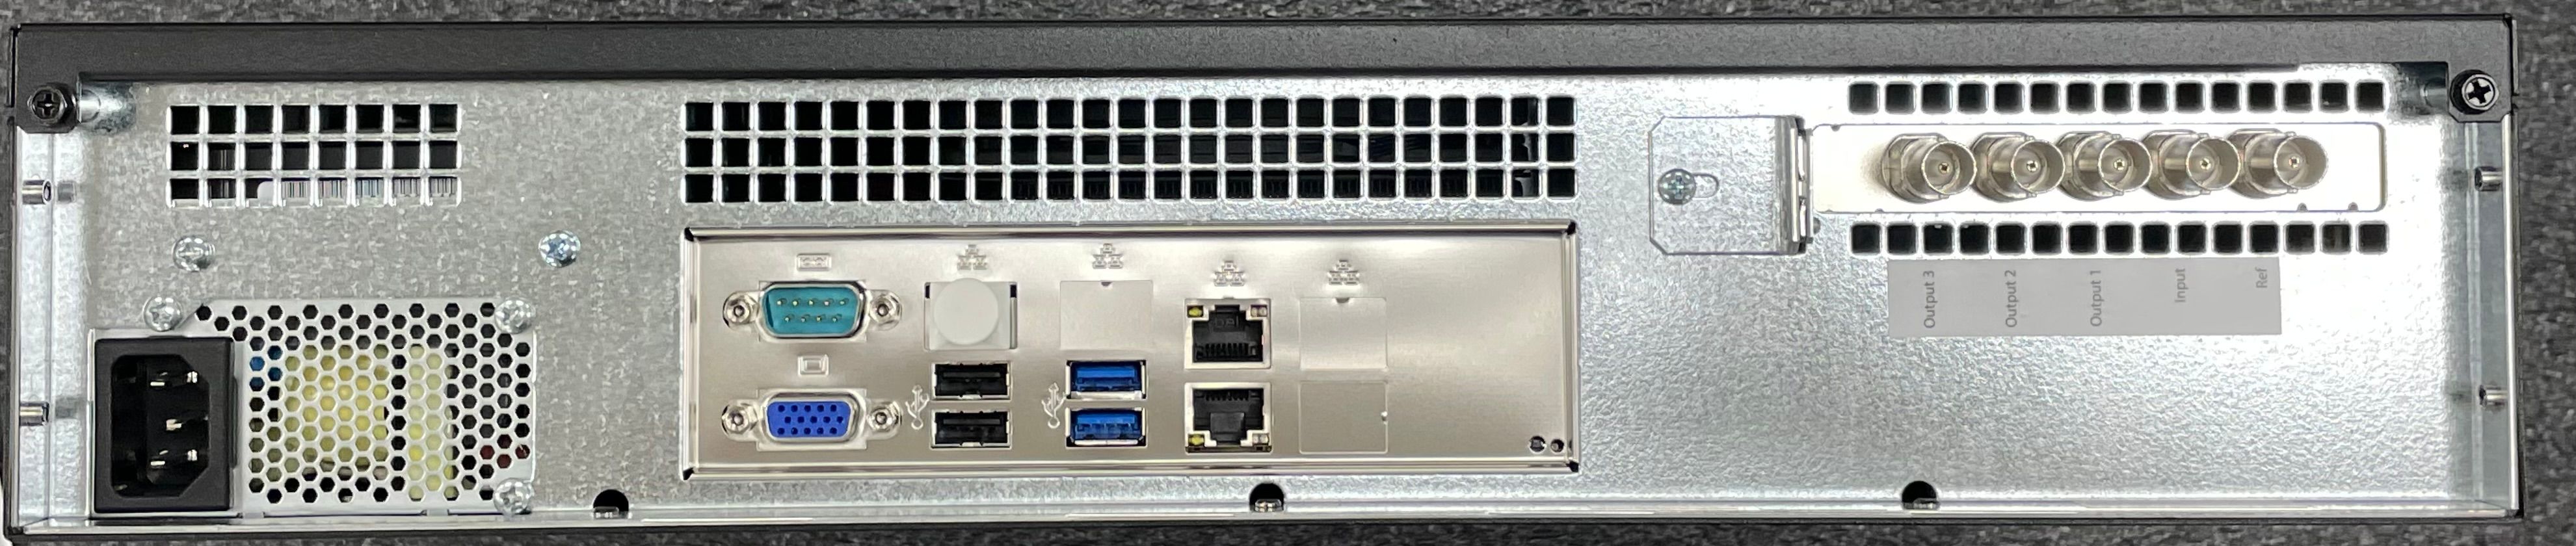
Connect your equipment to the rear panel of the MediaScribe Gateway:
VGA Port: Connect your monitor here. You'll use this to view the operating system during initial network configuration. After setup, you can disconnect the monitor—daily operation happens through the web browser interface.
USB Port:s Connect your keyboard and mouse. Like the monitor, these are only needed for initial setup and network configuration.
Ethernet Port: Connect to your Local Area Network. MediaScribe requires internet access to process audio through the cloud ASR (Automatic Speech Recognition) engine.
SDI Connections: The rear panel includes one SDI input and three SDI outputs:
Ref (Reference Input): Optional genlock input. Connect this if you need to synchronize MediaScribe's outputs with other broadcast equipment. If you leave this disconnected, MediaScribe uses its internal clock.
Input: Connect your video source here. This could be your production switcher's program output, a direct camera feed, or your mixer. MediaScribe supports these video formats:
- 1080i59.94
- 1080p59.94
- 1080p60
- 720p59.94
- NTSC
Outputs 1, 2, and 3 – These three outputs can each be configured independently:
- Closed captions embedded in the video signal for broadcast or recording
- Open captions burned into the video image for displays that don't support closed caption decoding
- In-room transcript display showing rolling text for meeting attendees
Power on and first boot
Once all cables are connected, press the power button on the front of the appliance. MediaScribe will run through a short Out-of-Box Experience (OOBE) where you:
- Accept the license agreement
- Allow the operating system to check for updates
- Complete any remaining Windows 11 setup steps
This process typically takes less than 5 minutes. When complete, you'll see the Windows 11 desktop.
Log in to the appliance
Use the username and password from your welcome card (also printed on the back of the appliance) to log into Windows. You're now ready to configure network settings.
Network configuration
MediaScribe needs an IP address so you can access its web interface from other computers on your network. We recommend using a static IP address or a reserved DHCP address so the IP doesn't change between meetings.
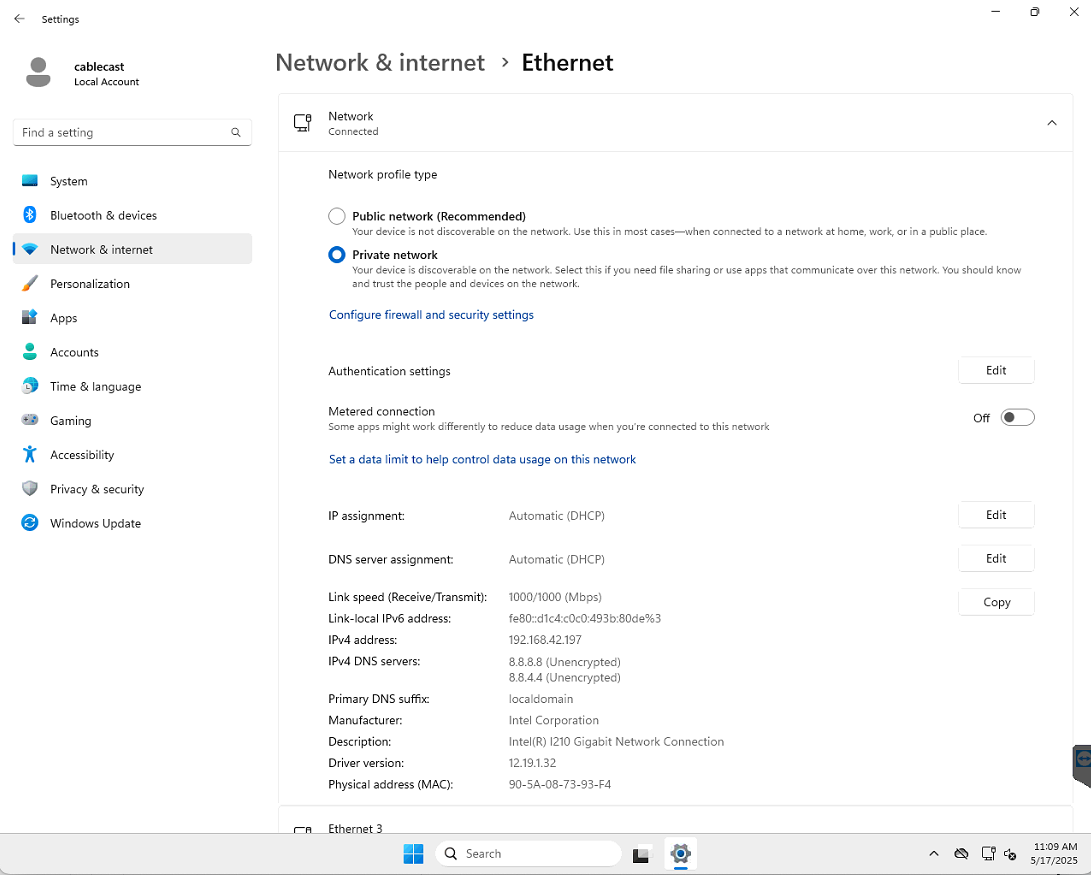
Find your current IP address
- Click the Start button or press the Windows key
- Type "Settings" and press Enter
- Click Network & Internet
- Click Ethernet
- Look at the IPv4 address in the properties section
Write down this IP address—you'll need it to access MediaScribe from a browser.
Change to a static IP address
If your IT department wants MediaScribe to use a specific IP address:
- In the Ethernet settings, click Edit next to "IP assignment"
- Change from "Automatic (DHCP)" to "Manual"
- Turn on IPv4
- Enter the IP address your IT department provided
- Enter the subnet mask (usually 255.255.255.0)
- Enter your network's gateway address
- Enter your DNS server addresses
- Click Save
MediaScribe will now use this IP address every time it powers on.
Accessing MediaScribe from outside your local network
If you want to access MediaScribe from outside your building (for example, remote monitoring or troubleshooting), you'll need to work with your IT department to:
- Configure an external IP address or DNS name
- Set up port forwarding through your firewall
- Ensure proper security settings are in place
Most agencies operate MediaScribe only on their local network for security.
Access the MediaScribe interface
Once network configuration is complete, you can disconnect the keyboard, mouse, and monitor from the MediaScribe Gateway. All daily operation happens through the browser-based interface.
Open MediaScribe in a browser
From any computer on the same network:
- Open a web browser (Chrome, Firefox, Edge, or Safari)
- Enter the MediaScribe Gateway's IP address in the address bar
- Press Enter
The MediaScribe interface will load. You're now ready to configure and operate the system.
If you set up external access, you can enter the external IP or DNS name from any location with internet access.
Operating MediaScribe: The basics
MediaScribe is designed for non-technical operators. A clerk, A/V technician, or administrative staff member can run meetings after a brief training.
Start a live meeting
To begin captioning:
- Navigate to the MediaScribe interface in your browser
- Toggle the Transcribe switch in the header to "On"
- MediaScribe immediately begins processing audio from the SDI input
- Captions appear on configured outputs within 3 seconds
That's it. MediaScribe captures, transcripts, and records the meeting automatically.

Stop a meeting
When the meeting ends:
- Toggle the Transcribe switch to "Off"
- MediaScribe stops processing and saves the recording
- The full transcript, video, and audio are now available in the file manager
Using Demo Mode
MediaScribe includes a Demo Mode that generates sample captions without requiring a live video feed. Demo Mode is useful for:
- Training new operators on the interface
- Testing network connectivity
- Demonstrating MediaScribe to elected officials or stakeholders
- Verifying that SDI outputs are properly configured
To activate Demo Mode:
- In the MediaScribe interface, click Settings in the left-hand panel
- Navigate to Presets and create a new Preset or edit an existing one
- Navigate to Inputs
- Set the mode to Demo in the Input Source dropdown
- Upload a test video file
- MediaScribe will play the file on a loop, generating captions as if it were a live meeting
This allows you to explore features, test configurations, and train staff using realistic content without needing a live video feed or scheduled meeting.
Understanding presets
MediaScribe uses presets to store different configurations for different types of meetings. A preset saves:
- Caption style and color settings
- Audio description settings
- Language and translation options
- Output configurations
- Custom vocabulary sets
For example, you might create:
- A "City Council" preset with formal captioning and full audio descriptions
- A "Planning Commission" preset with technical vocabulary
- A "Community Forum" preset with Spanish translation enabled
Operators switch between presets with one click before starting a meeting. This eliminates manual configuration and ensures every meeting type gets appropriate accessibility settings.
Configuring outputs for WCAG compliance
MediaScribe's three SDI outputs can be configured to meet specific WCAG requirements.
In-room caption displays (WCAG 1.2.4)
Configure an output to show open captions or in-room transcript display on monitors that meeting attendees can see. This meets the requirement for live captions during real-time events.
People who are deaf or hard of hearing can follow the discussion without waiting for post-meeting transcripts. Position displays where attendees can easily view them without blocking sightlines to speakers.
Broadcast and recording outputs (WCAG 1.2.2)
Configure an output with closed captions embedded in the SDI signal. When you record this output or broadcast it on cable, viewers can enable captions on their TV or player. This satisfies the requirement for captions on prerecorded content when the meeting is later published as on-demand video.
Audio descriptions (WCAG 1.2.5)
MediaScribe automatically generates audio descriptions that narrate:
- Text shown on screen (presentation slides, documents)
- Visual demonstrations or physical actions
- Charts, diagrams, and other graphics
- Speaker identification when visual cues matter
Audio descriptions are embedded as a secondary audio track. When someone who is blind or has low vision plays the archived meeting, they can select the audio description track to hear what's happening visually.
Mobile captions and multilingual access
Beyond the SDI outputs, MediaScribe provides mobile captions through a QR code displayed during meetings.
How mobile captions work
- Display the MediaScribe QR code on a screen in your meeting room
- Attendees scan the code with their smartphone camera
- Live captions open in their mobile browser—no app download required
- Attendees can select from 72+ languages for real-time translation
This is particularly important for serving diverse communities. An attendee can follow a city council meeting in Spanish, Somali, Hmong, or any of the other supported languages while the meeting happens in English.
Mobile captions require no special wifi configuration. They work on any smartphone with a camera and internet access.
Custom vocabulary for accuracy
Government meetings use specialized terminology that standard speech recognition often misses. MediaScribe lets you add custom vocabulary so:
- Street names appear correctly ("Brattleboro" not "Battleboro")
- Council member names are spelled properly
- Local landmarks and facilities are recognized
- Technical or legal terms specific to your jurisdiction are accurate
Adding custom vocabulary
From the MediaScribe interface:
- Navigate to Settings and create or edit an existing preset
- Select Vocabulary
- Add words or phrases that appear frequently in your meetings. You can also upload a csv file.
- Save the vocabulary set
MediaScribe learns from your custom vocabulary and improves accuracy over time. Most agencies report 95%+ accuracy after adding 50-100 local terms.
Common setup questions
Can MediaScribe process our existing meeting archive?
Yes. MediaScribe can add captions to historical recordings. This helps agencies meet WCAG requirements for their entire video library, not just new content. Archive processing is particularly important because compliance requirements apply to all public-facing video.
How much IT support do we need?
Minimal. IT staff typically help with initial network configuration and rack installation (a few hours). After that, A/V or administrative staff operate MediaScribe independently. The system requires no ongoing IT configuration.
What if our video format isn't listed?
MediaScribe supports the most common government broadcast formats. If you're using something else, contact MediaScribe support before purchase to confirm compatibility.
Can we test before committing?
Yes. MediaScribe offers demos and trial periods so you can verify it works with your specific infrastructure and meets your agency's needs.
Next steps
Once your MediaScribe Gateway is set up and configured:
- Run a test meeting using Demo Mode to familiarize operators with the interface
- Caption your first live meeting with full accessibility features enabled
- Review the transcript and caption accuracy
- Adjust custom vocabulary based on any terms MediaScribe missed
- Create presets for different meeting types
- Train backup operators so multiple staff can run meetings
For advanced topics, like configuring translation languages, customizing caption appearance for brand guidelines, and setting up archive processing workflows, explore additional MediaScribe Academy articles.
Your accessibility compliance is now automated. Every meeting you caption makes your community more inclusive and protects your agency from legal risk.