Closed Captioning with Cablecast Cloud Services
Overview
Starting in Cablecast 7.4, we announced the addition of Closed Captioning support using Cablecast Cloud Services. This is a fully cloud-based solution that will allow you to caption both Live and pre-recorded content without the need for additional hardware.
This is a paid feature that is available on systems with a Flex or VIO line of servers running Cablecast 7.4 or newer. The pricing is based on minutes used, and you are able to purchase bunches of minutes to load into your account.
Video walkthrough on captioning in Cablecast:
In this article, we will walk you through how to set up online and Offline captioning as well as managing caption settings.
Note: Since this is a cloud-based solution, there is some web traffic that needs to be allowed to your server. See our article about Cablecast Services to Allow to make sure your captioning works properly.
Understanding Online vs. Offline
Captioning within Cablecast will refer to two different kinds of Captioning, Online and Offline.
Online captioning is captioning real-time streams of content
Example: Encoding a city council meeting, live sports, etc
Offline captioning is transcribing captions for existing files on your server
Example: taped studio shows, existing Sports game, old city council meetings
Online (Live) Captioning
Online captioning is the real-time transcription of captioning during live events like a sports game, meeting, studio show, or other program with talking that you want generated into captions.
Cablecast Live Captions Overview
Scheduling captioning
You can easily schedule a show playout to enable live captioning for it in as little as a few clicks.
Live captioning must come through a configured encoder on the Cablecast system.
Navigate to your Schedule
Find or schedule your live event
Click on the ✏ Edit Run button.
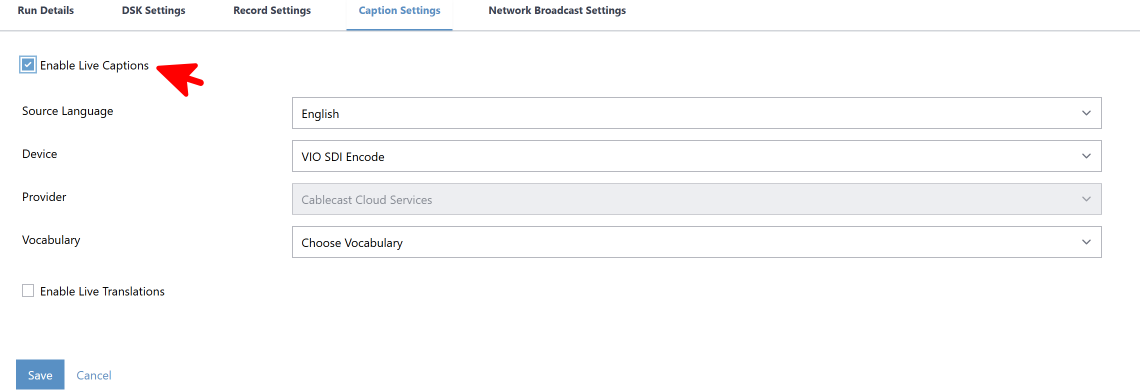
Toggle “Enable Live Captions” on the Run Details panel on the right, and select the encoder.
Click “Save”.
Send Autopilot.
Note that if you schedule your Live event to run longer than the event will actually run for, you'll need to manually stop the transcription in the Force Matrix when the feed ends by selecting "Action" next to the encoder > Stop Transcribing and clicking Take. If this step is not done, the caption job will continue until the scheduled end time.

Starting Transcription via Control Rooms
For last-minute or unscheduled events, you can start live captioning directly from Control Rooms.
Tip: All of the steps below can be automated using a macro. See our knowledge base article on Control Room Macros to set up a one-click or keyboard shortcut workflow.
Starting Captions Manually
In Control Rooms, route your live source to your encoder.
Click Action next to the encoder and choose Start Transcribing.

Select your source language and click Take.

Click Action on the encoder again and choose Start Passthrough.
Select your server output and click Take.

Important
Do not route your live source directly to the channel output. The caption data is applied by the Cablecast server, so the signal must pass through the server before reaching your channel.
Confirm that your video server output is routed to the channel (it may already be).

Optionally, you can also record the event by clicking Action on the encoder, choosing Record, entering a file name, and clicking Take.

Ending a Caption Job
When your event is over, stopping your encoder or recording will automatically stop captions as well (Cablecast 7.10+). If you were not recording the event, click Actions next to the encoder and choose Stop Transcribing.
After stopping, route your bulletin board or CG output back to the channel as you normally would:
Standalone CG server: Click the radio button next to the CG server device under your channel output to route it back to the channel.
CG outputting from the same server output: Click Action next to your video server output, choose Play CG, select your channel output, and click Take. The passthrough will stop, and CG will resume on that output.

Online (Live) Captions With Network Streams
You can also enable Online (Live) Captions for Network Streams in Cablecast.
To use this feature, captions must be configured within each individual Network Stream during its setup.
If captions are enabled in the Network Stream configuration, they will always be active for that stream whenever it is scheduled, manually routed, or recorded. To disable captions, you must turn them off in the Network Stream configuration before bringing the stream into Cablecast again.
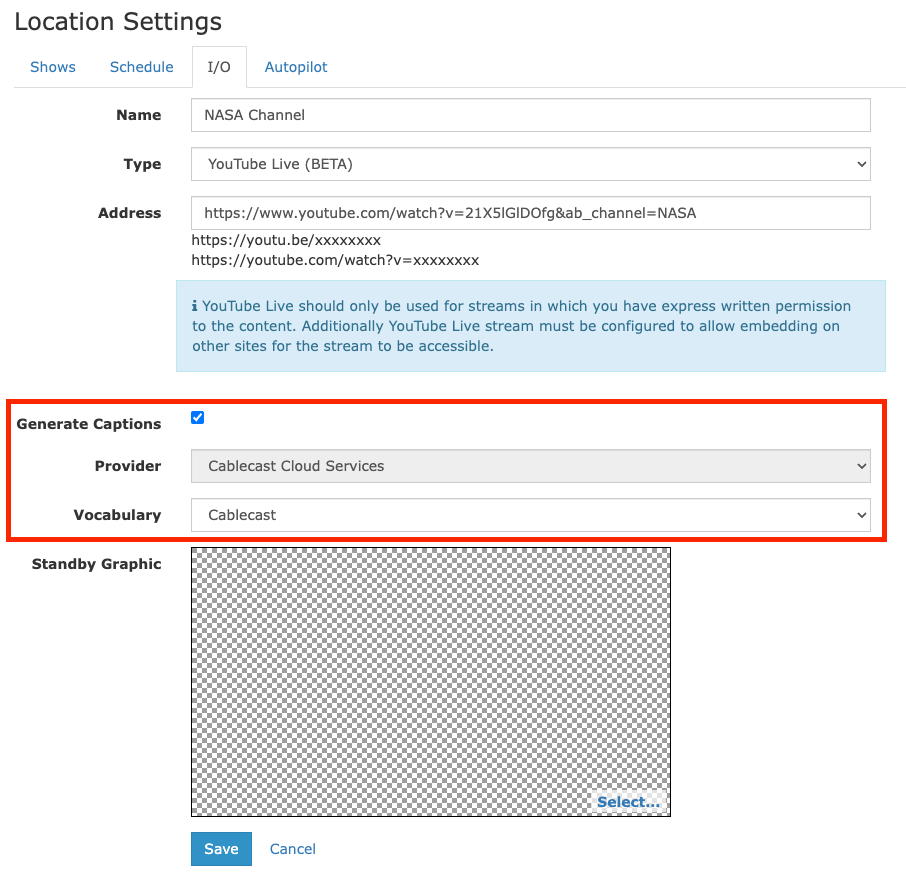
Navigate to Settings > Location Settings > I/O Tab > Network Streams
Create a New Stream or Edit an existing one you have.
Near the bottom, there is a check box to Generate Captions. Check that box.
You can then set your Caption Provider and what Vocabulary you would like to use.
Click Save when set.
You are then able to set Live Network Stream Shows to do Online (Live) Captions as shown above.
Offline (File) Captioning
Enabling Captioning
You can send an existing file off to be captioned within the Show Record screen. Doing so will strip out the audio from your show file, transcribe it in the cloud, and return the captions file to your Cablecast system.
Navigate to the Show Record for a program you want captioned, and edit the Show.
Click on the Text Tracks tab at the top of the Show Record, and toggle “Auto Generate Captions�”

Change any applicable settings (only the default options are currently available) by clicking the Settings button to the right of the Auto Generate Captions toggle.
Vocabulary: Use a custom Vocabulary set, if applicable. More on Vocabularies below.
Primary Language: Indicates the primary language of the event and determines the language of the captions. Typically, this is English.

Save the Show Record.
After saving the show record, the Cablecast system will start a “Captioning Job” to process captions on the file. Once the captions are created, they can be managed from this same area of the Show Record or by going to the Text Tracks section of Cablecast in the left-hand menu (the CC icon).

Reprocessing Captions
If there is a problem with the generation of captions, you can retry the Caption job. It's recommended that you check the error description to better understand why it failed, and attempt to correct the issue before retrying the job. If a caption job is repeatedly failing, reach out to the Cablecast Support team for further assistance.
Via Show Record
Open a show record, and navigate to the Text Tracks section of the Show Record. If the most recent caption job failed, you can retry the caption job here.
Via Text Tracks UI
The same steps can be used to manage captions by going to the Text Tracks menu item in the left-hand menu bar in Cablecast and searching for the Show you want to manage captions on.
Note
You can only “Retry” captions for the Cablecast Cloud Services provider. For third-party caption solutions, please refer to your device UI for issues with captions.
Remember that resubmitting a caption job will generate new caption files via Cablecast Cloud Services and will be billed per minute used.
Custom Vocabularies & Acronyms
You can define custom Vocabularies for your Closed Captioning jobs, and you can have as many as you’d like.
Custom Vocabularies are only supported within Cablecast Captioning. For custom vocabularies on other third-party caption devices, refer to their manuals & documentation.
Cablecast Cloud Services captioning will give an error when a comma ',' or period is used '.' example: Dr. (will throw an error) or cablecast.tv (the period will cause the error). Use: Dr-dot- or cablecast-dot-tv instead.
Listing of Vocabularies
To manage your custom Vocabularies:
Click “Settings” on left navigation bar
Click on “System Settings” and select "Vocabularies" under the Closed Captioning header.

Creating New Vocabularies
Click New Vocabulary
Give your Vocabulary a name
Enter your custom phrases.
Each phrase can be up to 50 characters
Can only contain letters, hyphens, apostrophes, and periods.
To add acronyms, use the format
<phrase>|<display>. The first half is the phrase to look for and the second part is how it will be displayed (example: U.S.A.|USA).Each phrase is typed and added with the ENTER key.
Once you’re finished, click Save to commit the changes, or Cancel to abort.

A single Cablecast system is limited to a total of 5 Custom Vocabulary dictionaries. Please contact Cablecast Support if you require more.
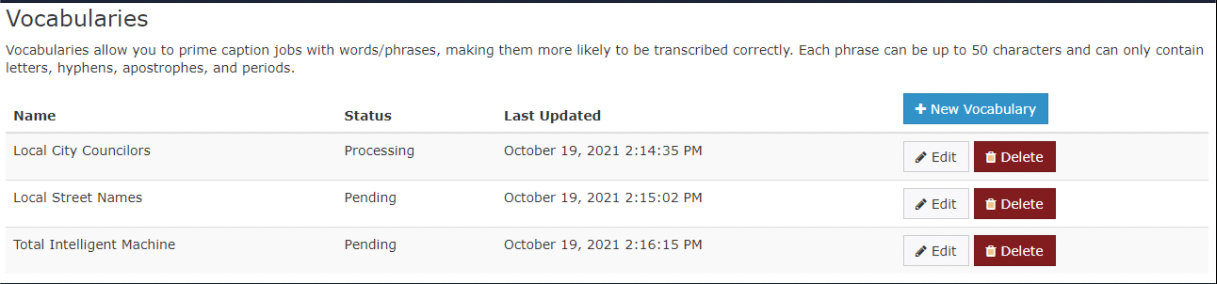
Custom Vocabularies will need to process in Cablecast Cloud Services before they can be used. The steps are as follows:
Pending: This Vocabulary is pending processing in the cloud
Processing: The Vocabulary is currently processing within the cloud.
Ready: You can now use this Vocabulary in new Captioning jobs
Failed: There was a server-side issue. You may to check your internet connection, API Token/Secret, or contact support.
Custom Vocabularies cannot be used until they have finished processing and are in a “Ready” status.
UI Enhancements / Cues
In addition to being able to enable transcribing and adding transcribed captions, you can also see at a glance what programs have captions enabled.
Schedule
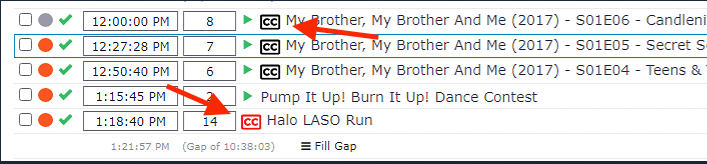
The schedule will show a Closed captioning icon for shows that either match the following criteria:
Black CC icon: The show record / file has caption files present
Red CC icon: The show will be captioned live
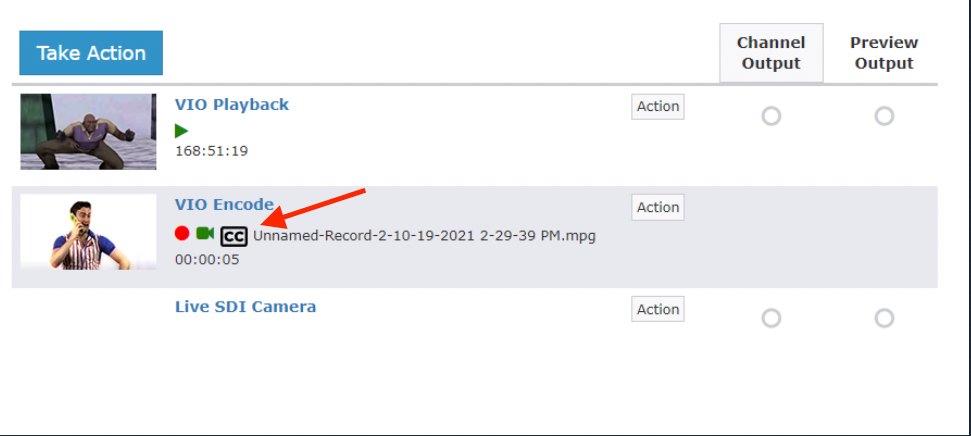
Control Rooms/Force Matrix
Control Rooms/the Force Matrix will also show a closed captioning icon when the source supports Captioning. This is designated by a black “Closed captioning” icon.