Cablecast Closed Captioning Translations
Customers using Cablecast 7.7+ and Cablecast Closed Captioning Translations can now have the ability to caption programming in over 70 different languages. See this article for a comprehensive list of supported languages.
A Note about Cablecast Translations
Cablecast Translations is a paid add-on. You will also need Cablecast Captions in order to utilize Cablecast Translations. To purchase Cablecast Translations, contact our Sales team by emailing sales@cablecast.tv.
For those who prefer a video explanation, the video below goes over all of the steps outlined in this article.
Cablecast Translations
Instructional video on the use of Cablecast Translate tools
Closed Captioning Languages
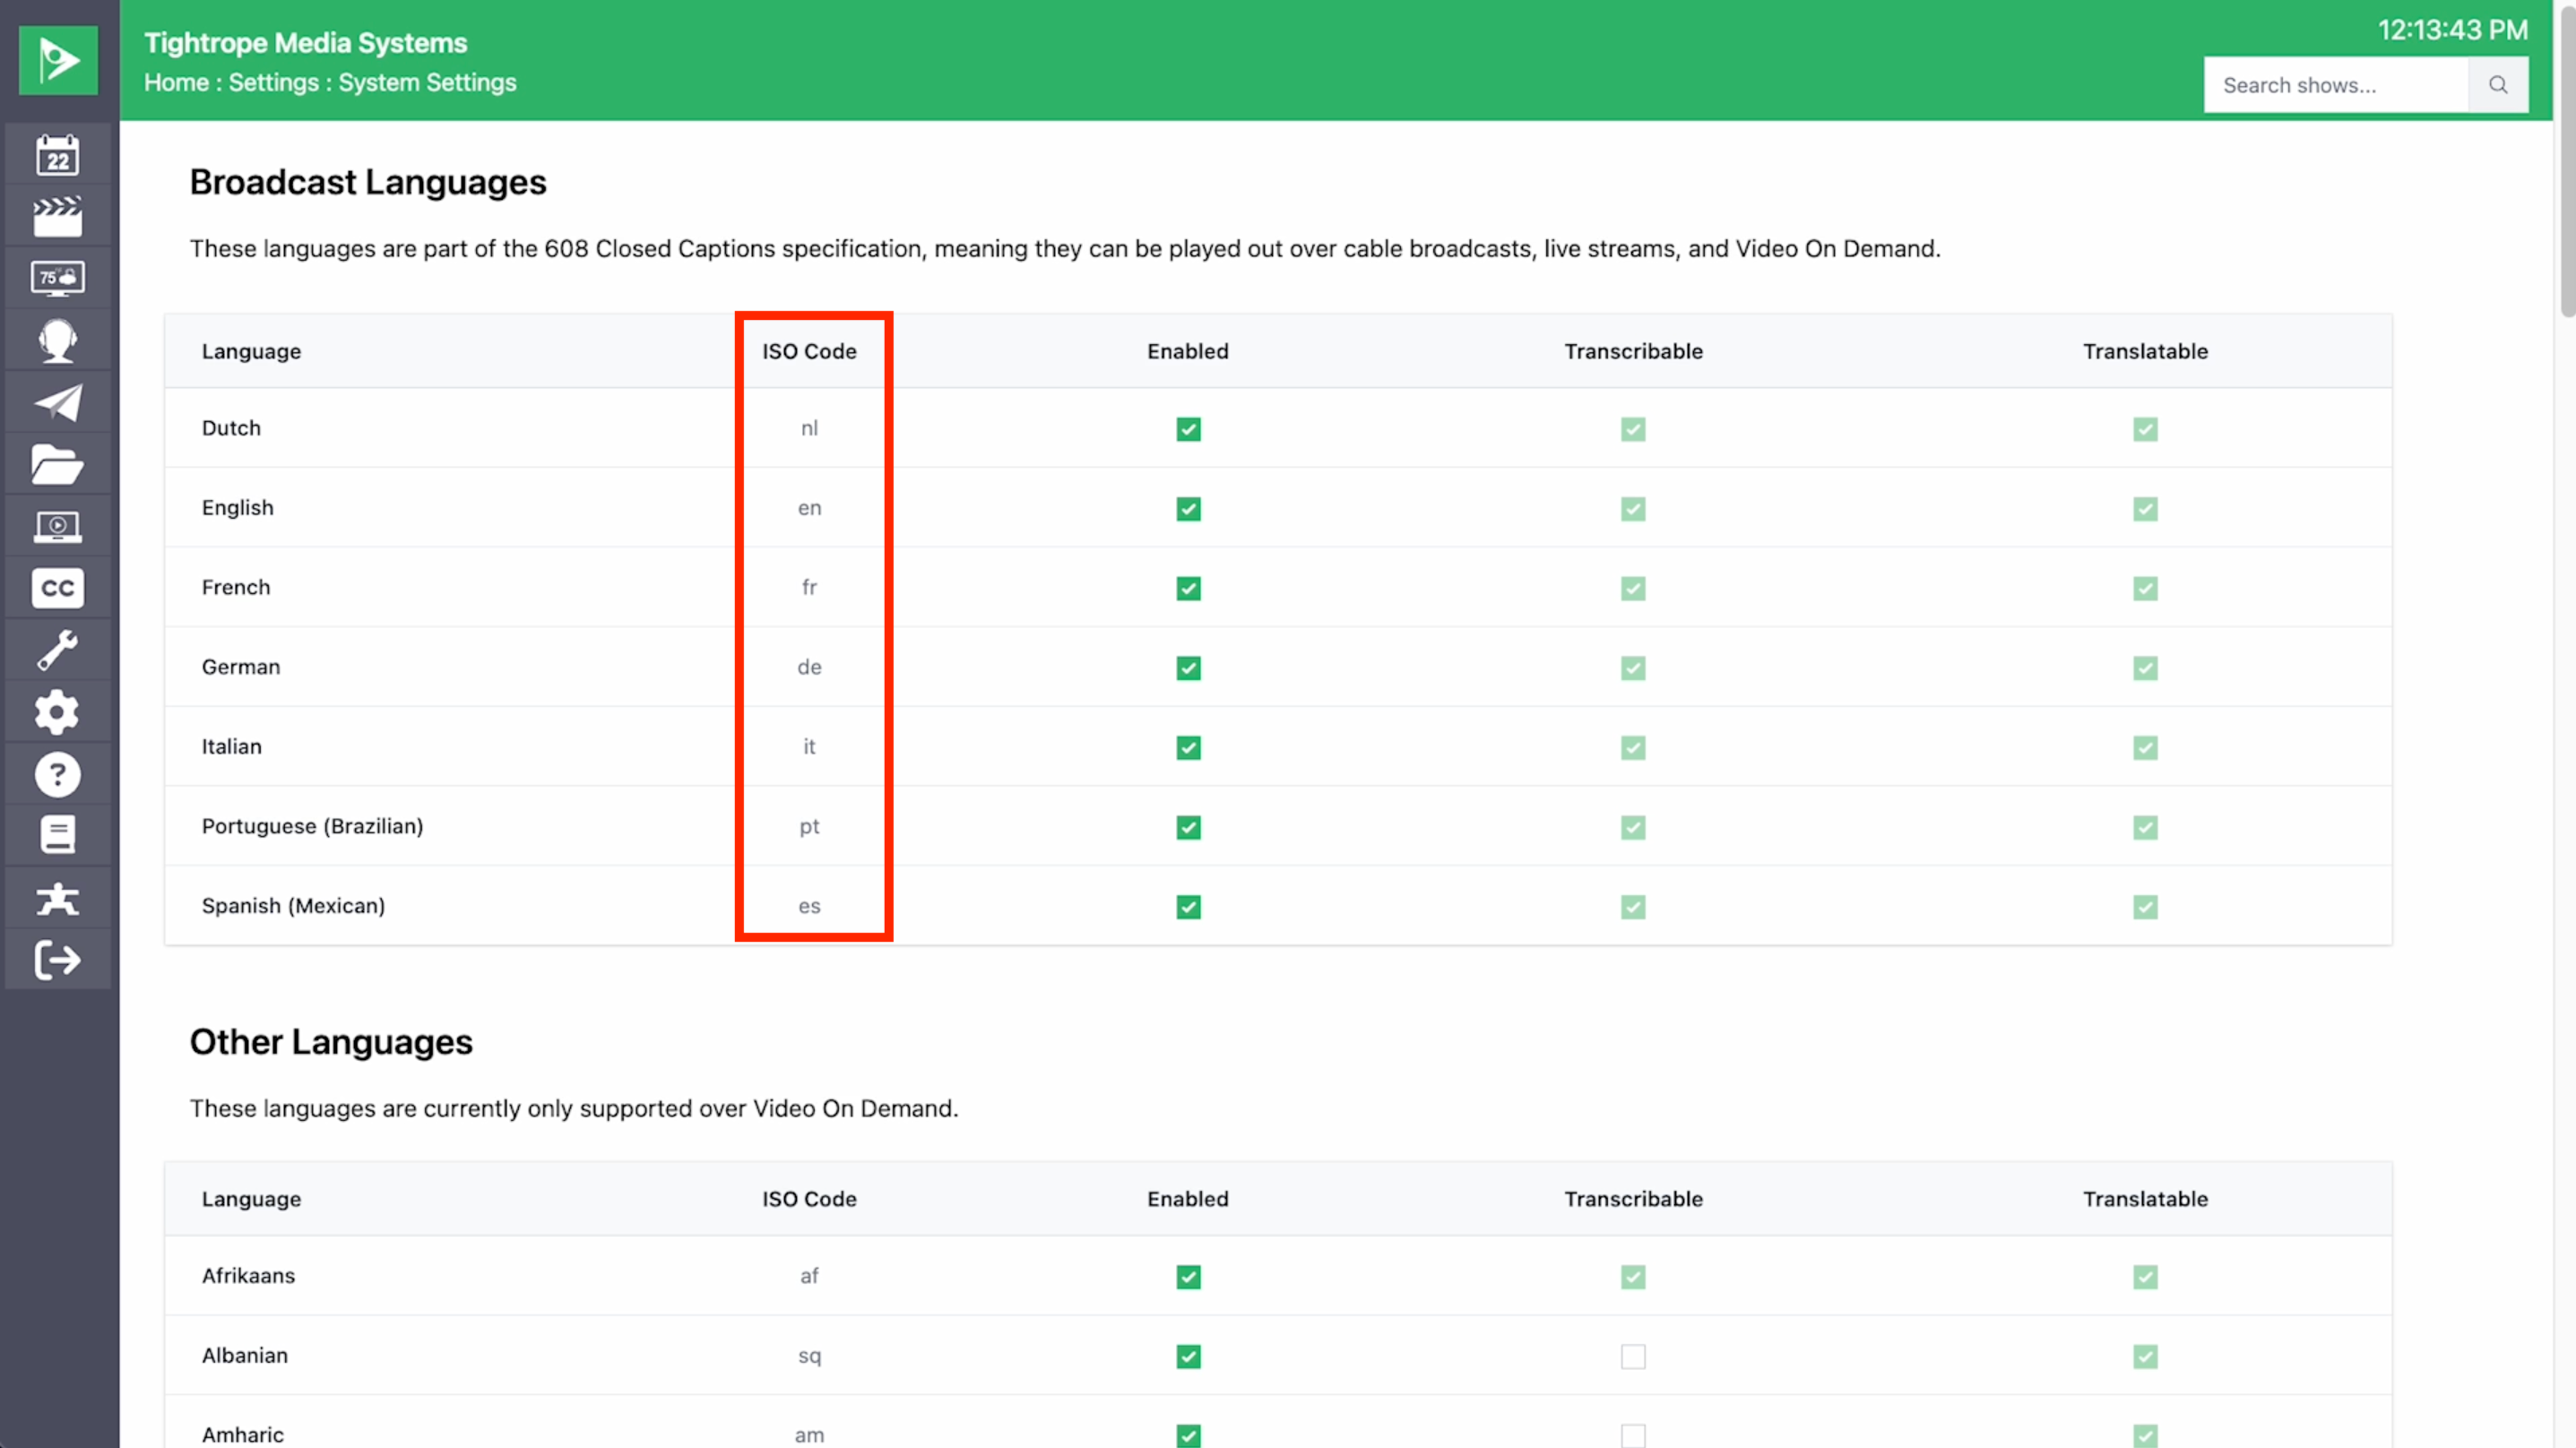
If we go to Settings > System Settings > Languages, the languages in the group at the top of the list are the 608 supported languages. Cablecast Captioning can both transcribe the captions into those languages as well as translate captions from other languages. This also applies to your Live stream if you have a Cablecast Live server.

For the other languages listed on this page, you can caption and translate many of the languages, but because they are not supported by broadcast closed captions, these languages will only be visible for VOD programs. This applies to the VODs on your website as well as the OTT apps.
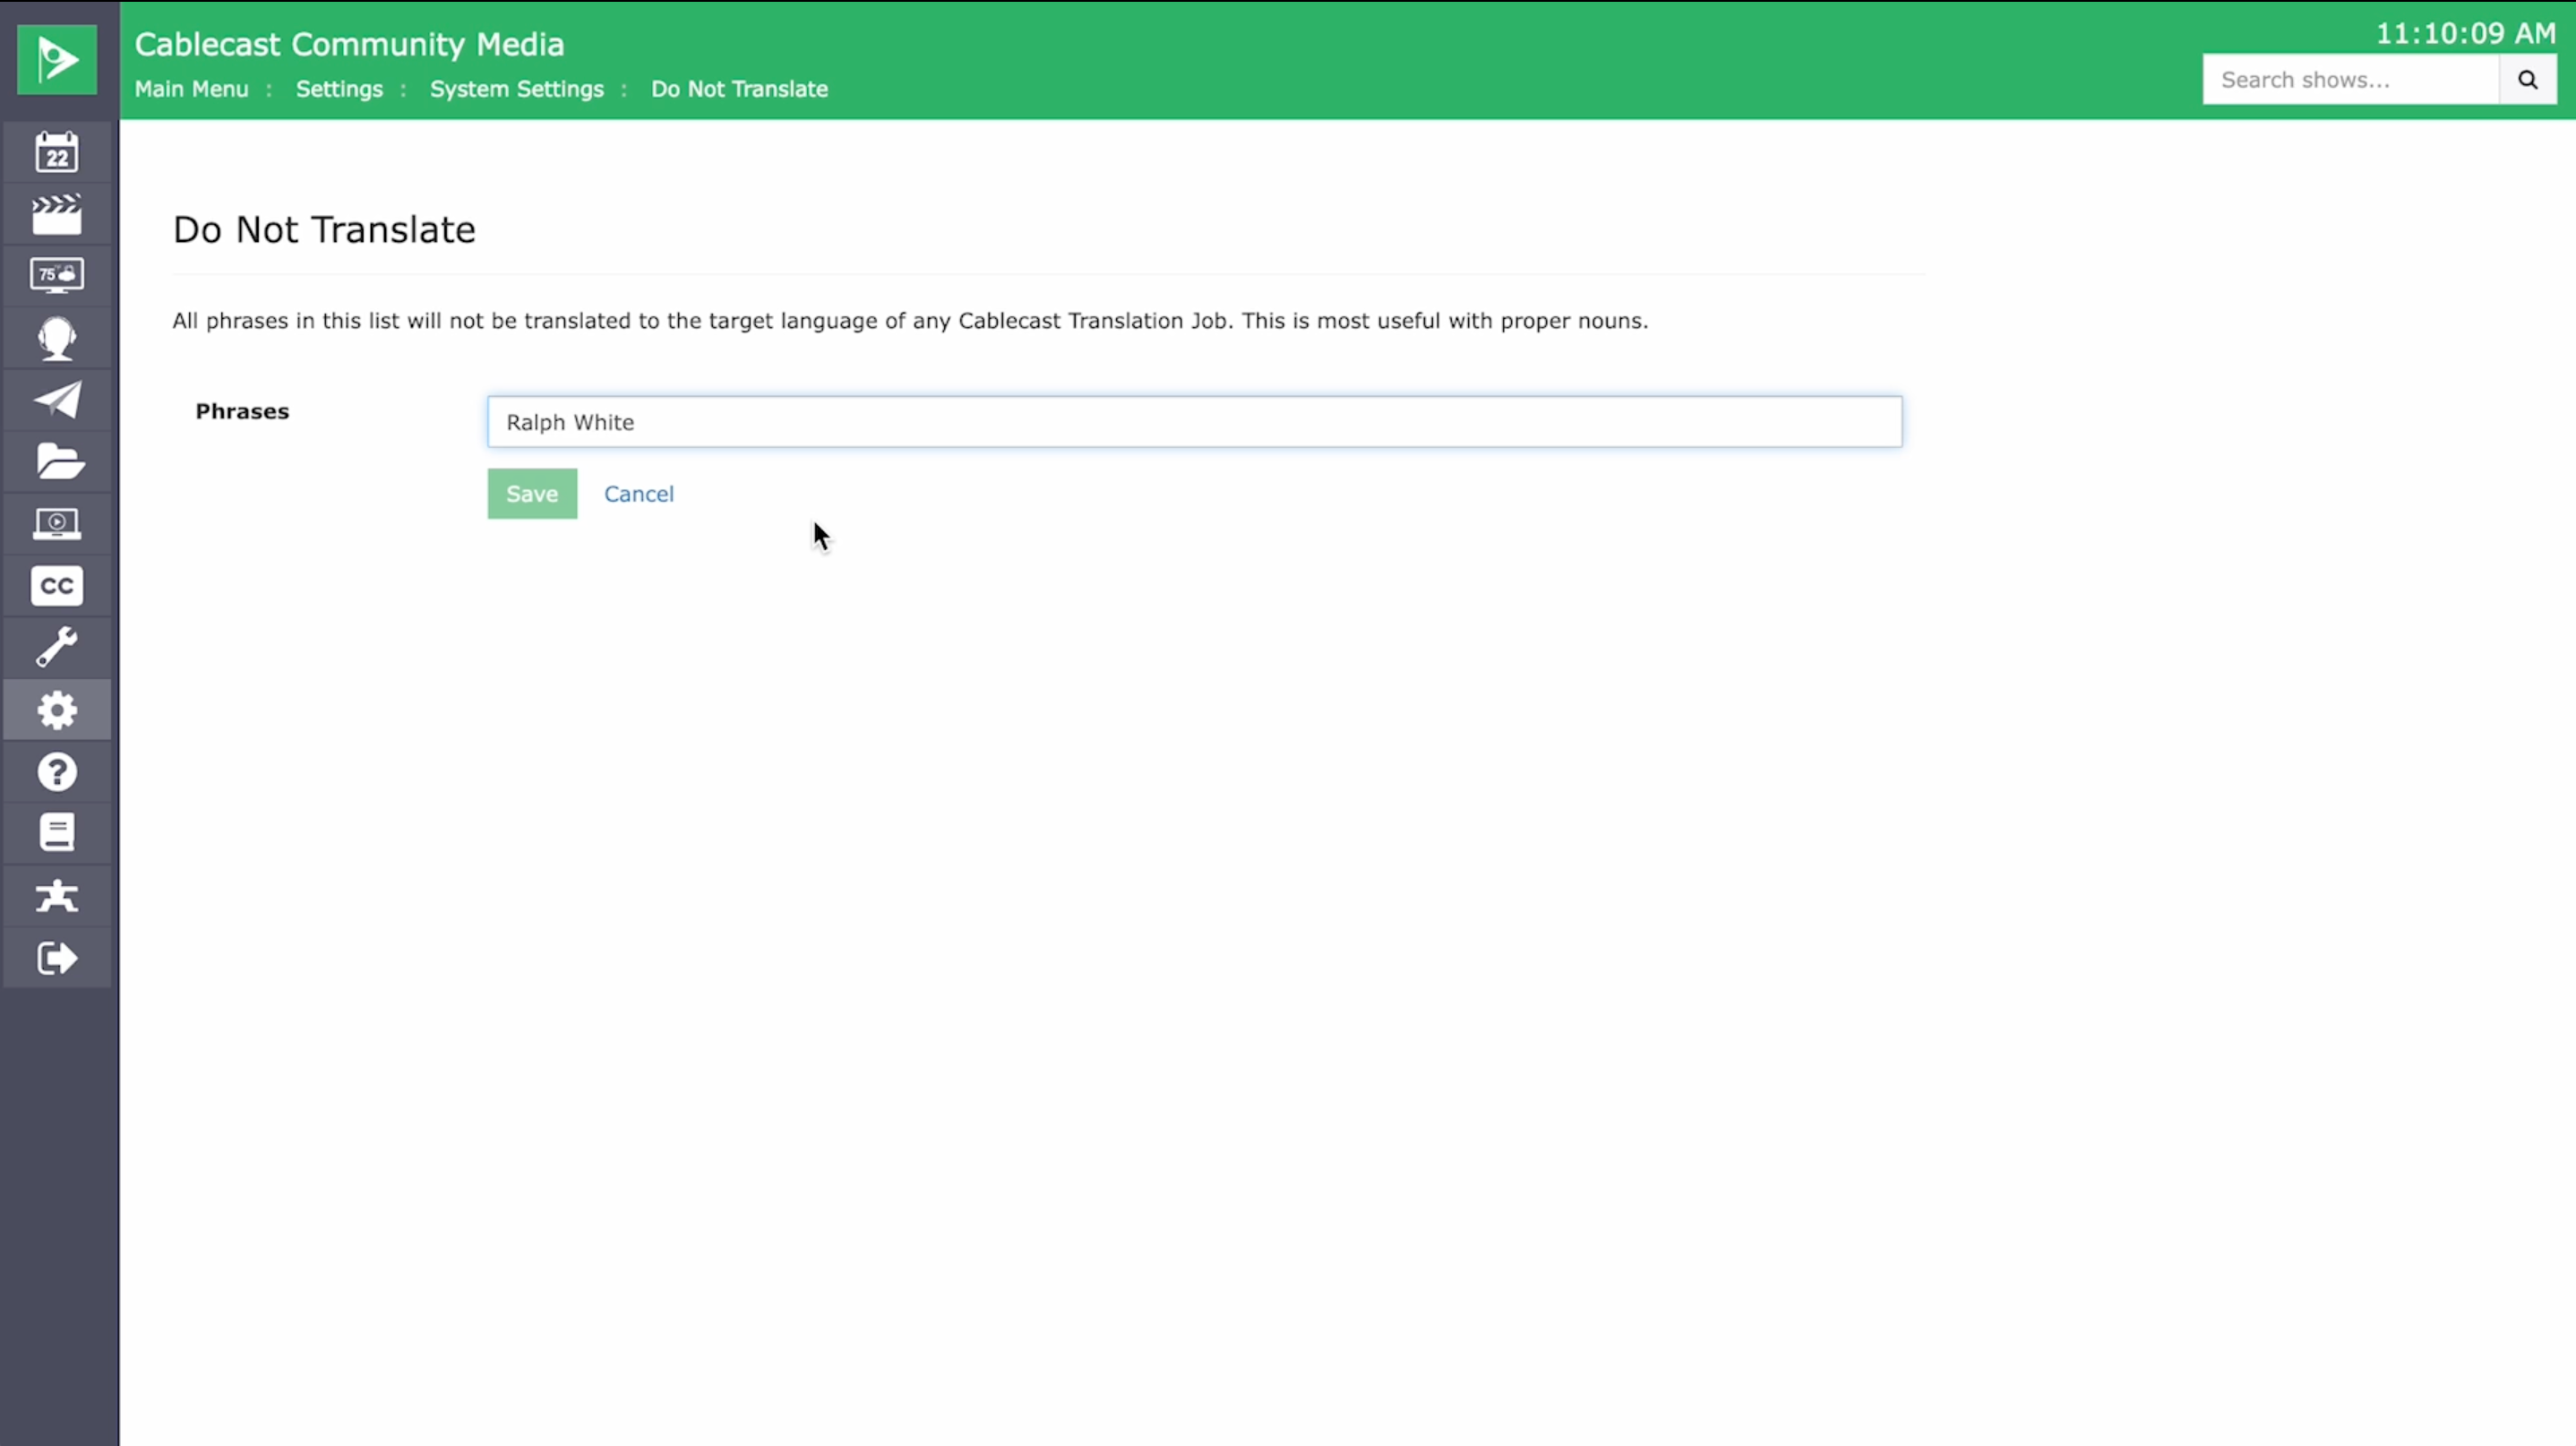
Do Not Translate
In the Do Not Translate section, this is where we would configure any words or phrases that we do not want to be translated by Cablecast. For example, if you have a city Council member whose name is Ralph White, but he doesn’t want his name translated to Ralph Blanco in Spanish. Once you enter your first word/phrase, be sure to press Enter to add it, then click Save to save your list of words/phrases.
When working on a vocabulary, you can also mark a vocabulary as “Do Not Translate” in the vocabulary settings. This will apply the same rules set in the do not translate settings to that vocabulary.
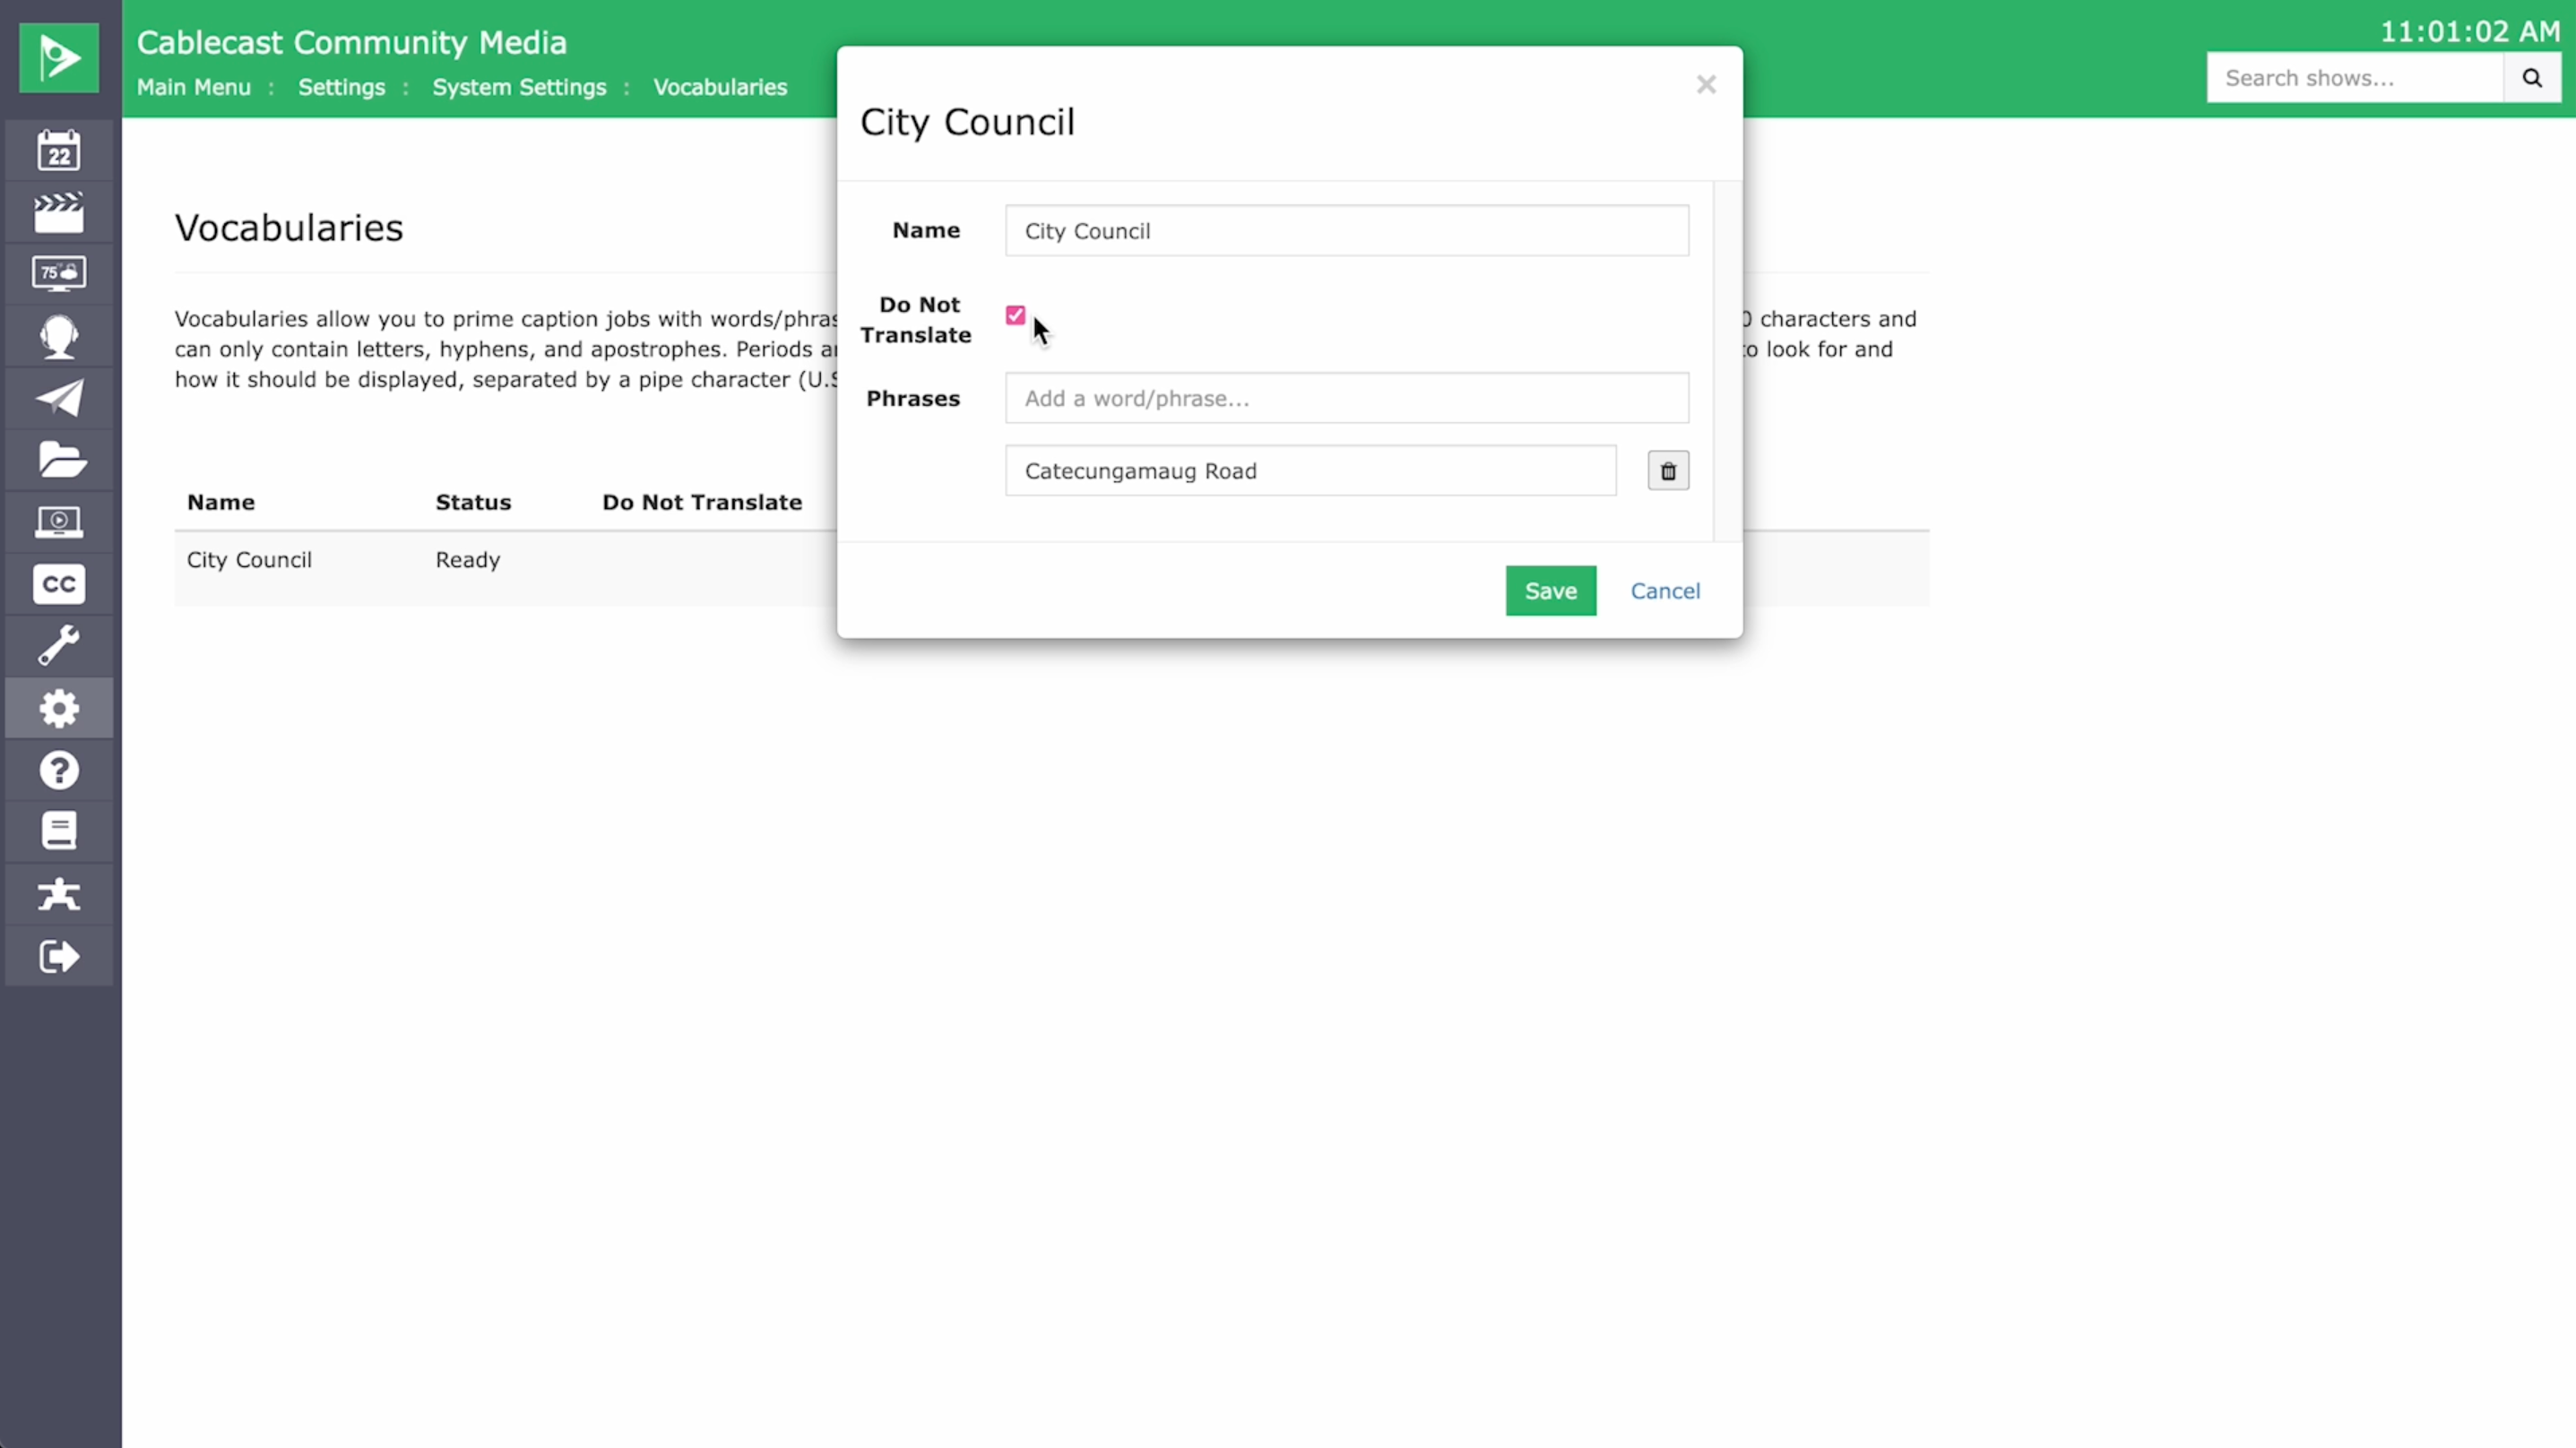
For example, if you always use the City Council vocabulary for city council meetings and you click the “Do Not Translate” box on that vocabulary, Cablecast Translations will not translate Ralph White’s name to Ralph Blanco for any event that is using that vocabulary.
Enabling Primary/Secondary Languages on a Channel
If you wish to enable a primary and secondary language for your channel, you can do so by going to Settings > System Settings > Channels > Select the channel you wish to enable languages on > Languages and set the primary and secondary languages of your choosing.

This will allow you to output captions in two languages simultaneously with 608 captions over cable and on your Cablecast Live streams. Note that while you can only have two caption languages on your cable channels and live streams, you can have unlimited caption languages on VOD. Also note that Live streams will always list the primary and secondary language caption options if there are primary/secondary languages set for the channel, even if there isn’t a secondary caption track for the program. This is due to the way the HLS streams work.
You can add up to two language caption tracks regardless of where the captions were generated, as long as the naming convention is videofilename.ISOcode.scc. We give the ISO codes for supported languages by going to Settings > System Settings and Languages under Closed Captioning.
Setting up a Caption Translation on an Existing Program
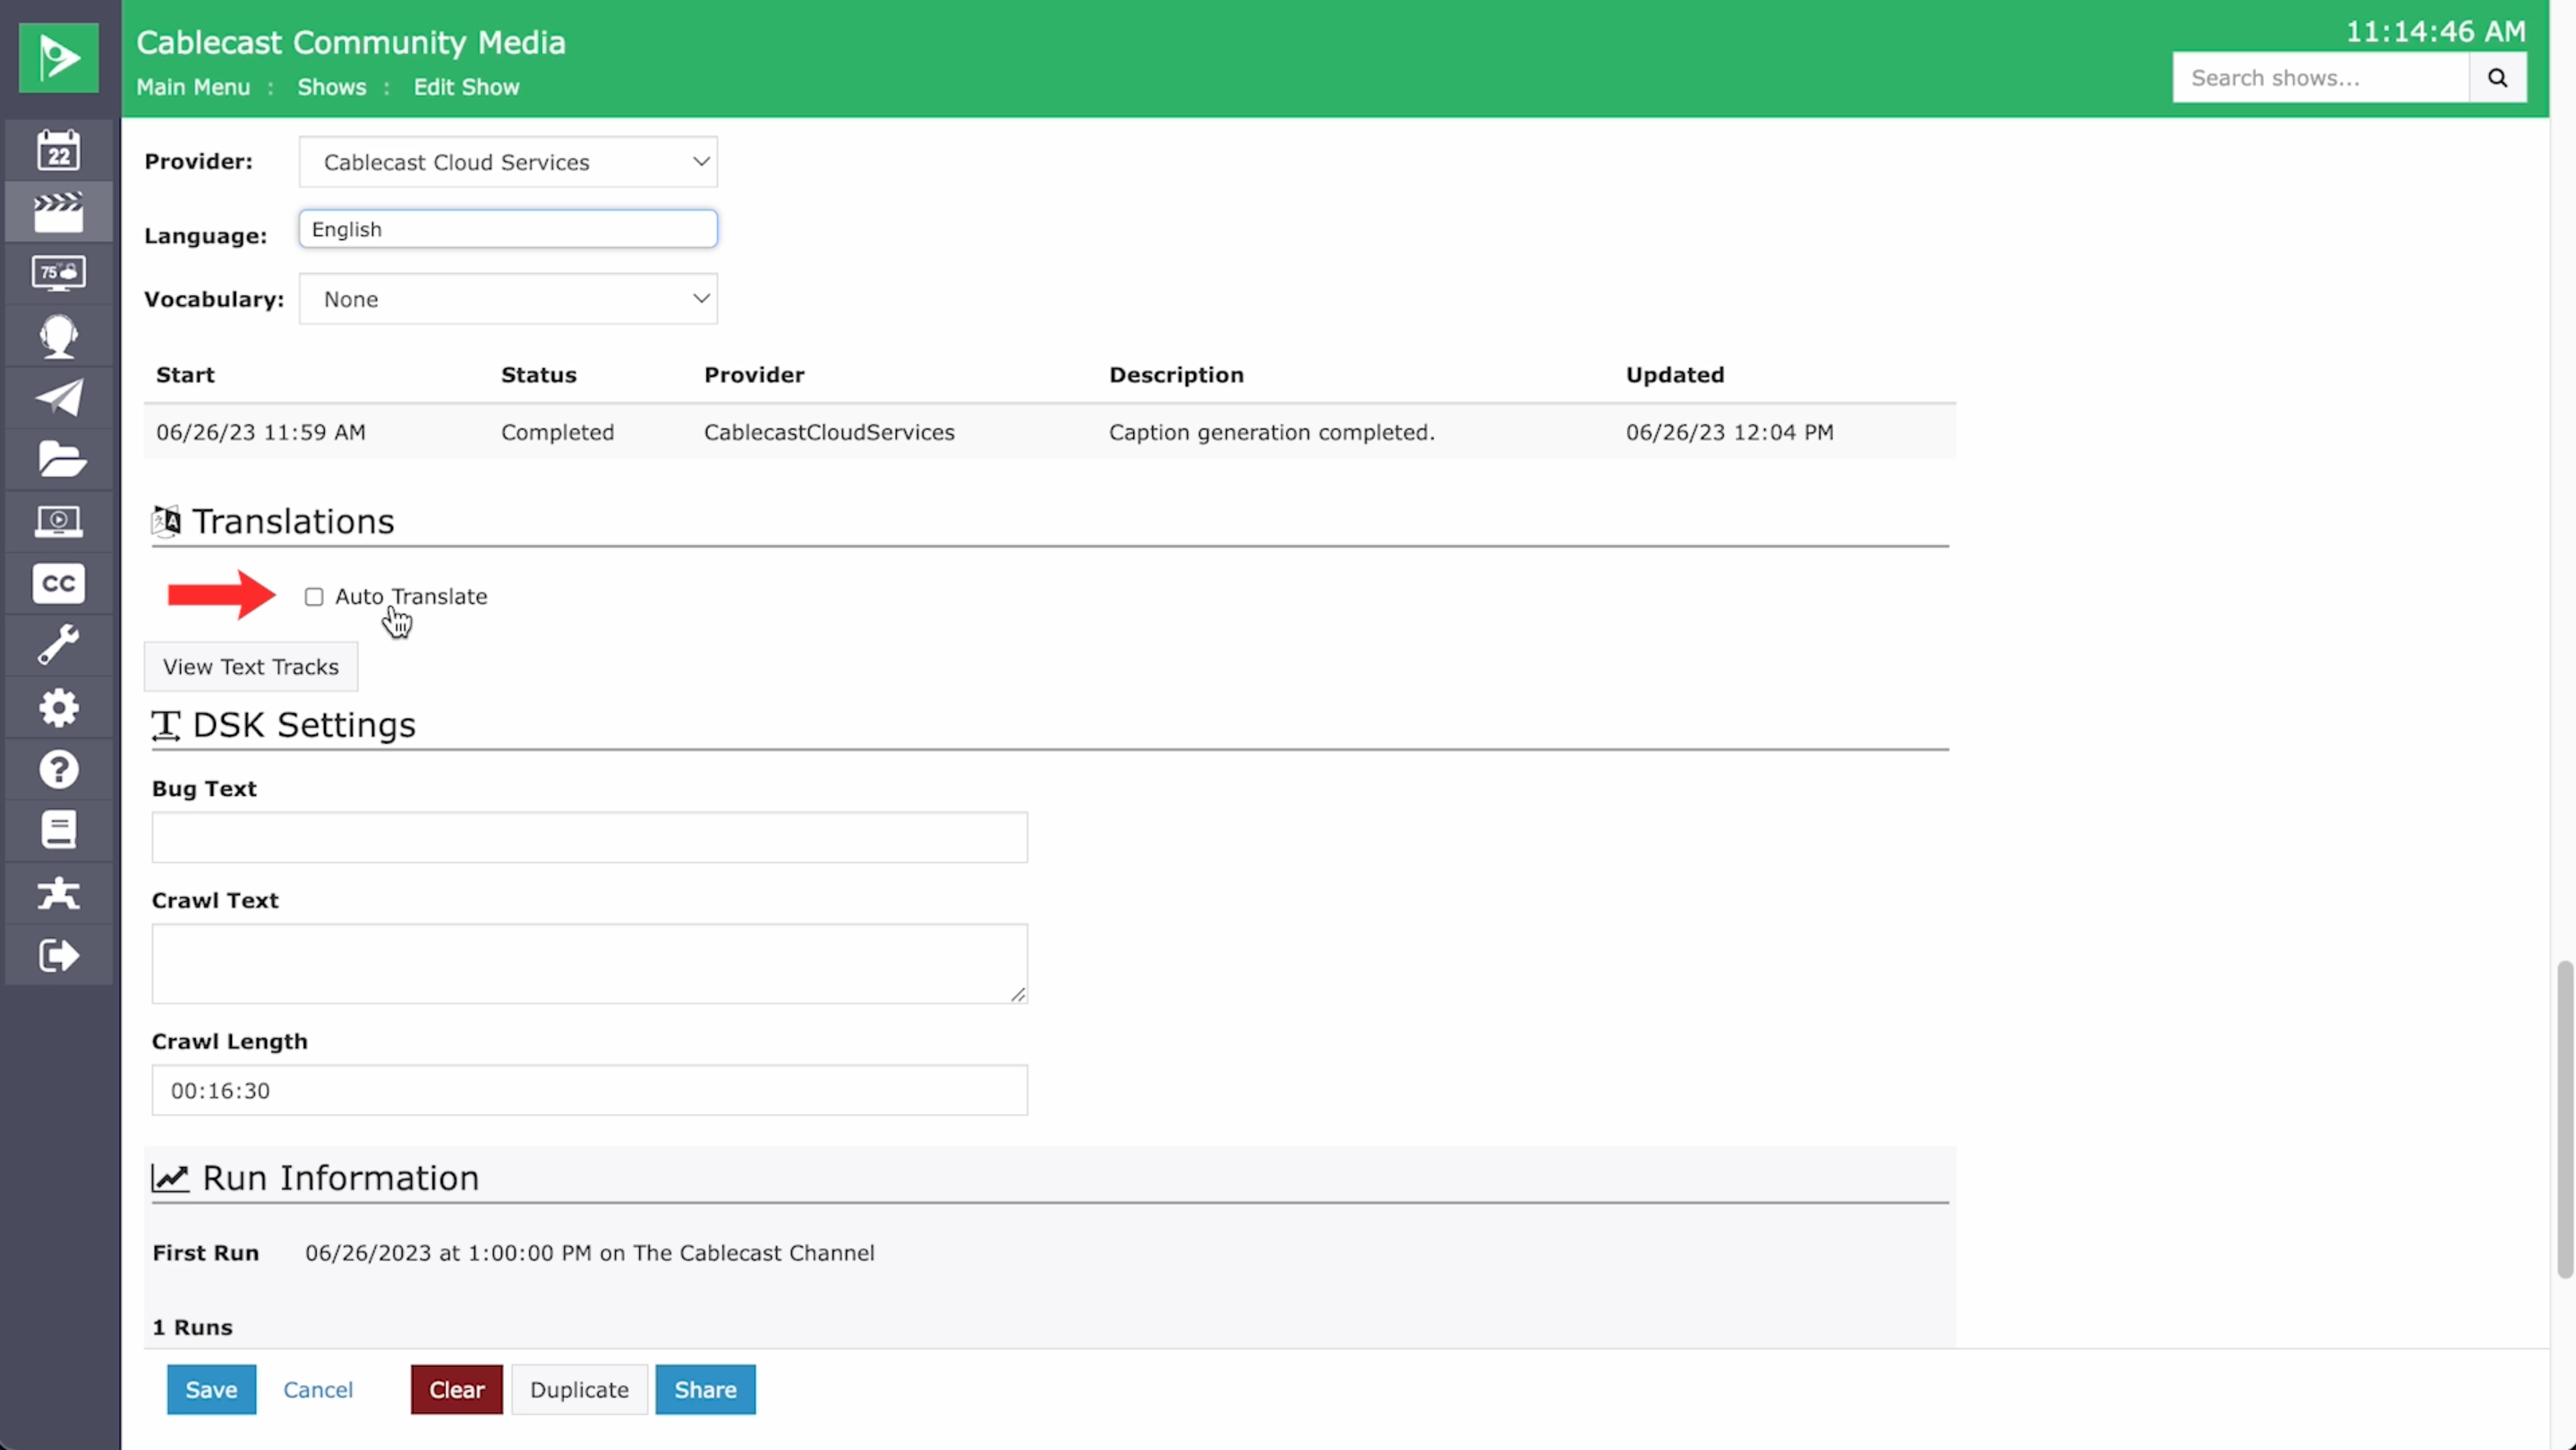
To set up a caption translation on a program, go to the Closed Captions section of the Show Record for the program you wish to enable captions on. Click the Auto Generate Captions box.

In the Source drop-down, select the source language of your program.
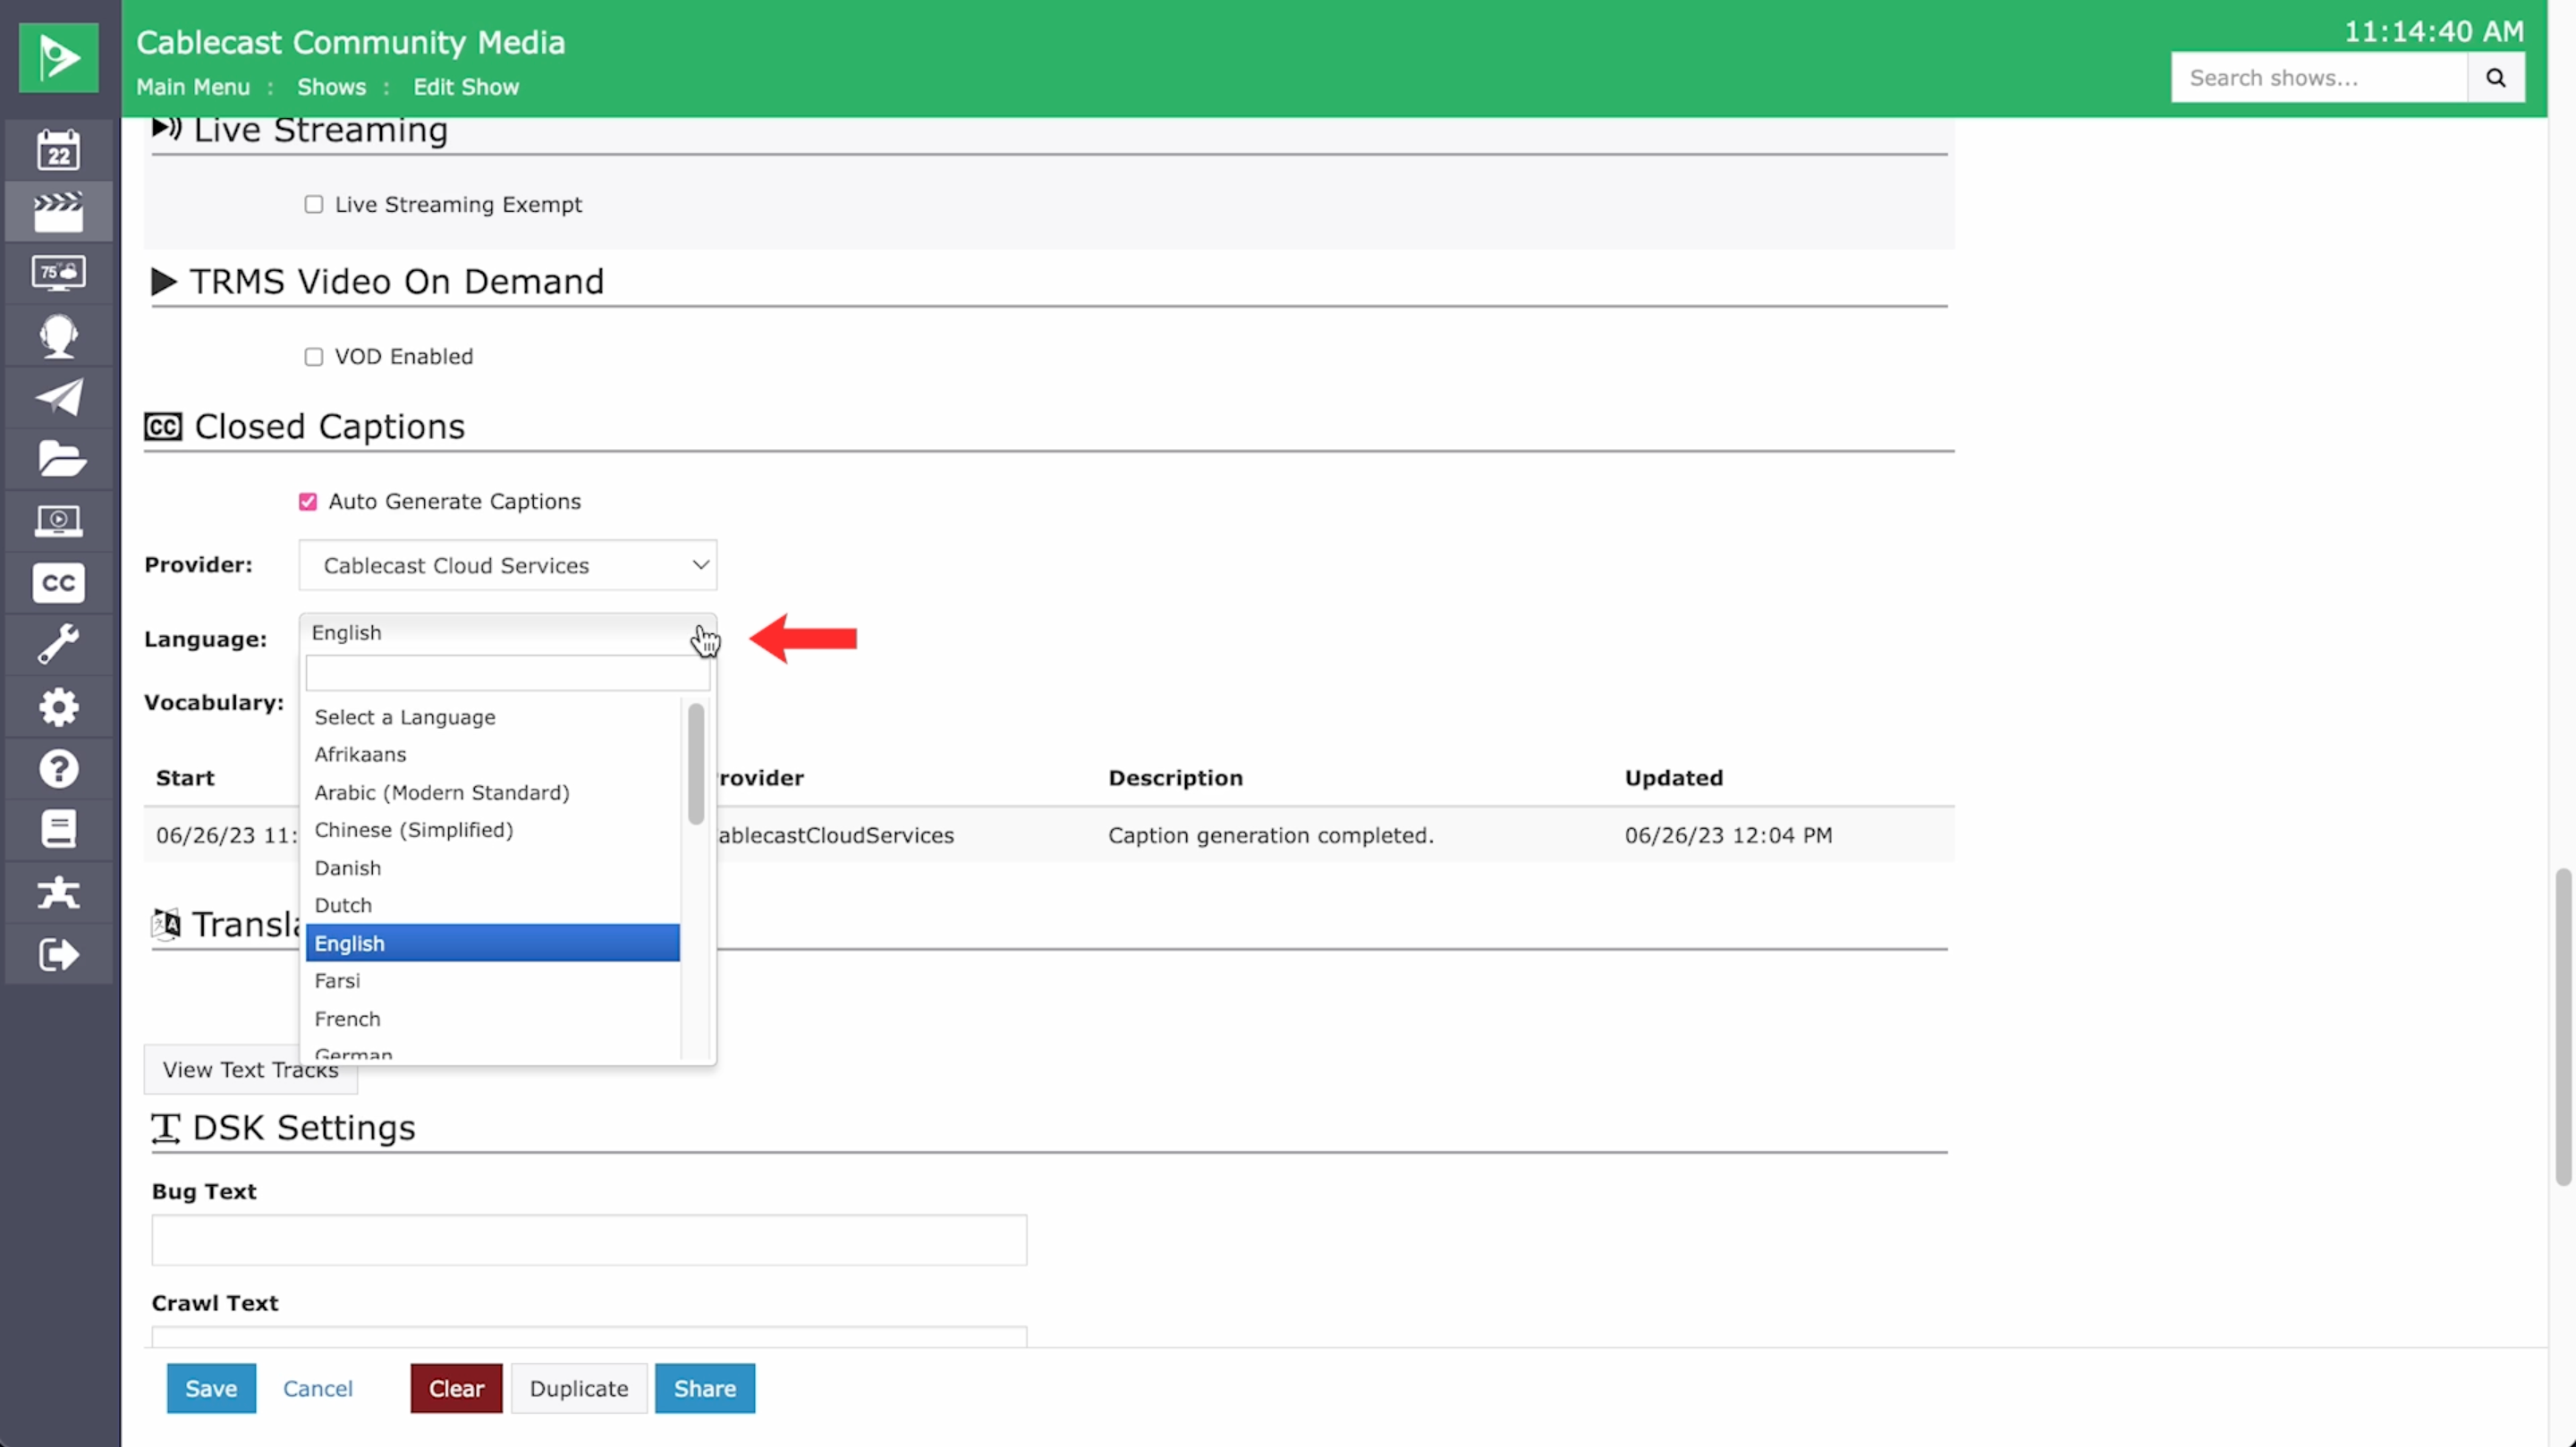
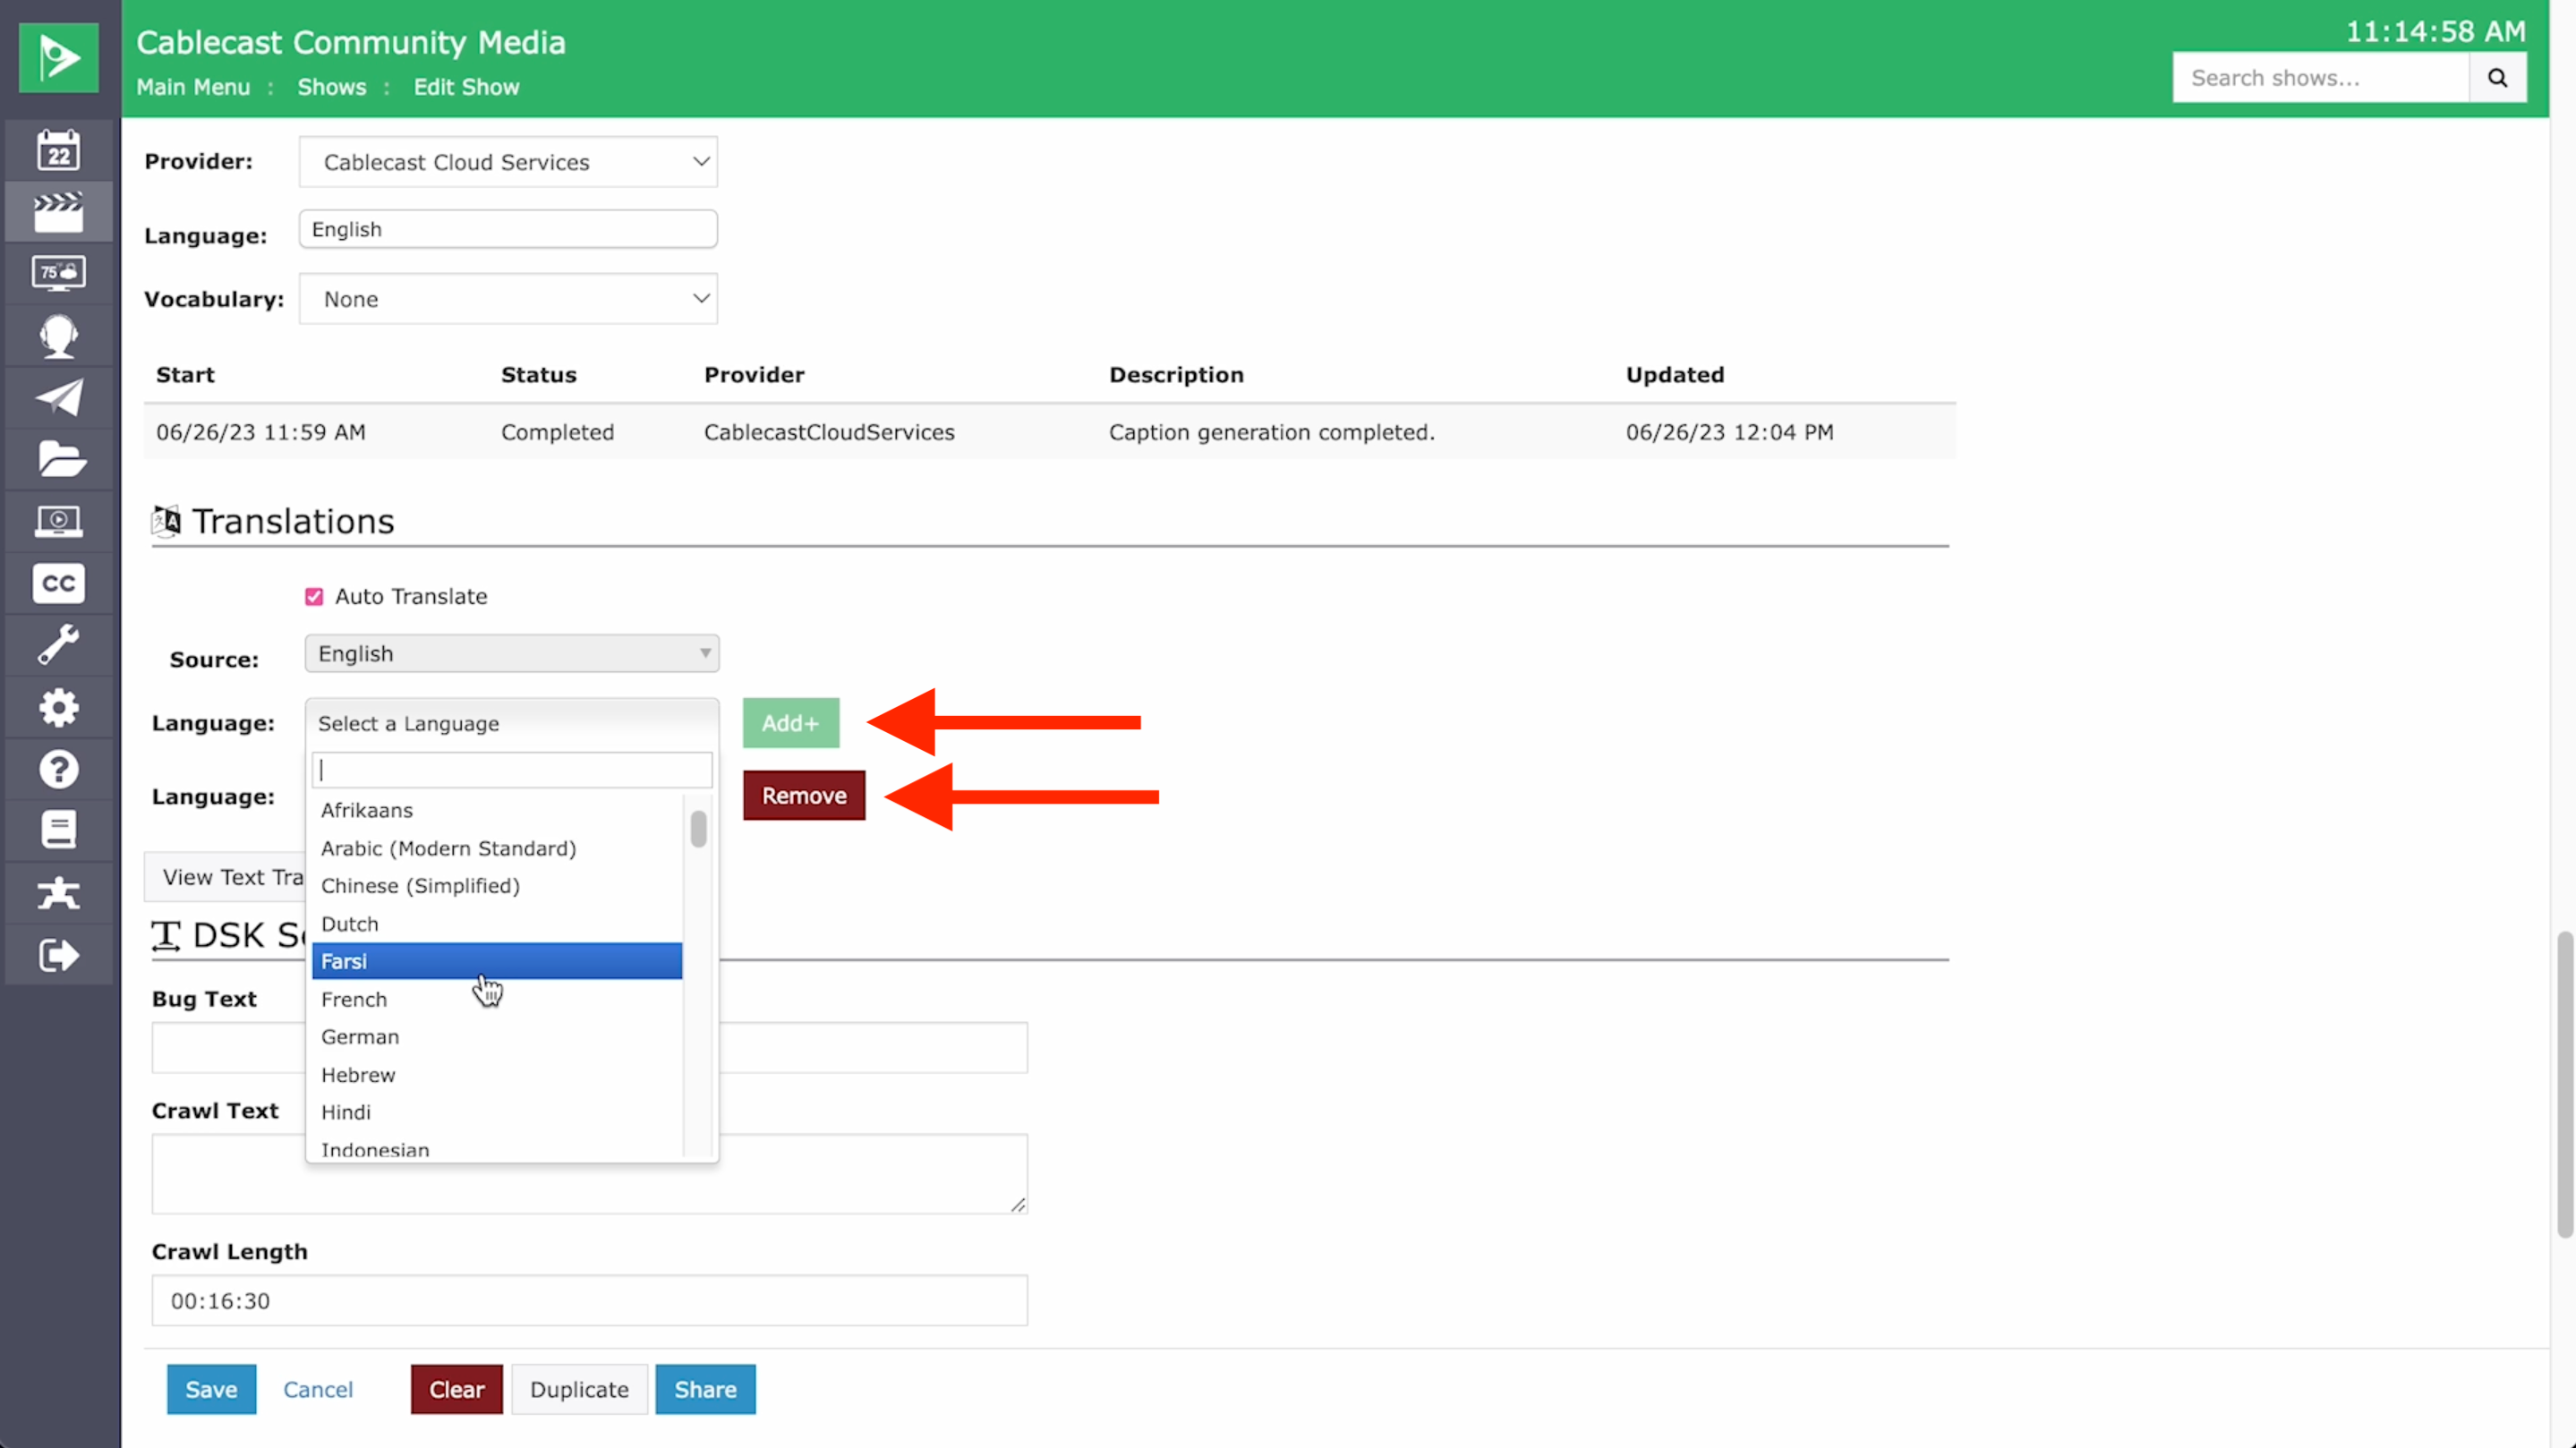
Below, select the Auto Translate box. Choose the language you would like to translate to.
You can translate multiple languages by clicking on the Add box to Add Additional Translations. If you wish to remove a translation from the list, click the red Remove box.
The captions will be generated and then the translation will be done off of the primary text/caption file.
Setting up a Caption Translation for a Live Event
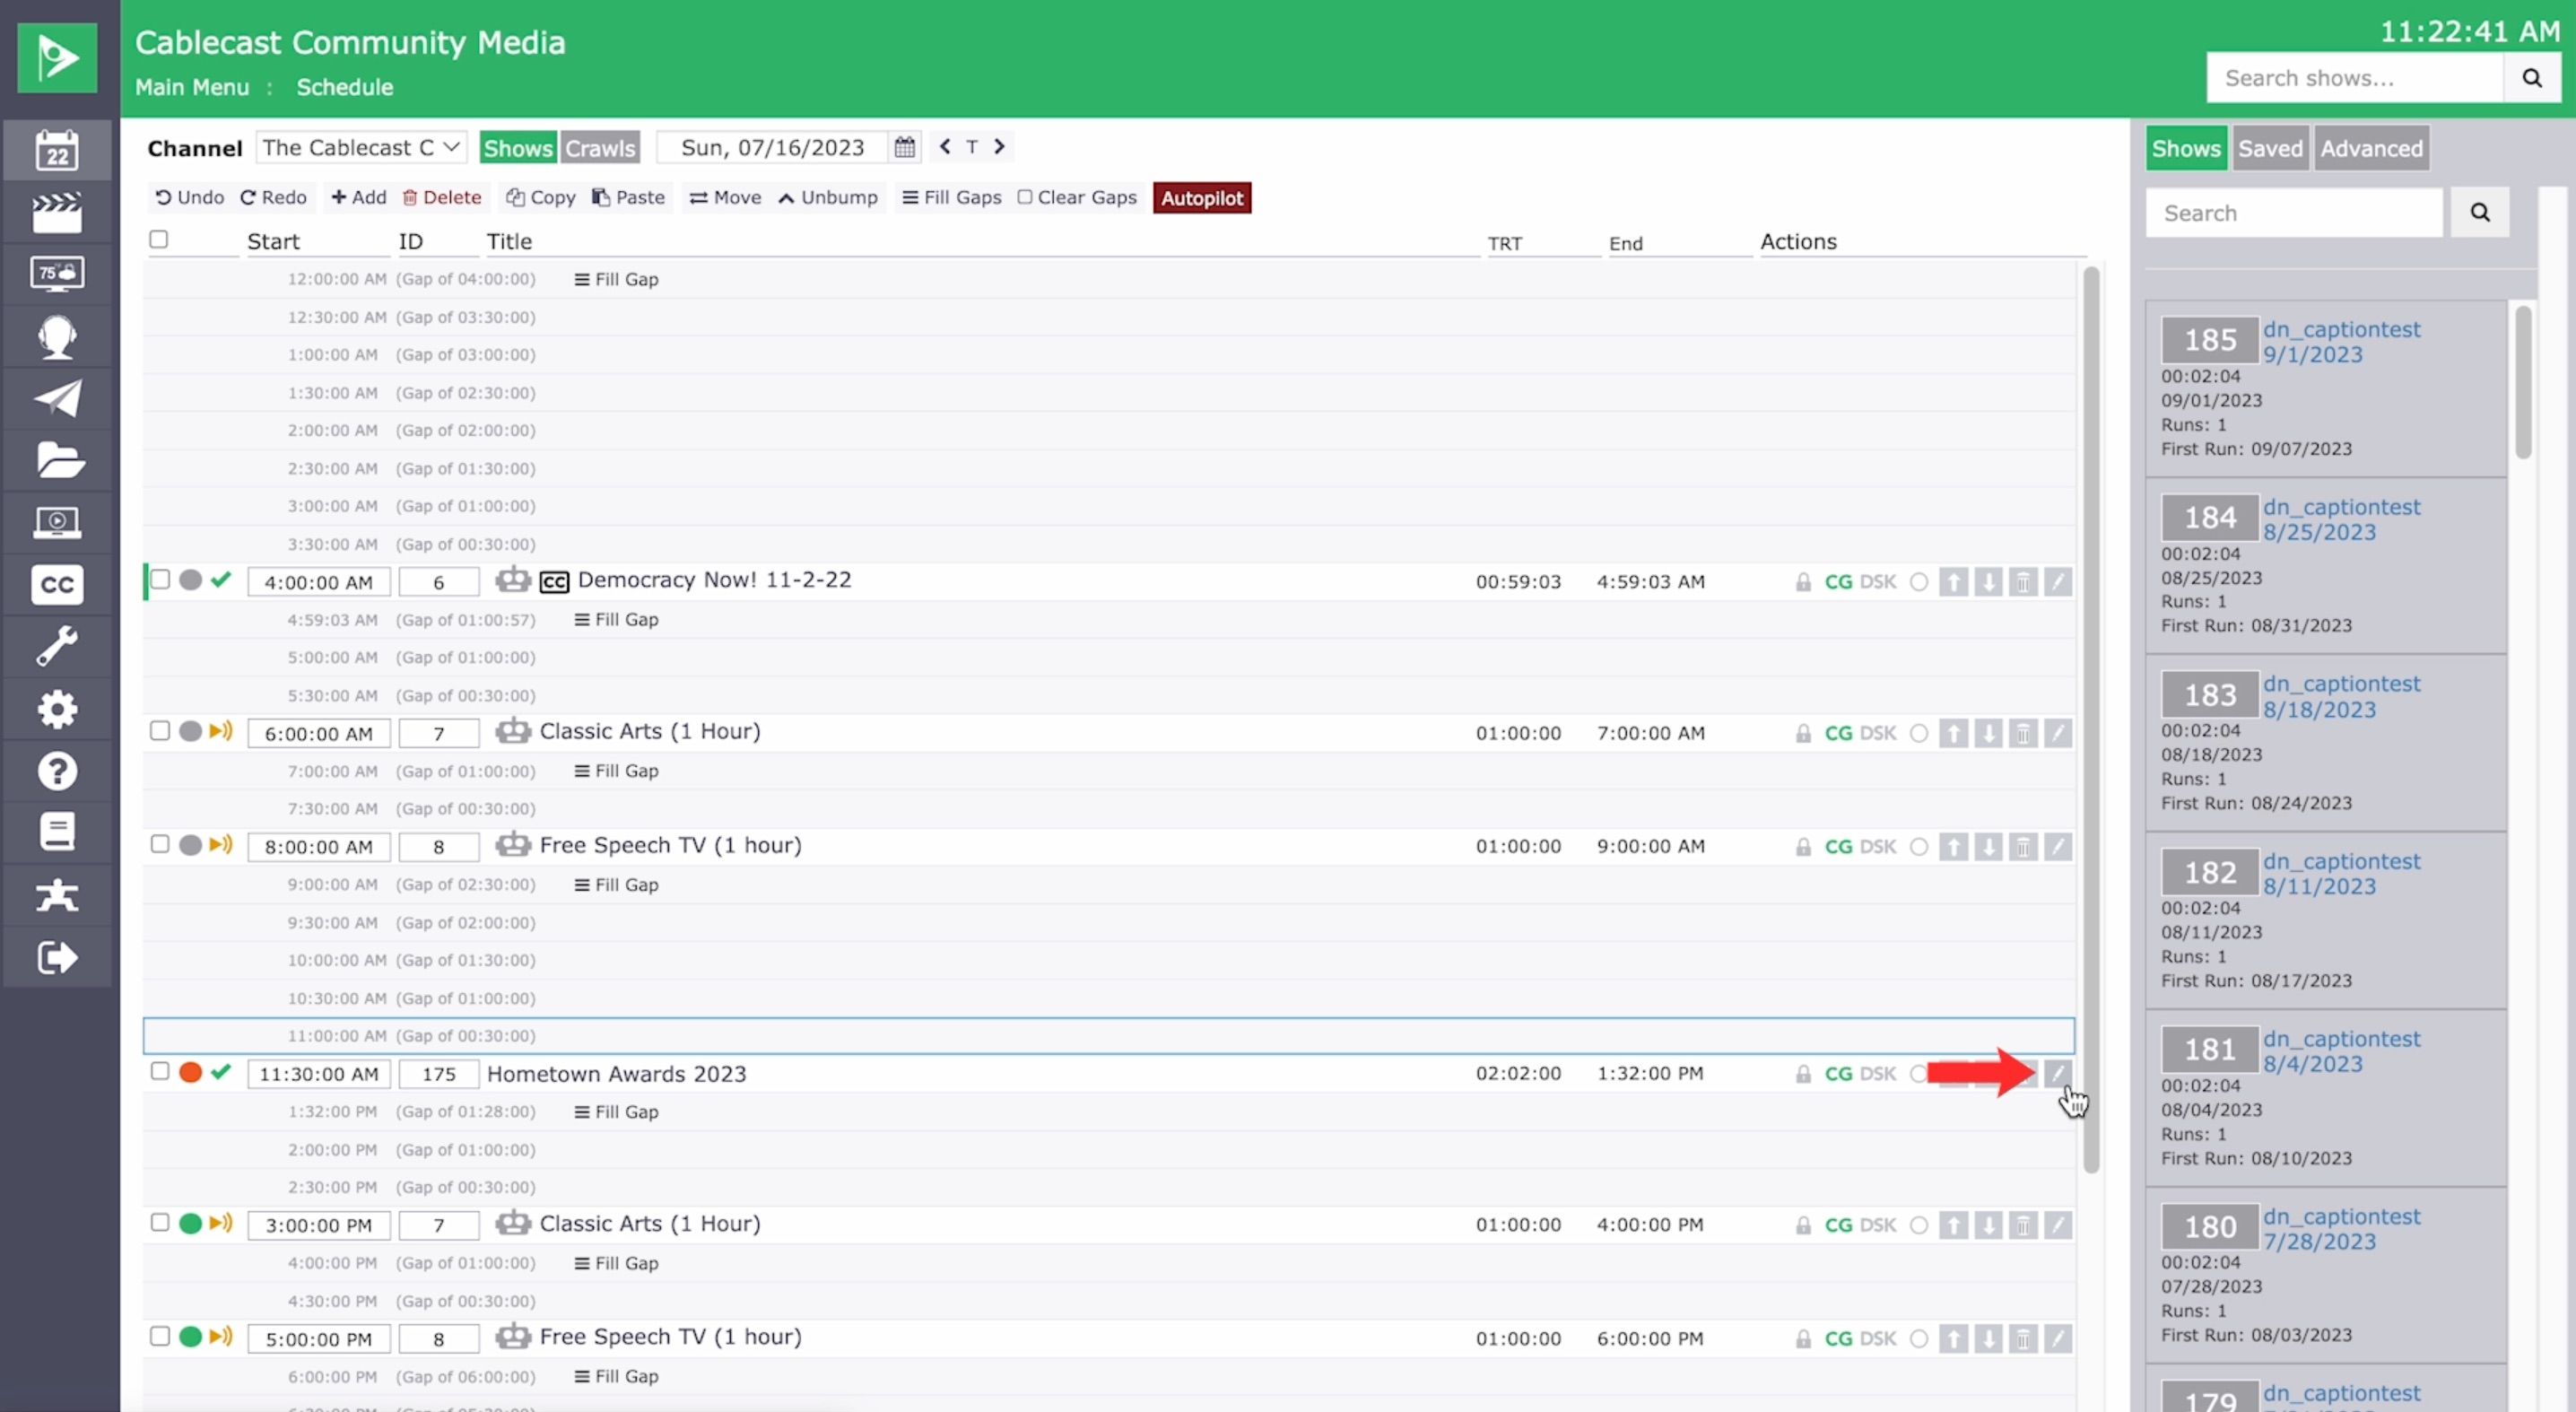
To do a translation on a scheduled live event, schedule the program and click the edit, or pencil icon on the far right of the scheduled run.
In the run details panel, you can enable Live Captions as well as Live Translations. To enable a Live Translation, click the Enable Live Translations box. Choose your source language.

For example, if you’re covering a city council meeting spoken in English, you’ll choose English as the source language. In the translation language drop-down, choose the language you want to translate to.
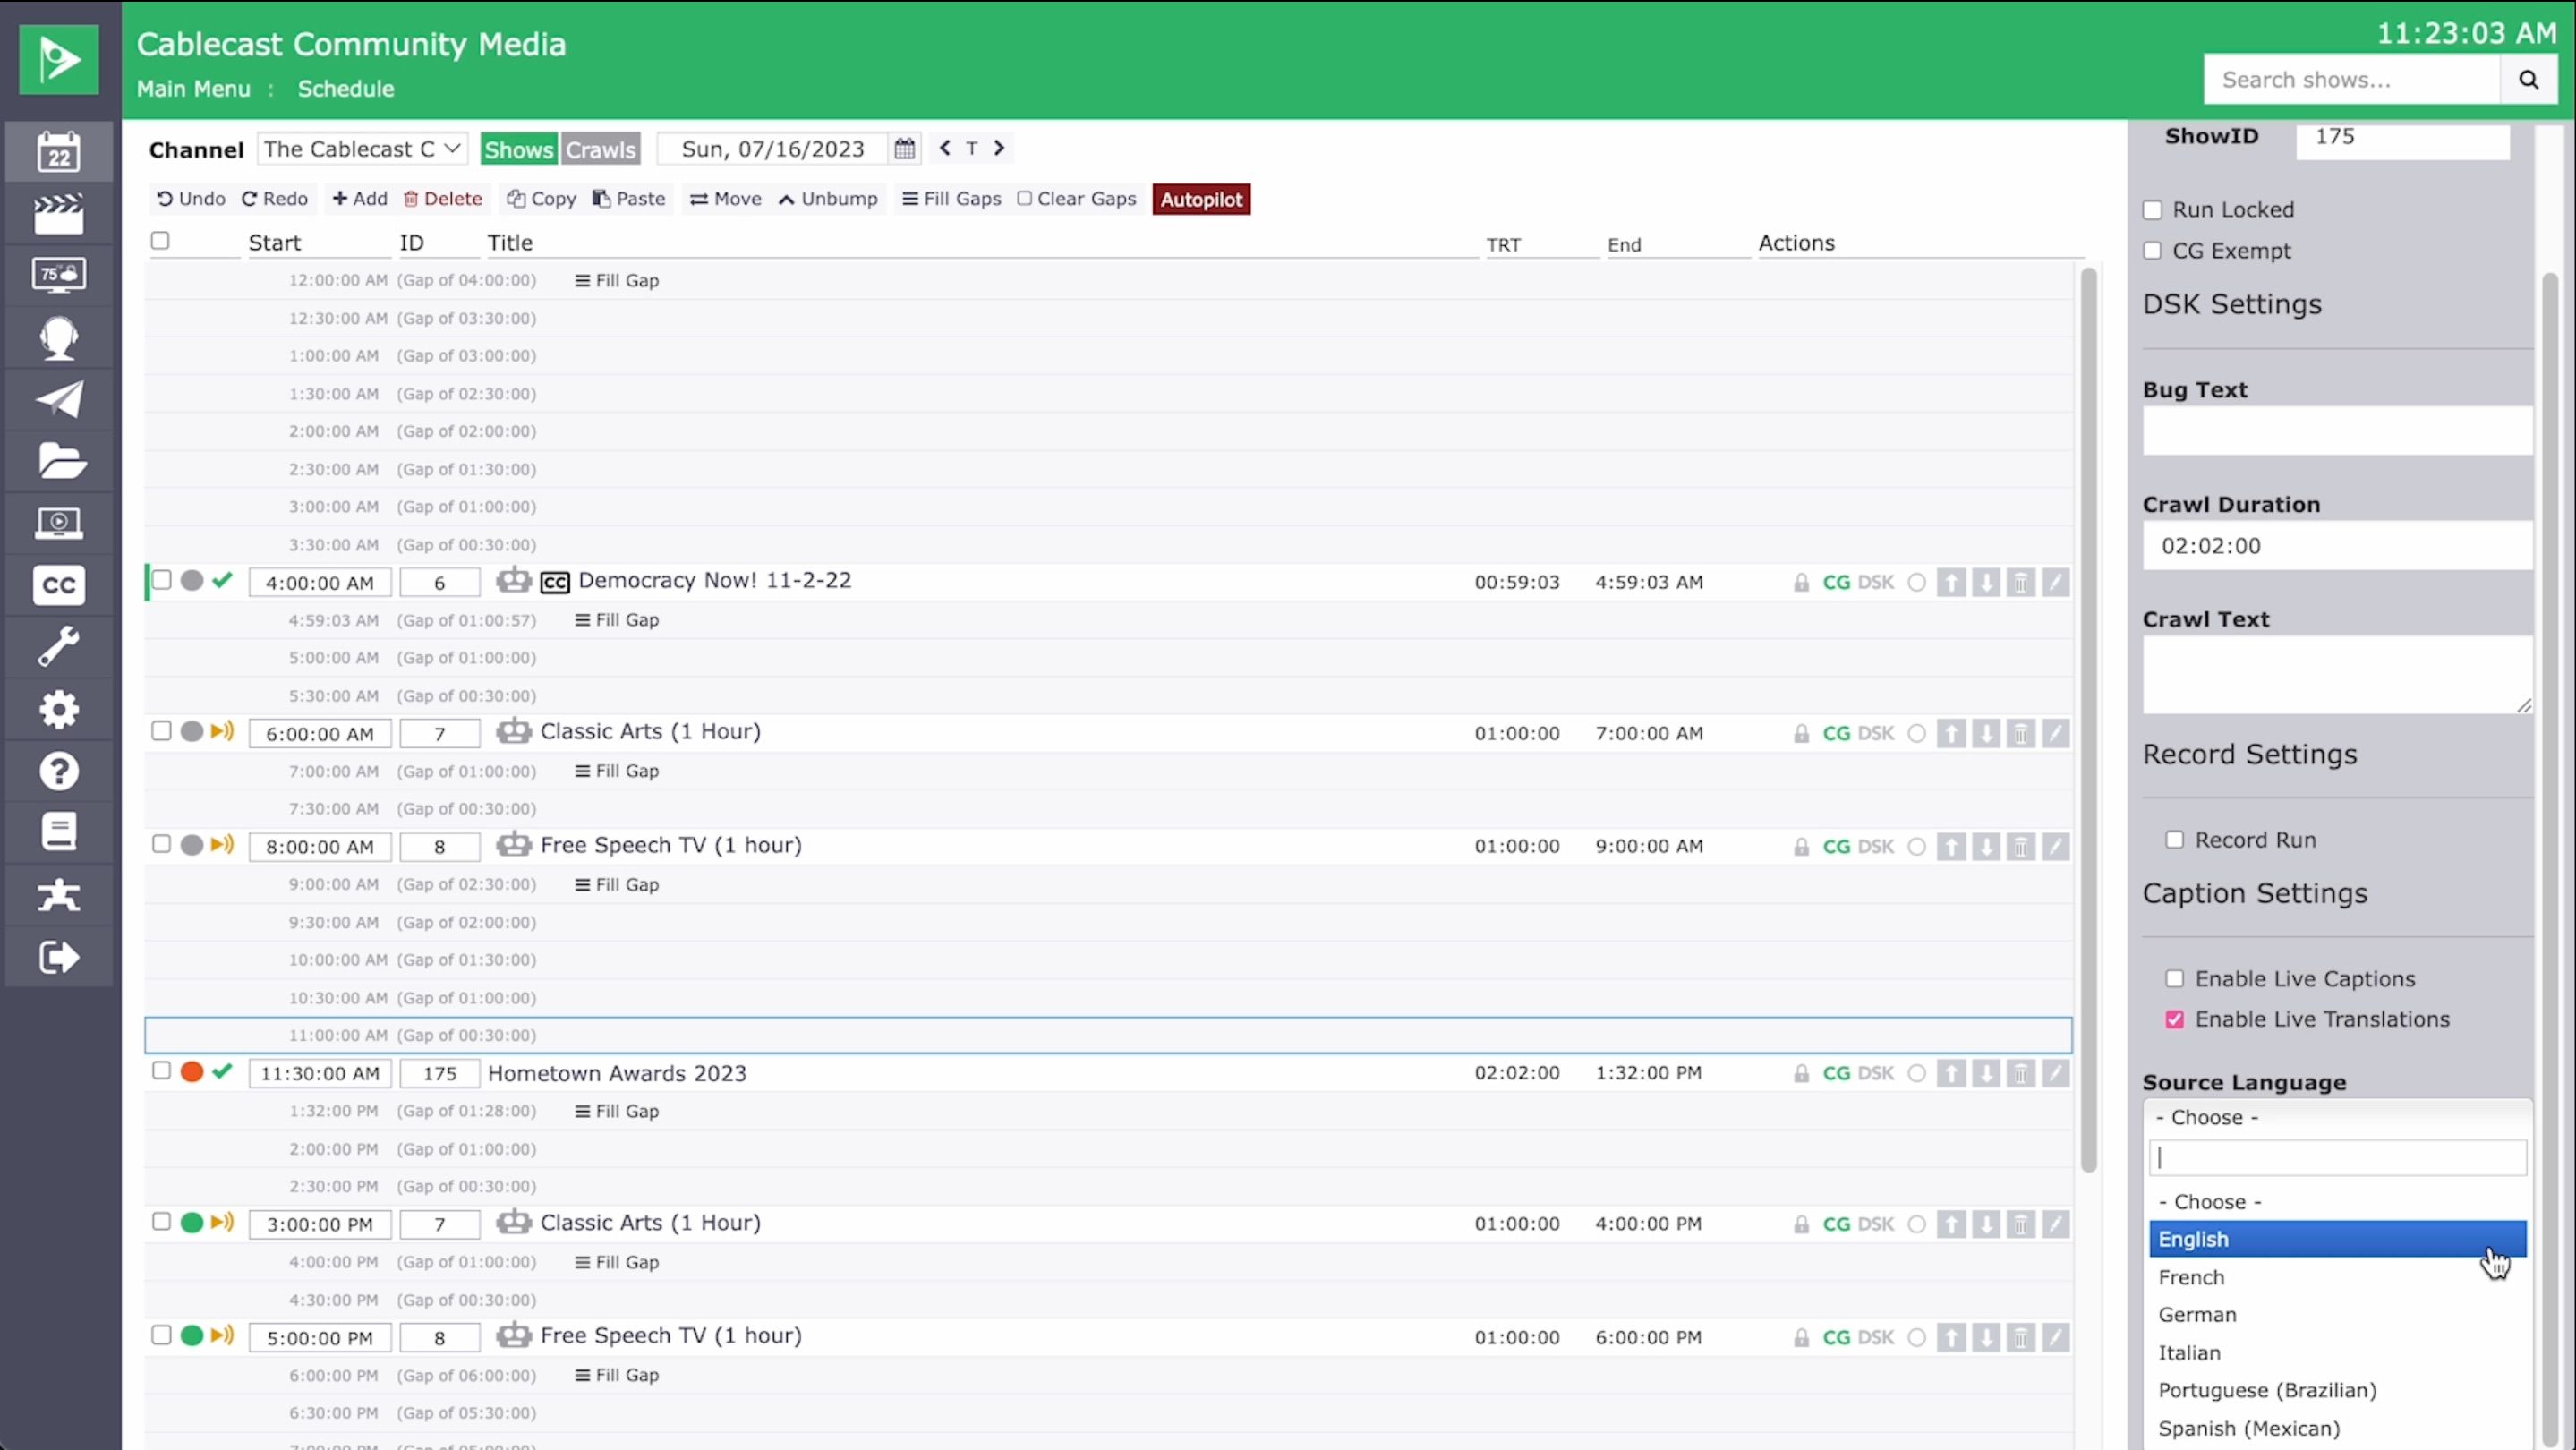
Note that you can only pick one translation language for live sources and only 608 languages. This language should match the secondary language you have set for the channel but is not enforced, so if you had a special event that needed to be in a different secondary language, you can set that here. You can always add additional languages for VOD after the event has ended.
Manually Starting a Live Event Translation
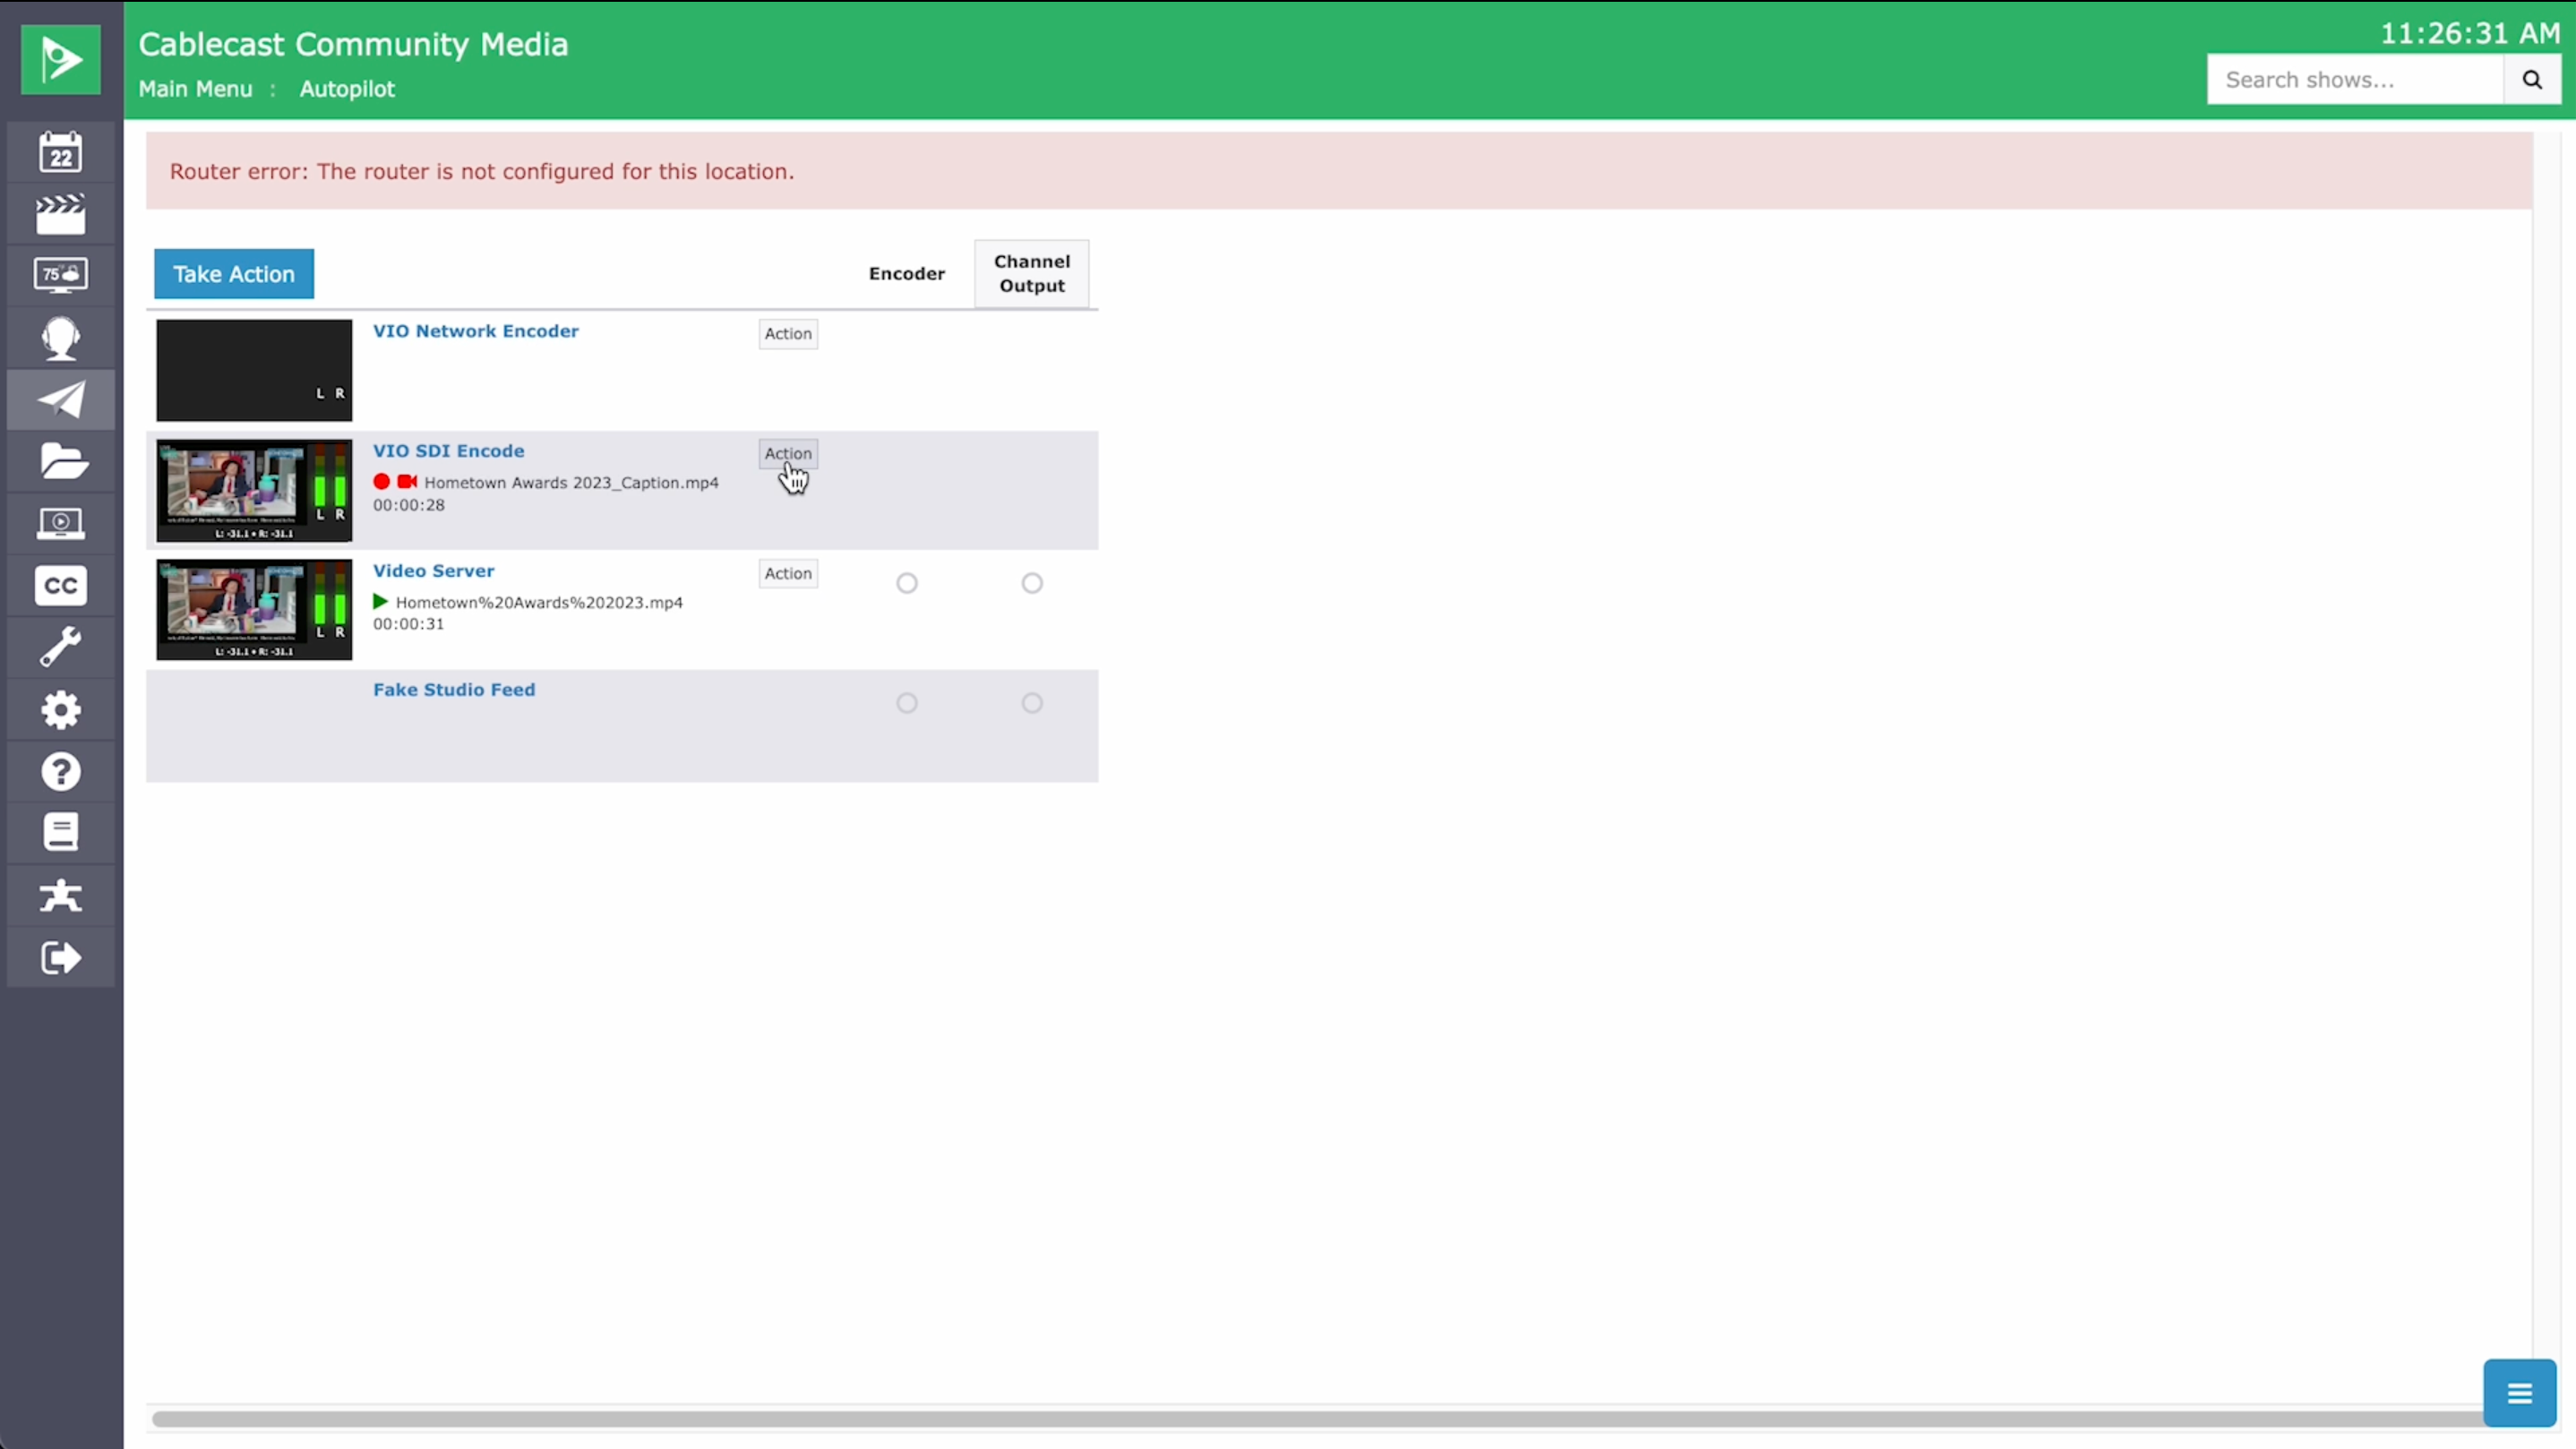
You can also manually start a translation on a live event. To do this, go to the Force Matrix. Your live source needs to be routed to an available encoder. Click the Action button next to the encoder and select Start Transcribing.
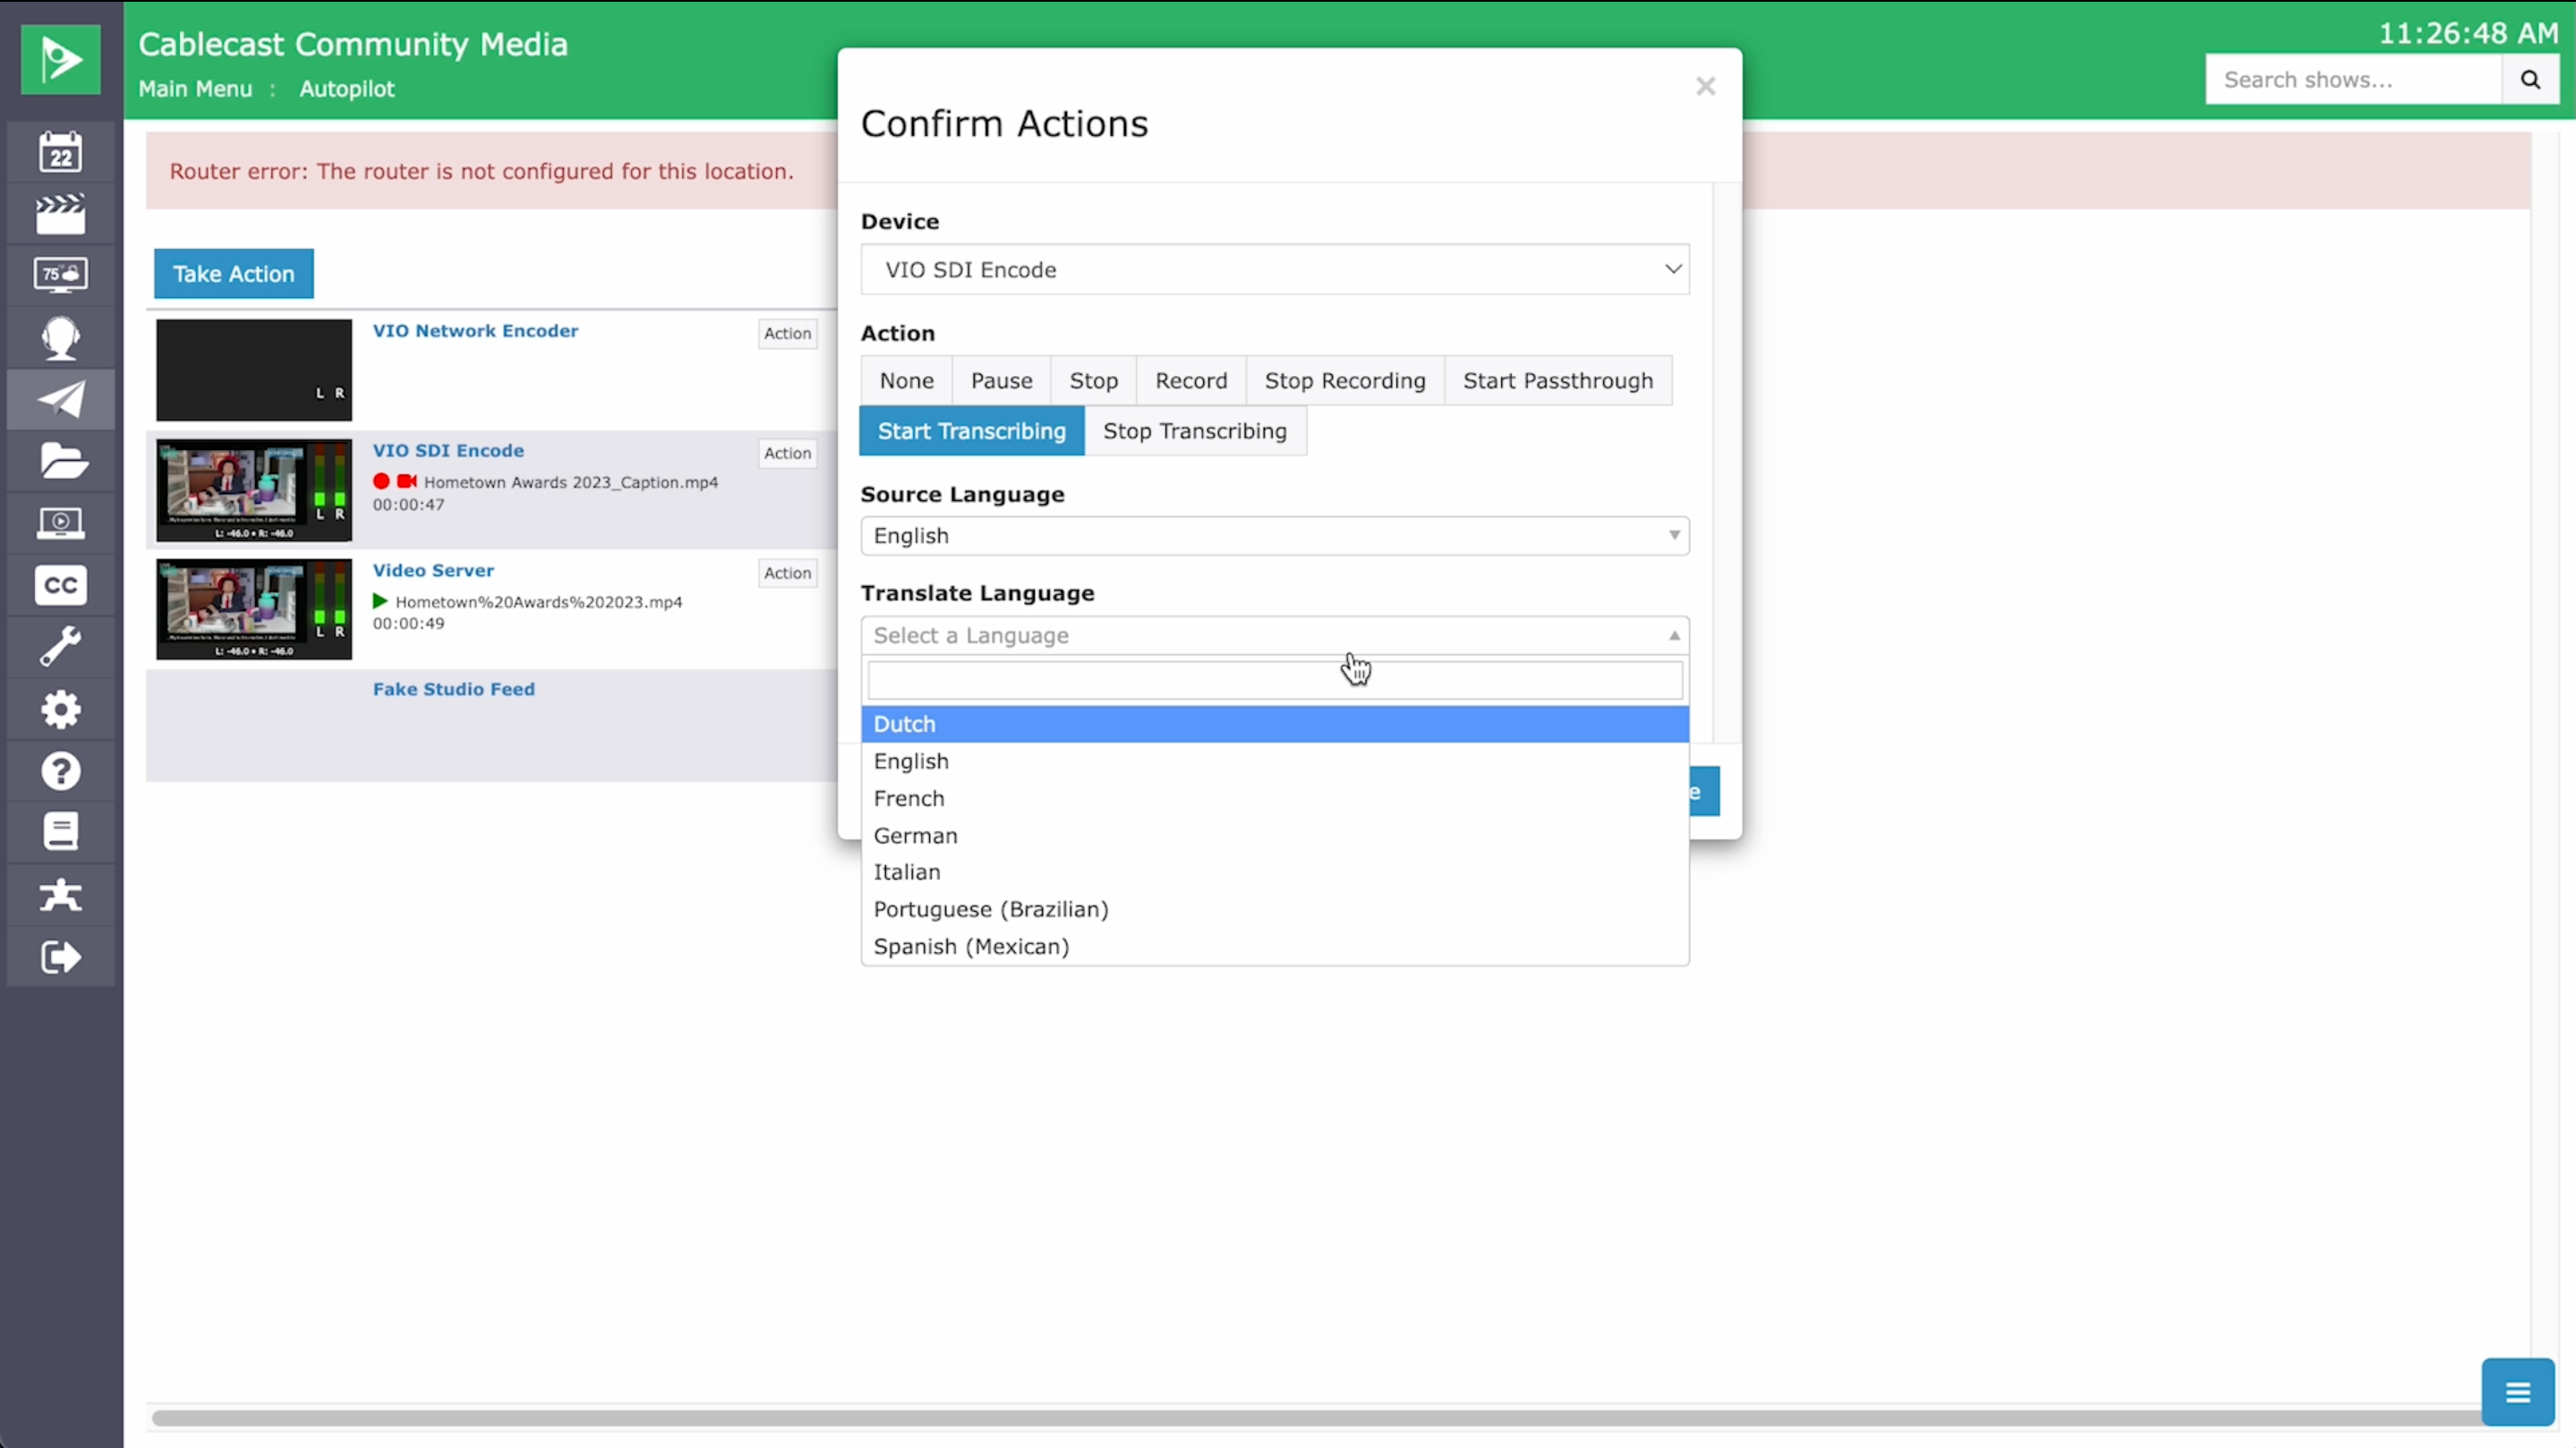
Similarly to how we configured our transcription for a scheduled live event, you’ll need to choose your source language, then your translation language, and click the blue Take button.
When your event has finished, be sure to come back to the Force Matrix and click the Action button next to the encoder again, select Stop Transcribing, and click the blue Take button again.
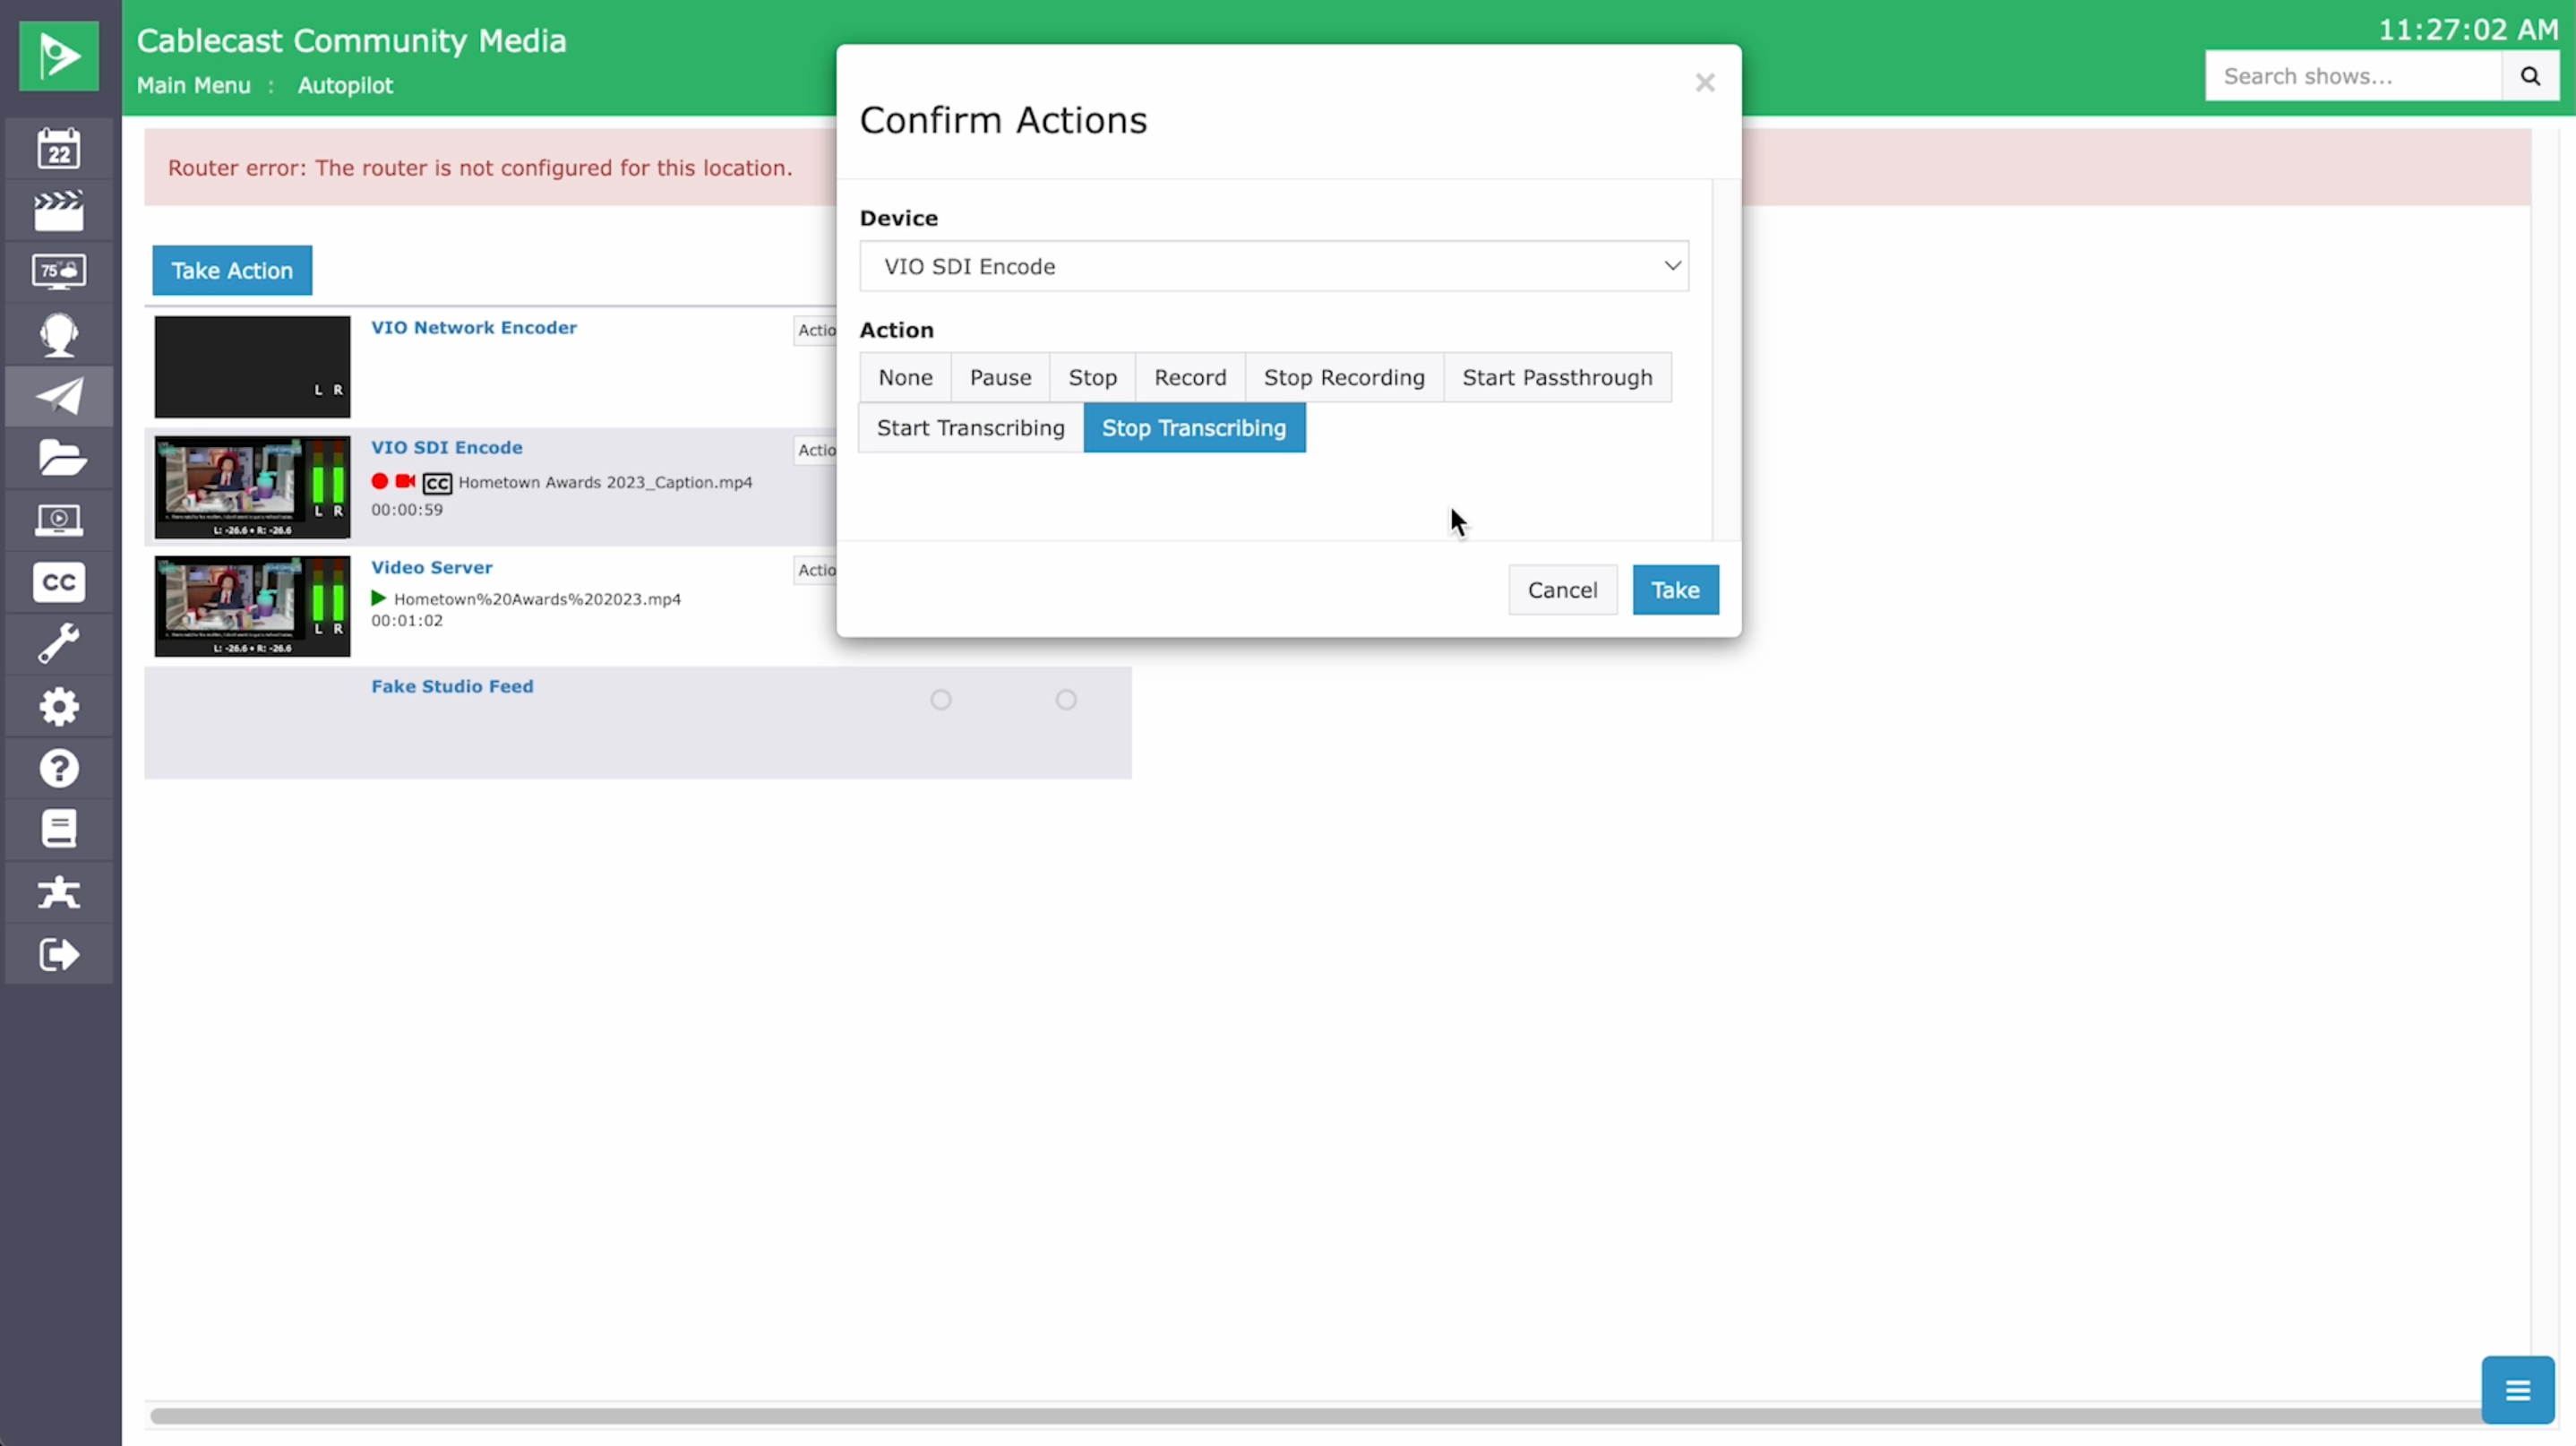
If you do not do this, the manual transcription will continue until the next event or until someone does manually stop it, which will result in a greater number of minutes being used for the event.
