Cablecast Caption Editor
Note: Cablecast 7.7+ is required in order to use the Cablecast Caption Editor.
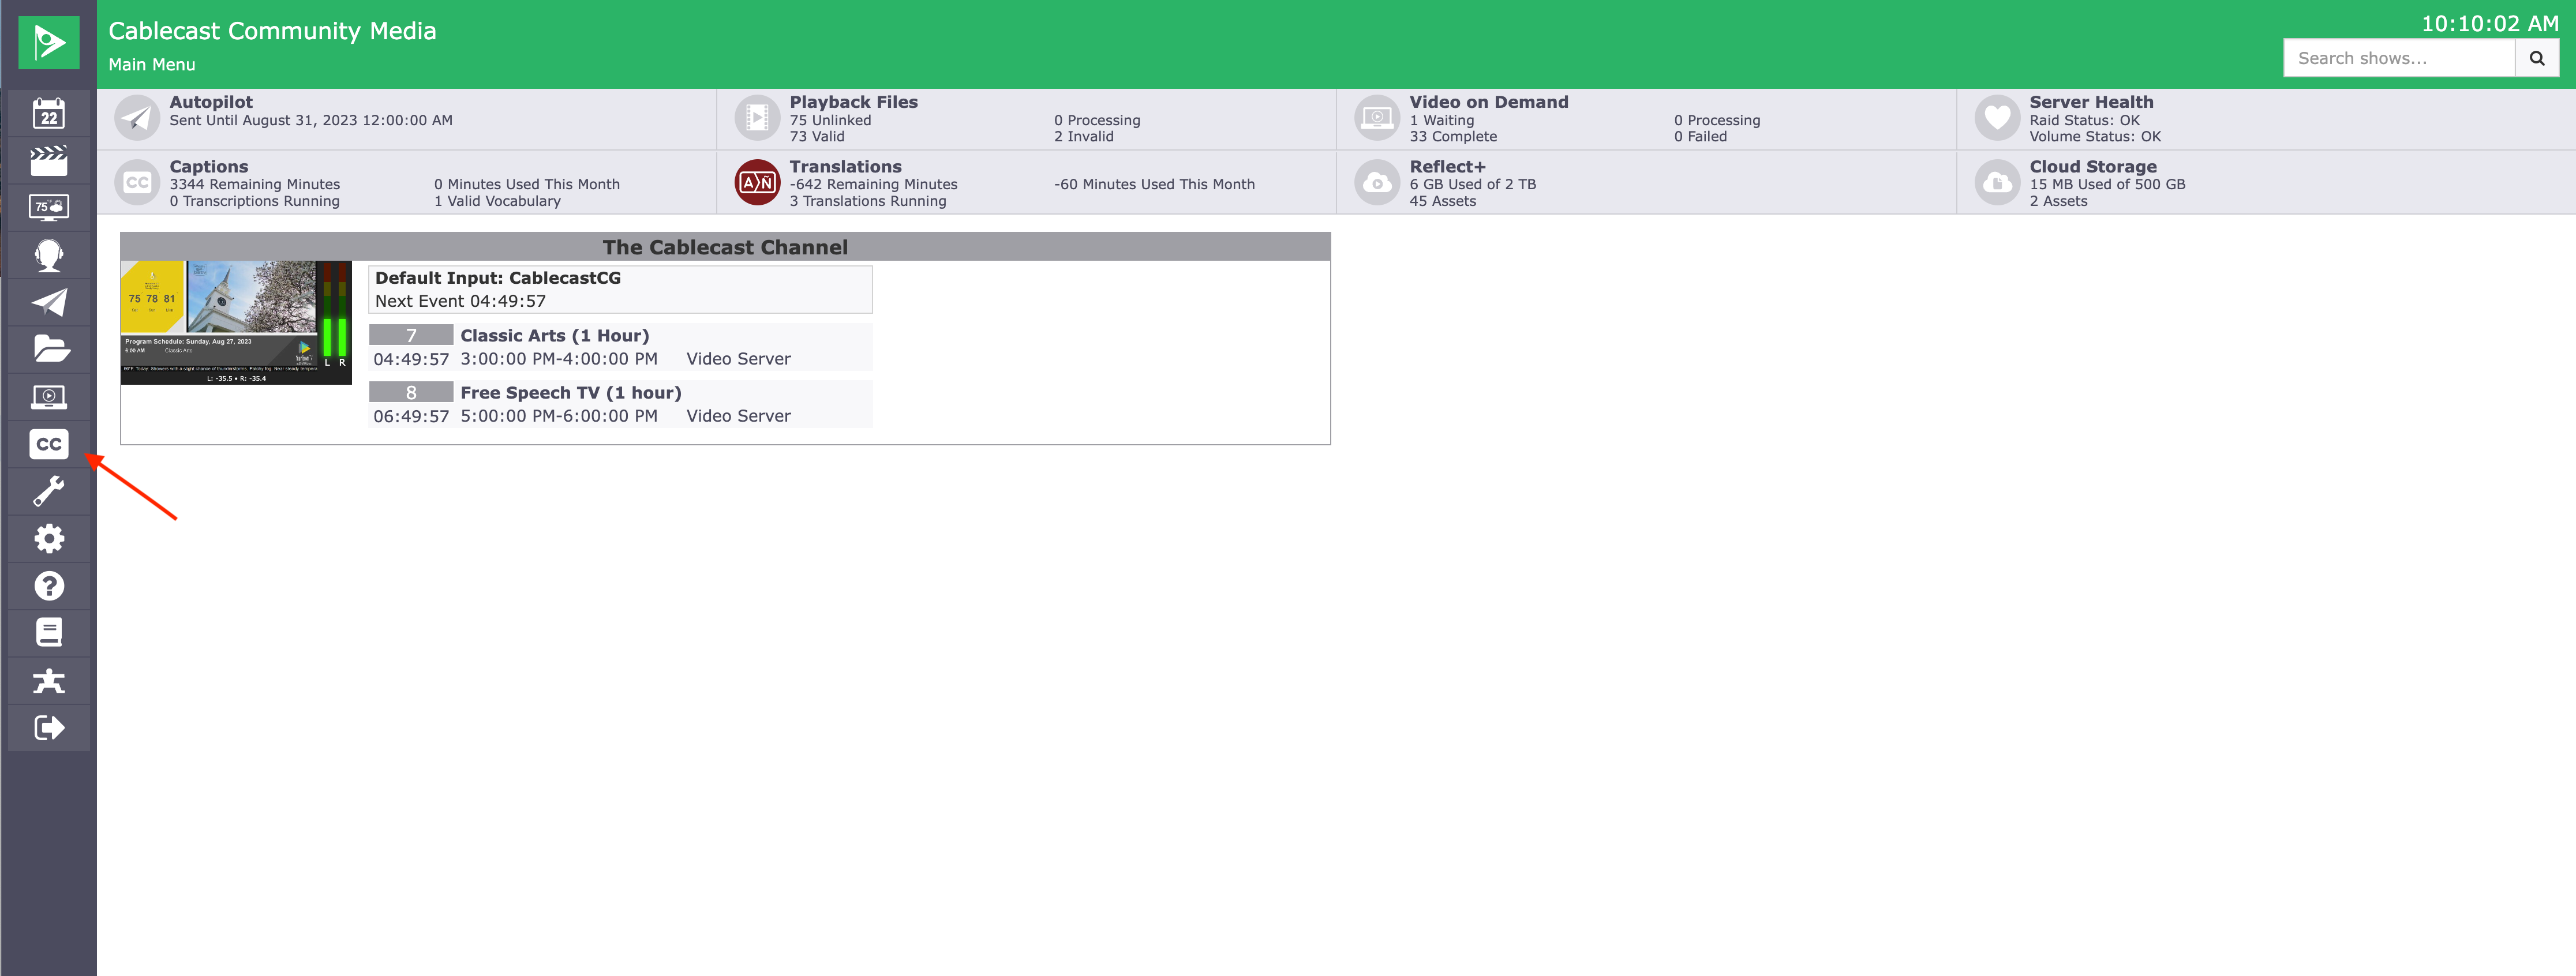
To start editing and adjusting the location of your Close Captioned sidecar files, click on the CC icon on the lefthand menu. Any sidecar file can be edited within the Cablecast Caption Editor.
From there, click the Actions button on the Sidecar file and select Edit.
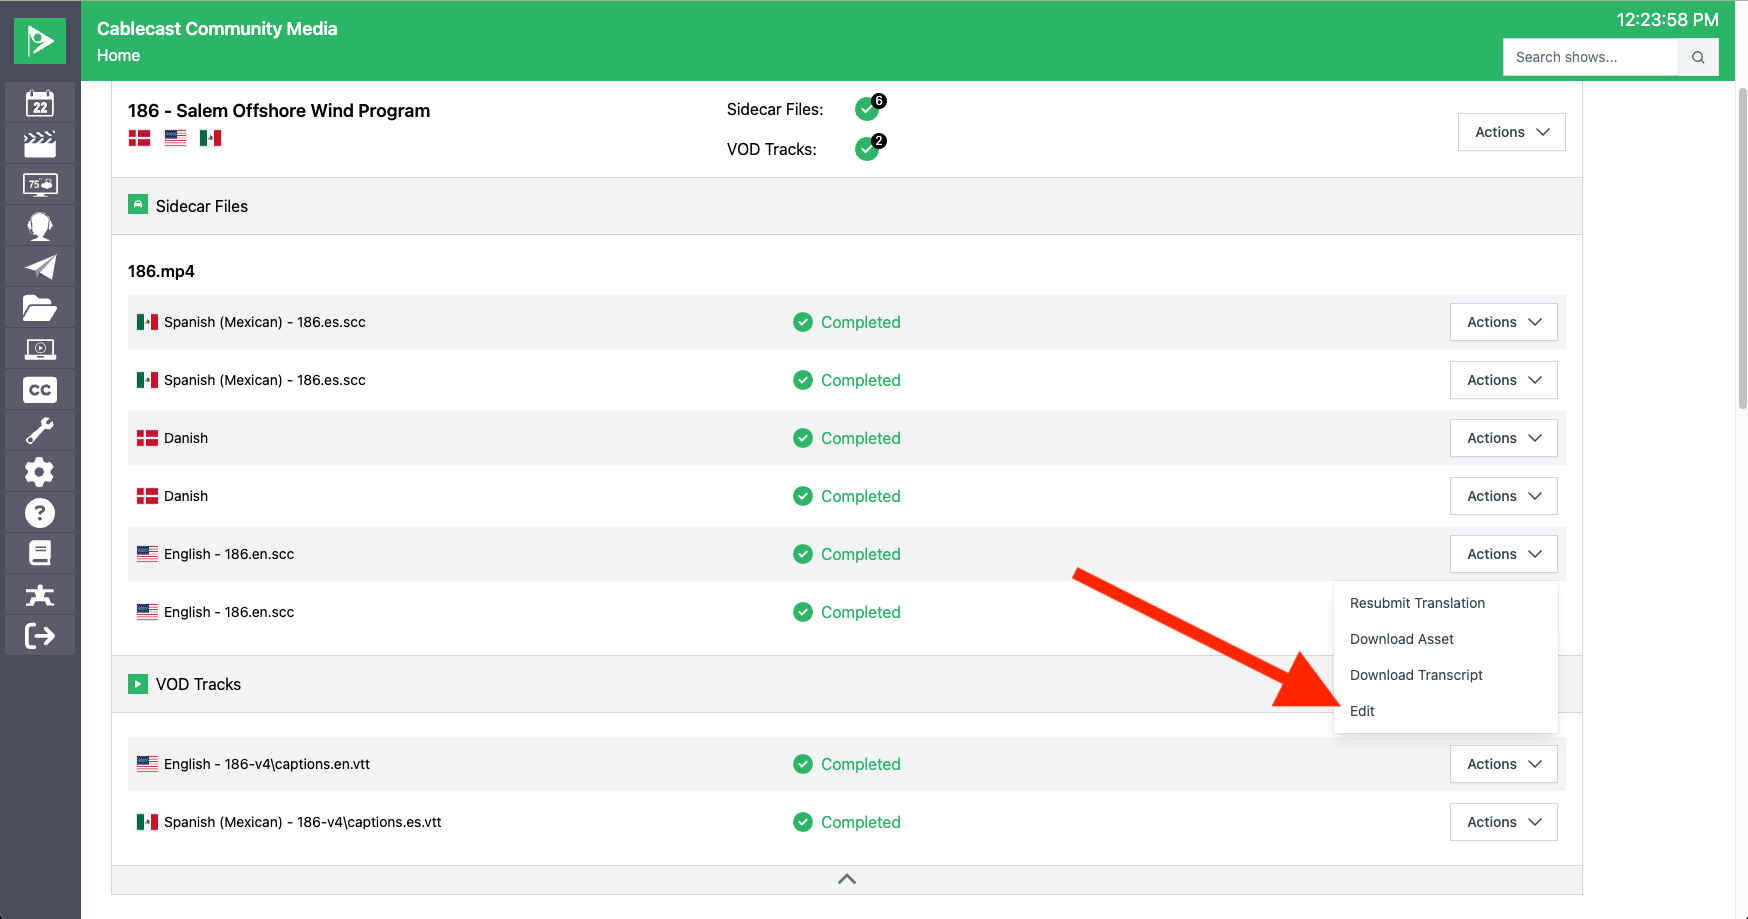
The Edit button opens the text track editor.
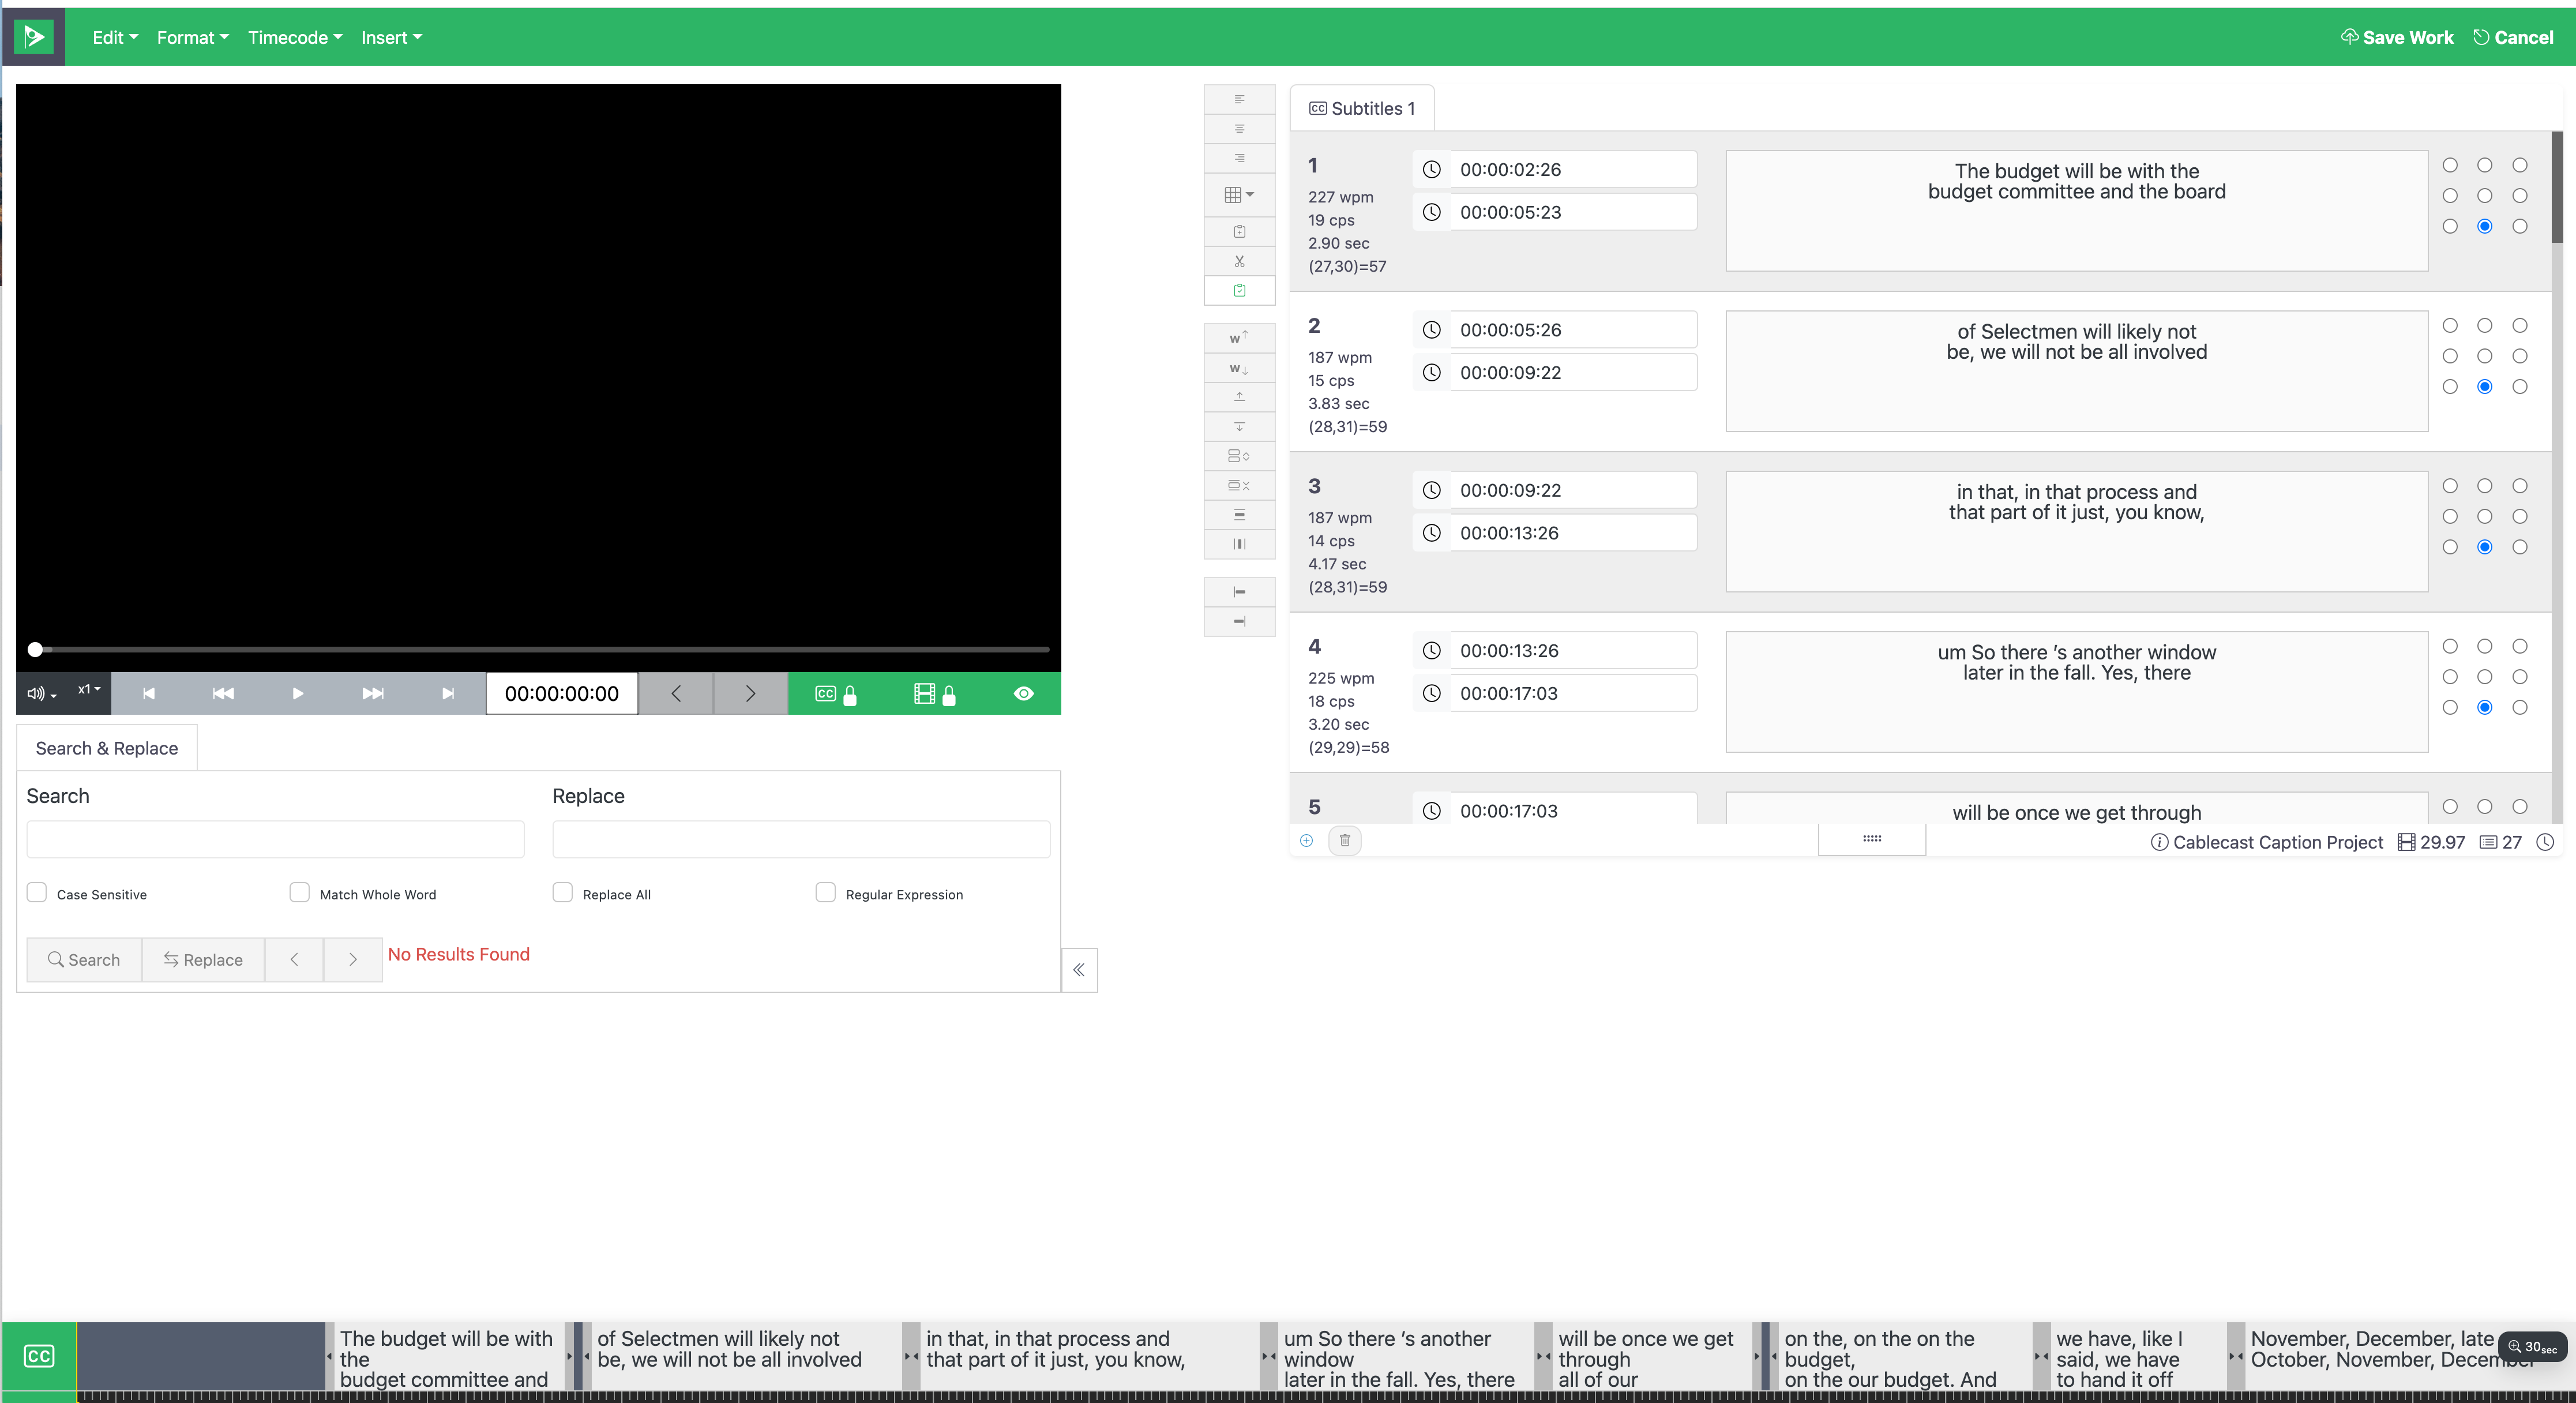
Media Player Panel
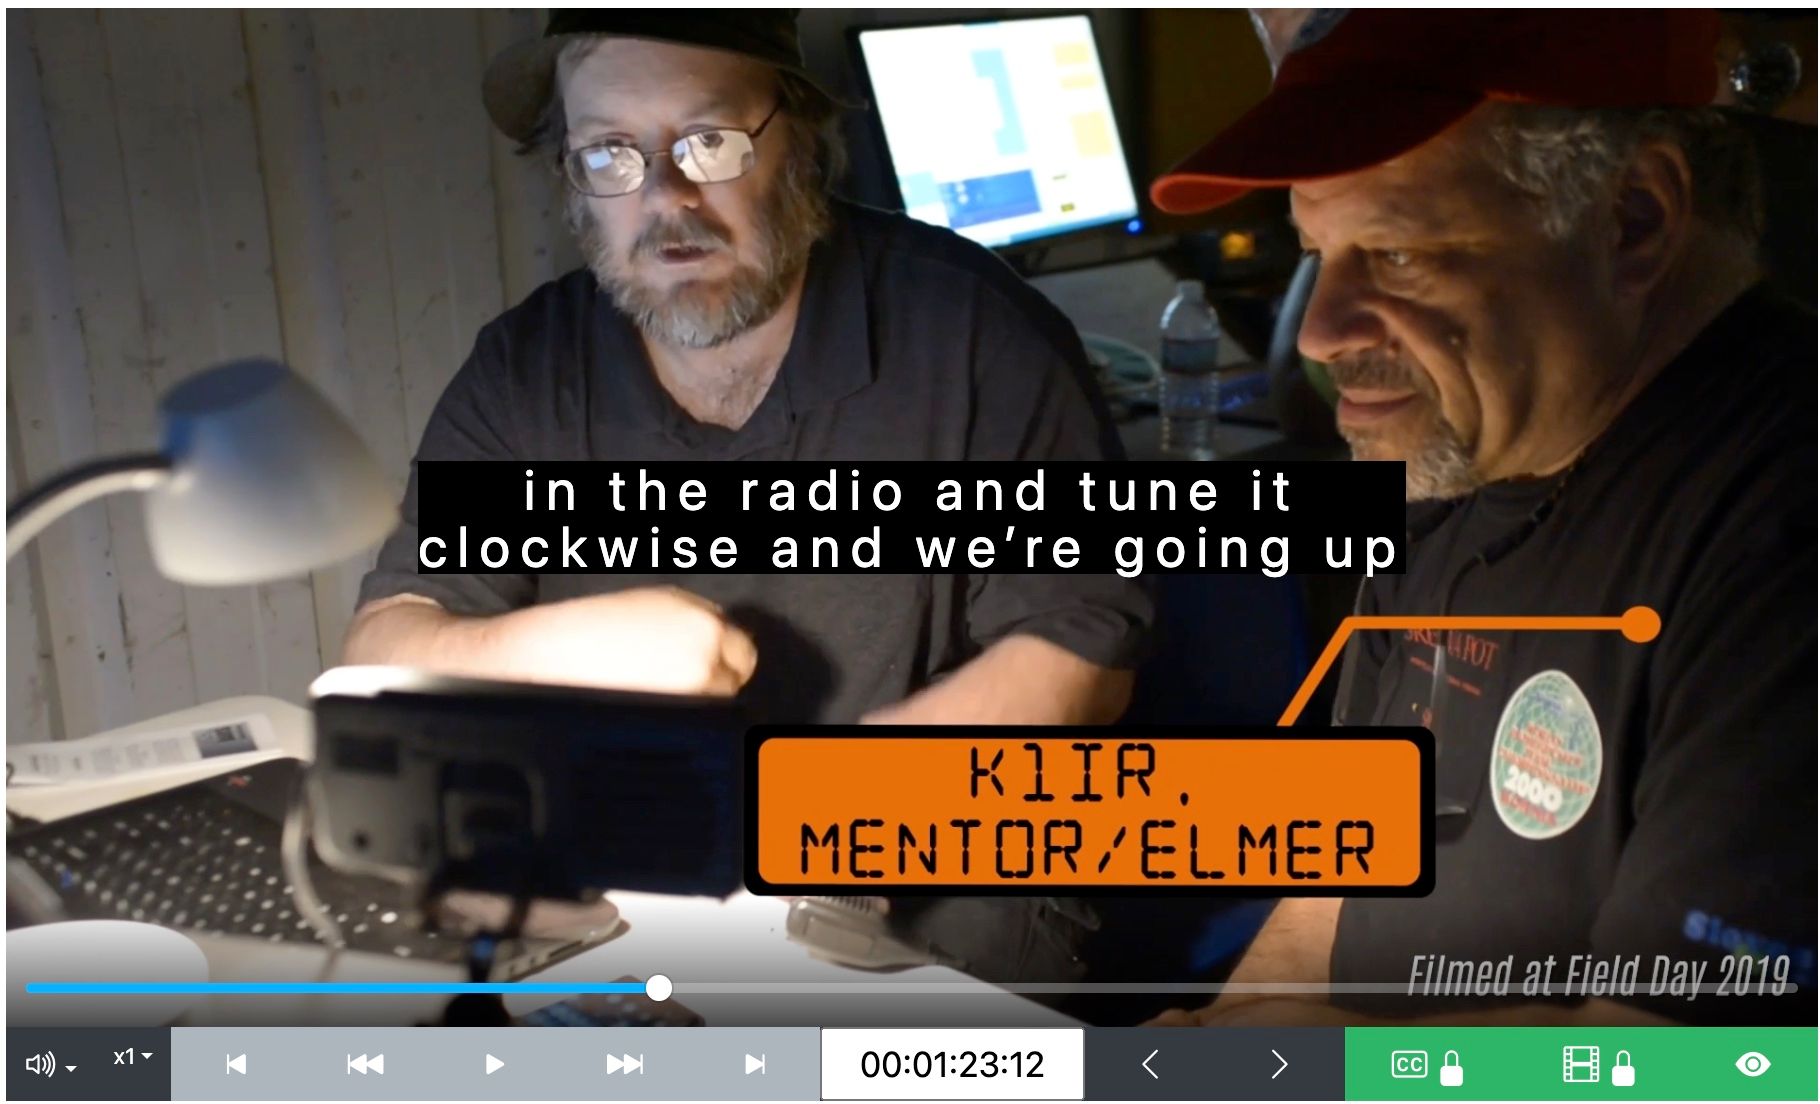
To find the specific text you wish to modify, utilize the Media Player to navigate to the precise location of the text you intend to edit. You have control over the playback speed so you can really make sure the text lines up and is grammatically correct.
- Volume Adjustment - Increase or decrease the audio levels so you can clearly hear what is being said
- Playback Speed - Select from .25 to 16 times real-time playback
- Play Controls - Jump to start/end, move ahead or back by one frame, play/pause
- Timecode Window - This will display the current time position in the file. A time can be entered in this field to jump to that position.
- Caption Events - Jumps ahead or back one caption event
- Caption Lock - As the video plays, the Captions will be automatically selected in the Events List Panel on the right.
- Preview CC - Clicking on any text section in the Event List Panel will bring you that time in the Media Player Panel
Search & Replace
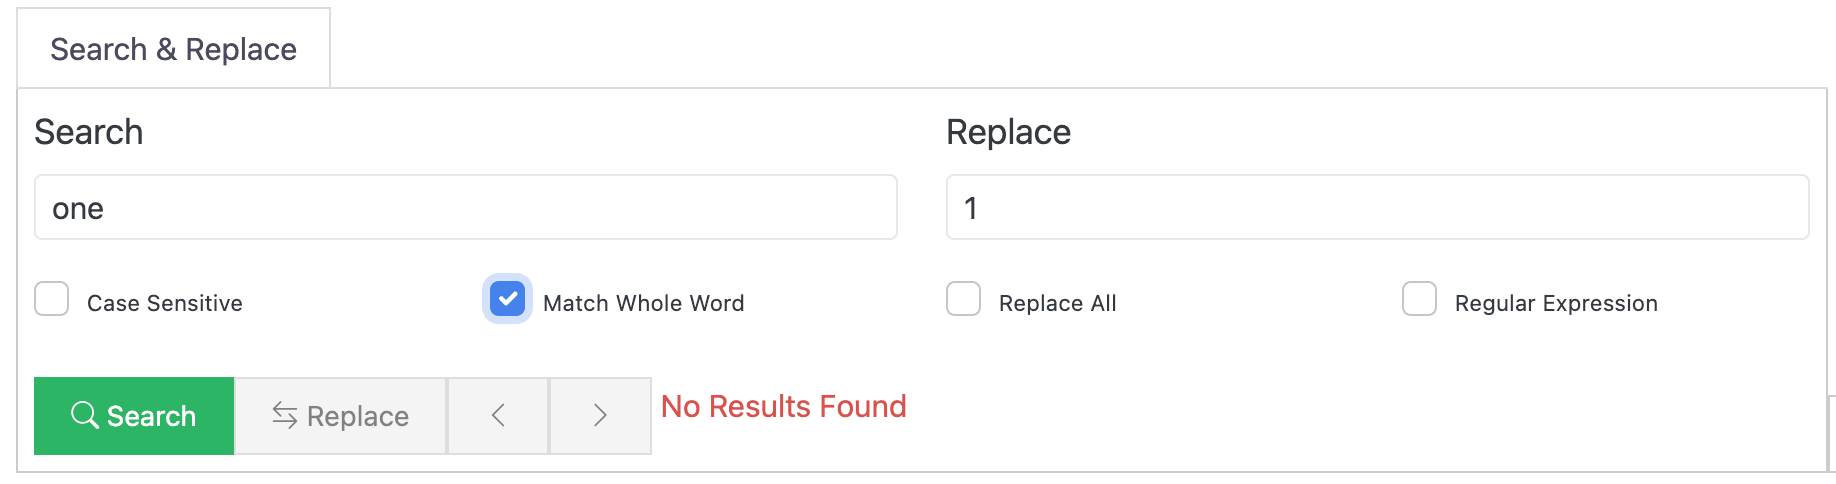
The Search and Replace panel allows you to search for a particular word and substitute it with a new word or set of characters. Enter a Search term and click the search button to begin searching the text. The number of results will show next to the bottom controls along with arrows to navigate between them. Use the arrow buttons to quickly jump between results. The selected Event will automatically scroll into view and the search term will be highlighted.
Event List Panel
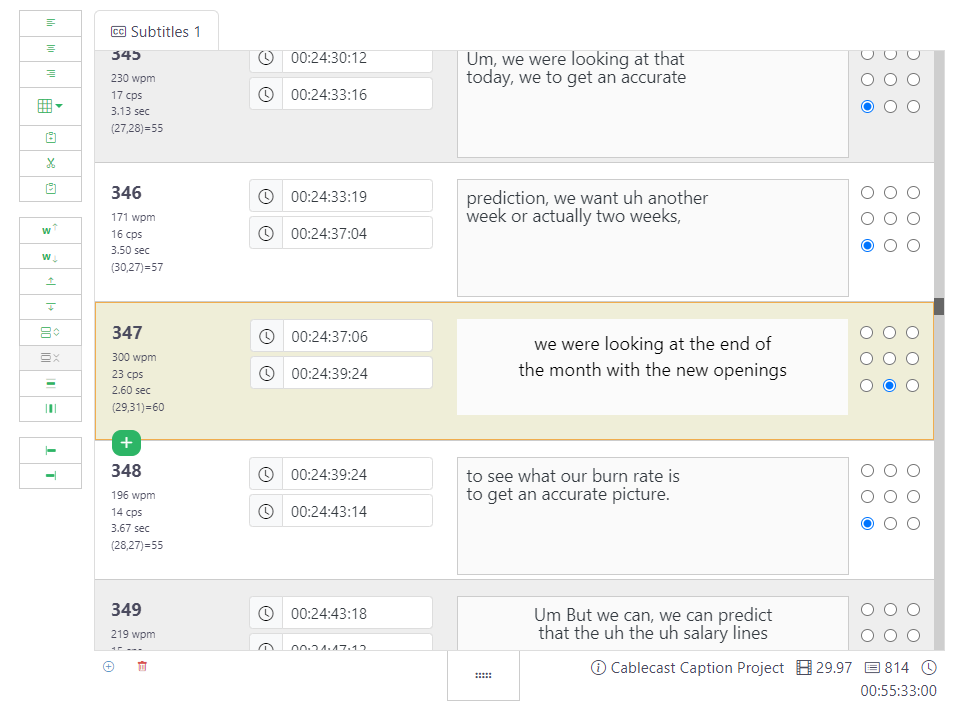
In the Event List Panel, you'll discover a range of choices to edit and reposition captions across the screen, allowing for adjustments around lower thirds and other graphics that could potentially be covered up by the text track.
The Event Editor Controls are located in a ribbon to the left of the Event List:
- Align Left - Set the alignment for the selected Events to the left.
- Align Center - Set the alignment for the selected Events to the center.
- Align Right - Set the alignment for the selected Events to the right.
- Position - Update the position of the selected Events using a nine box grid.
- Copy - Copy the selected Events or highlighted text to clipboard.
- Cut - Cut the selected Events or highlighted text to clipboard.
- Paste - Paste Events or text.
- Shift Word Up - Shift single word up to the previous Event.
- Shift Word Down - Shift single word down to the next Event.
- Shift Line Up - Shift single line up to the previous Event.
- Shift Line Down - Shift single line down to the next Event.
- Split Event - Split Event based on the cursor location.
- Merge Event - Merge all selected Events.
- Expand Text - Expand the text of all selected Events.
- Compress Text - Compress the text of all selected Events.
- Snap To Start - Update the Start time of all selected Events to match the End time of the previous Event.
- Snap To End - Update the End time of all selected Events to match the Start time of the next Event.
Event Timeline

The Interactive Timeline presents an alternative perspective of all the Events within the chosen Event Group. These Events are displayed as Timeline Events, organized according to their designated Start and End times. Events without Start or End times will not be displayed on the Timeline.
Timeline Events
Timeline Events will show the Event Text, along with handles used to update the Start and End time. Users can simply click and drag either handle to update the time of an Event. Users can also click and drag an Event anywhere on the timeline in order to update both the Start and End times at once.
Multiple Events can be moved at once by selecting more than one Event and dragging it on the timeline.
Event Handles
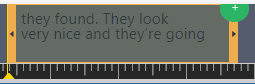
Selected Events will show a green plus (+) icon in the top right corner, used to create a new Event on the timeline. Events created using the timeline will automatically generate based on the timecodes of the selected Event. This means that the new Event will inherit timing based on the previous Event.
Horizontal Zoom

Horizontal Zoom controls are located to the right of the Timeline. Horizontal Zoom is limited to the default values 10, 15, 30, 45, and 60 seconds. The lower the number, the greater the Zoom multiplier. For example, 10 seconds will show 10 seconds of Events within the width of the display.
Save Work

Once editing has been completed, click the Save Work button in the upper right corner of the screen. This will update the appropriate caption file in Cablecast.